In this article, you’ll learn how to install Parrot Security OS on VirtualBox. We take it step-by-step as always.
Let’s dive right in.
Table of Contents
- Step 1 – Downloading the Parrot Security OS Virtual Appliance
- Step 2 – Importing the Virtual Appliance to VirtualBox
- Step 3 – Configuring the Virtual Appliance
- Step 4 – Starting and updating the Appliance
- Step 5 – Creating a Snapshot
- Step 6 – Changing Default Passwords and Creating a New User Account
- Step 7 – Deleting the Default User
- Conclusion
👀 This Tutorial has some related Articles!
👉 How to get started in Cyber Security – The Complete Guide
👉 How to get started with Bug Bounties
👉 Terminal Customization Series
👉 Best Ethical Hacking Books
👉 Download Kali Linux Safe & Easy
👉 Best Ethical Hacking Tools
👉 Install VSCode on Kali Linux
👉 Dual Boot Kali Linux with Windows
👉 Install Kali Linux on VirtualBox – Complete Beginner Guide
👉 Top Things to do after installing Kali Linux
👉 WiFi Adapter for Kali Linux – The Ultimate Guide
👉 Nmap Beginner Guide Series
👉 Metasploit Tutorial Series
👉 Burp Suite Beginner Guide
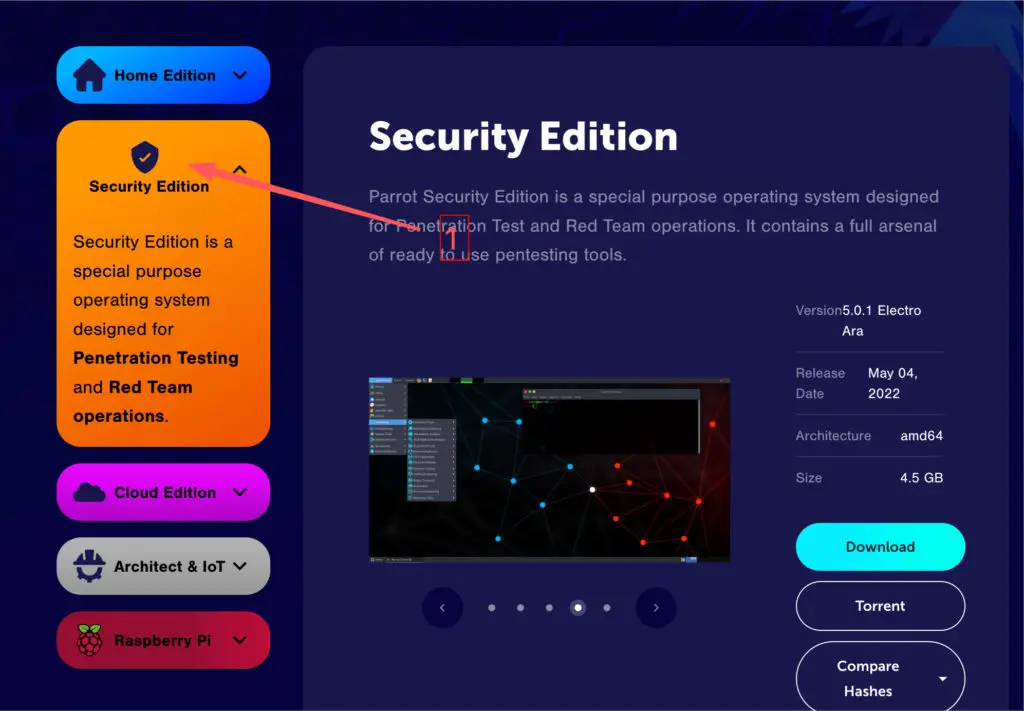
Step 1 – Downloading the Parrot Security OS Virtual Appliance
Head over to the Parrot OS website and download the Parrot OS Security Edition Virtual Appliance.
Step 2 – Importing the Virtual Appliance to VirtualBox
After your download has finished, open up VirtualBox and click File -> Import Appliance. Choose the Parrot-Security_Virtual.ova file from your downloads folder and click on Open. Click Next. Optionally, change the location where you want to save the Virtual Appliance by choosing a different folder (1).

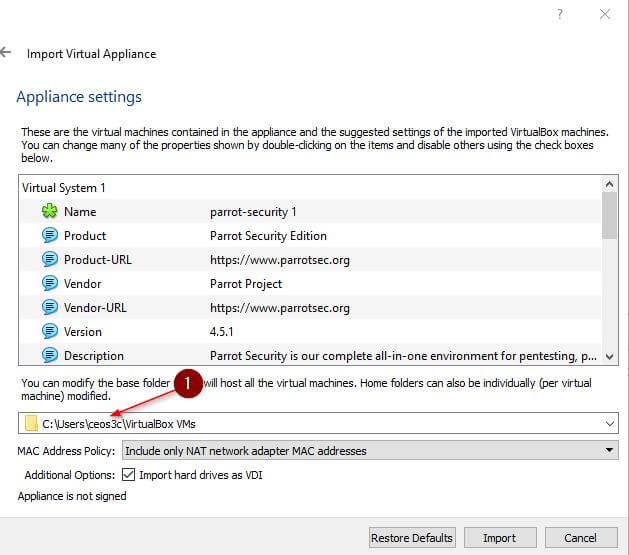
Click on Import. Agree on the License Agreement.
Step 3 – Configuring the Virtual Appliance
To install Parrot Security OS on VirtualBox, we now need to adjust the settings, or simply leave them as default depending on your system performance. If you have at least 8GB of RAM and a Quad Core processor, you can basically leave it as it is.
Right-click the Appliance and click on Settings. Rename the appliance if you want to. Head to the System tab next and adjust the Memory if needed. Assign at least 2GB of RAM to run Parrot Security OS smoothly.
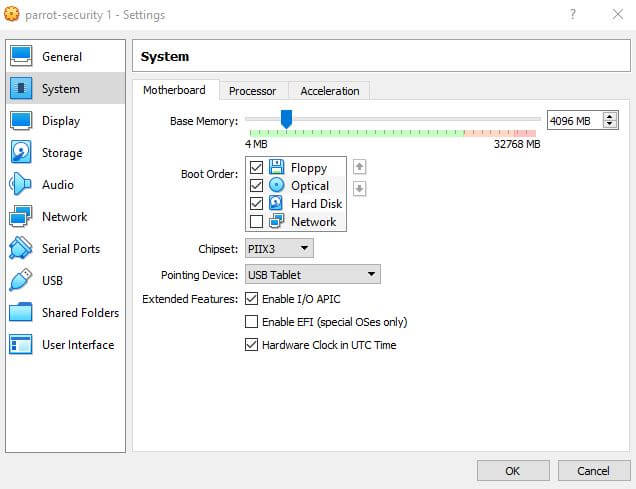
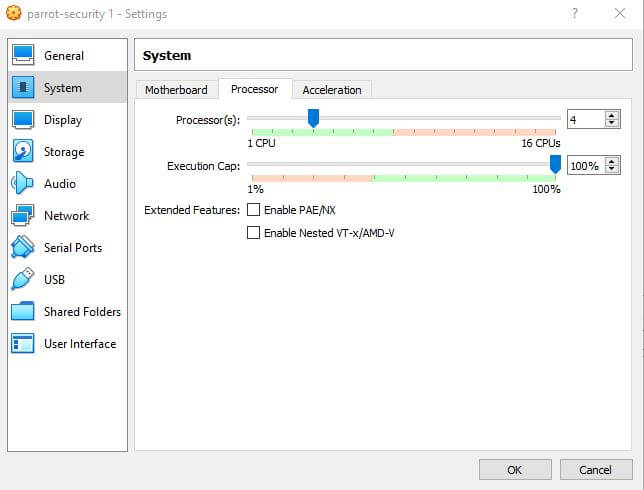
Next, open up the Processor tab and assign at least 2 cores to Parrot OS for good performance. It will run with 1 core but the performance will take a hit.
Optionally, navigate to the Network tab and change the Network Adapter from NAT to Bridged. If you don’t know what that means, don’t worry. Just leave it on NAT.
Step 4 – Starting and updating the Appliance
To wrap up this install Parrot Security OS tutorial, we have to take a few more steps and we are already done.
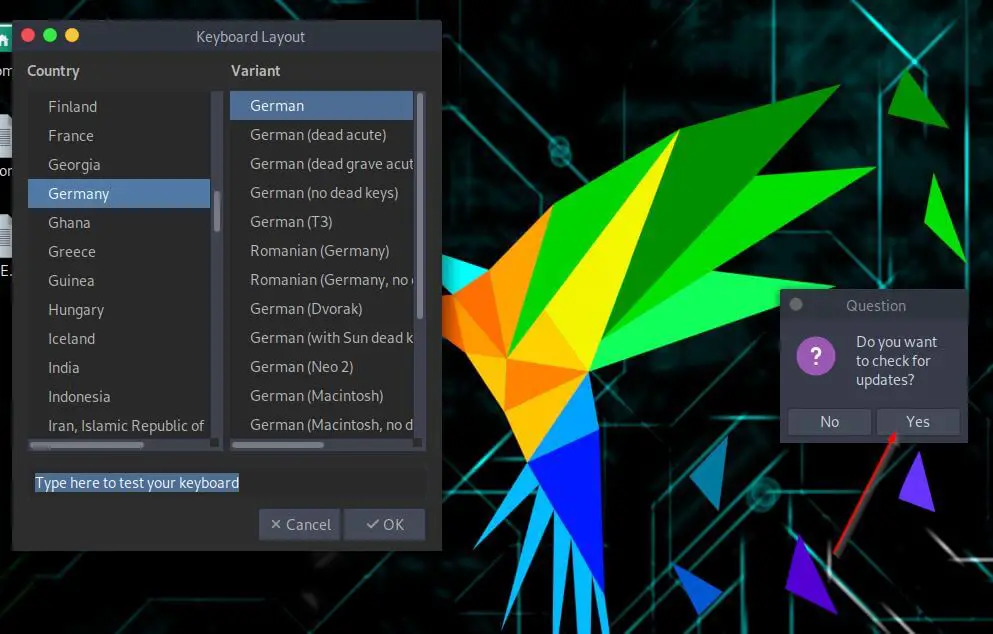
Right-click the Appliance and click on Start. You will be logged in automatically. Change your Keyboard Layout and click on Yes for the question if you want to check for updates.
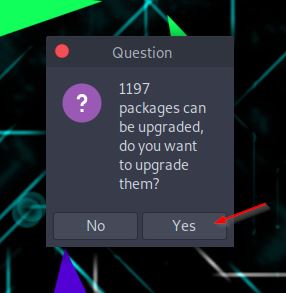
When getting prompted for a password, enter “toor“, the default password, without the parenthesis. Click on Yes again for the question that XX amount of packages can be updated.
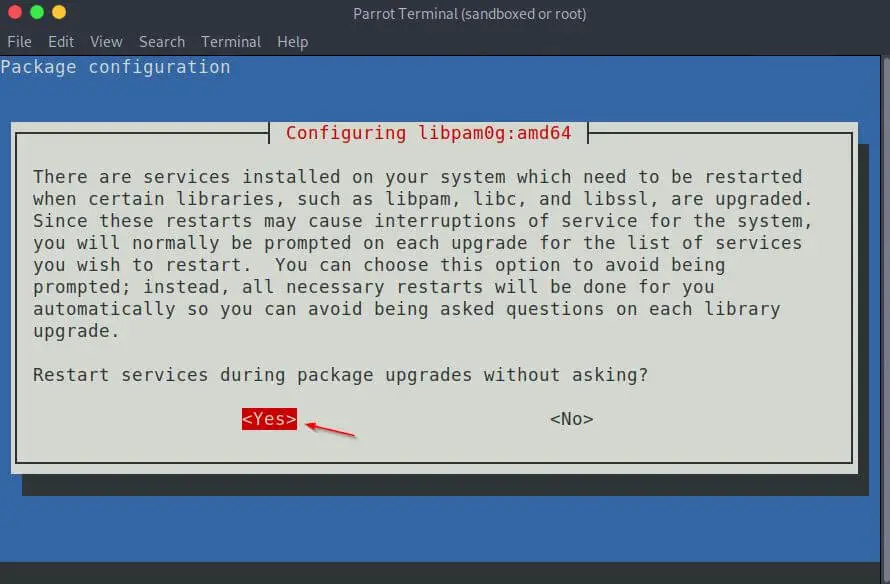
Choose Yes for the question if you automatically want to restart packages during the installation. Wait for the update to finish.
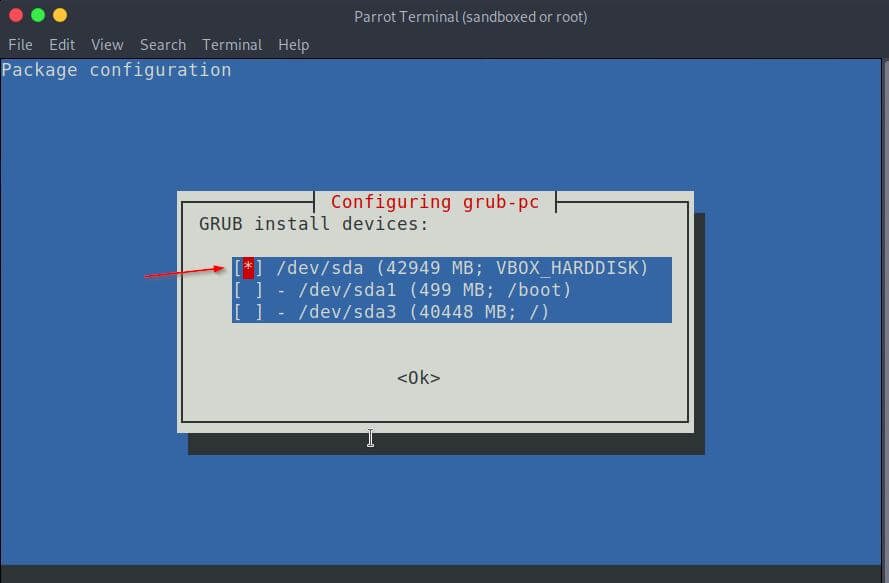
On the Grub-PC Update dialogue, make sure to choose the /dev/sda (VBOX_HARDDISK) disk when updating. You can choose with the space bar.
Step 5 – Creating a Snapshot
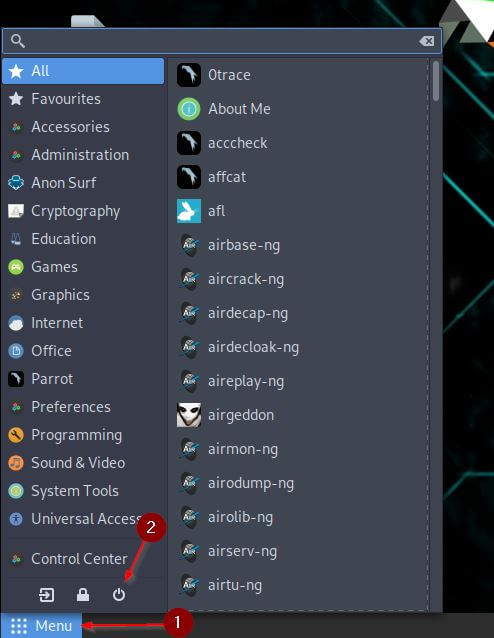
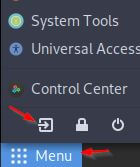
Shut down your Appliance by clicking on Menu and the shutdown button.
Or, do it the cool way, by opening a terminal and entering:
sudo shutdown nowEnter the password “toor” when prompted.
A snapshot is basically similar to a “Save Game” in a Computer Game. You save the state of your Virtual Appliance. So if you mess things up, you can always revert back to the working state by the press of a button. And you will mess things up, so make good use of it. You can create as many snapshots as you want.
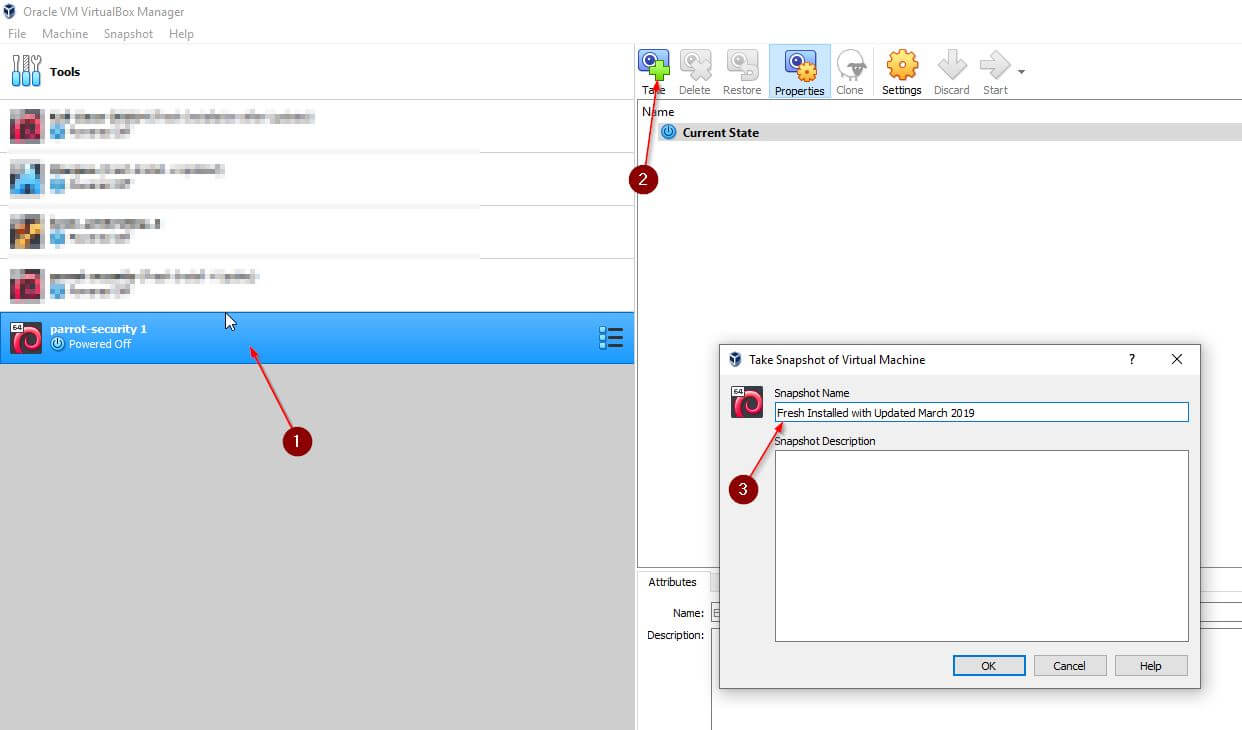
Select your Appliance, and click on the Take symbol.
Give it a descriptive name and hit Ok.
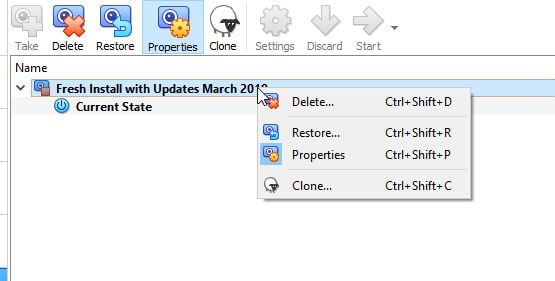
You can revert back to a snapshot by selecting it and right-clicking it, selecting restore.
Step 6 – Changing Default Passwords and Creating a New User Account
Right-click your Appliance and start it up again. Login with the default user account.
Creating a new low-privilege User Account
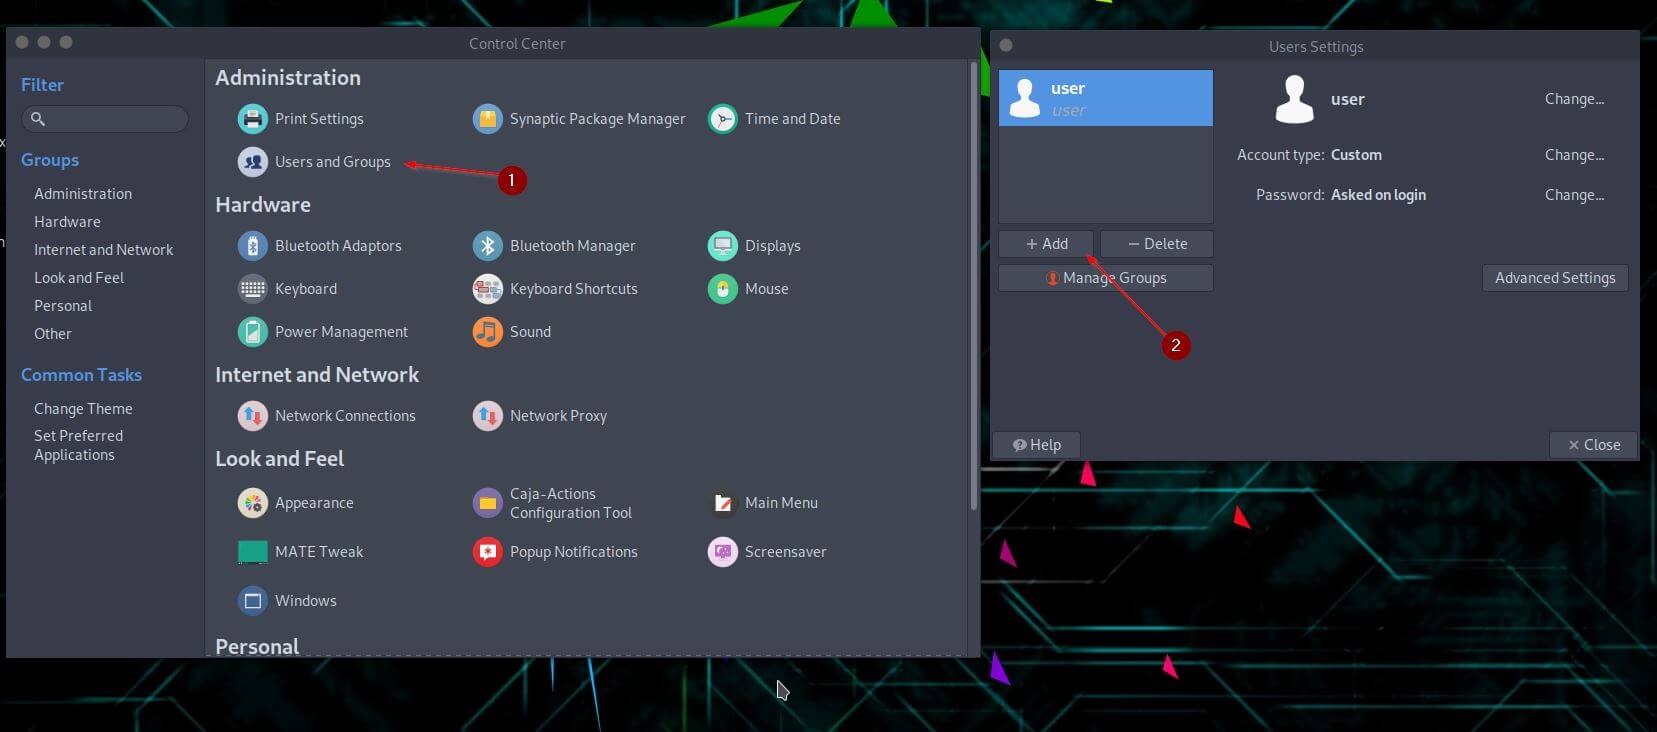
Open the Menu in the lower left corner and select Control Center. Open Users and Groups under Administration. Click on + Add. Enter the default “toor” password.
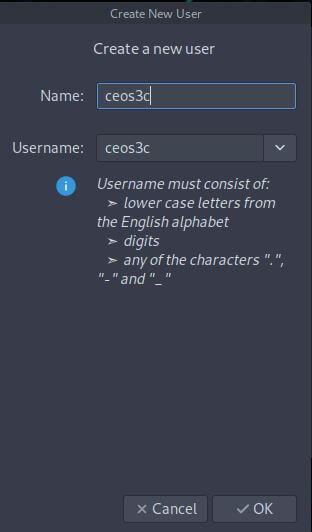
Enter a name for your new User Account. Click Ok.
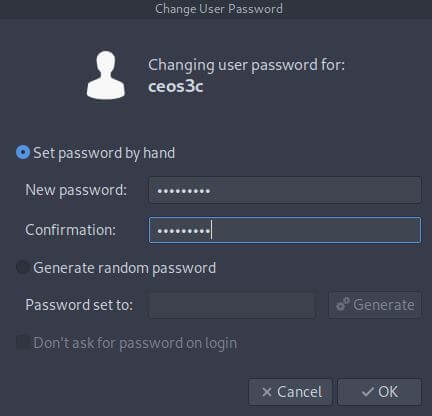
Choose a safe password and click on OK.
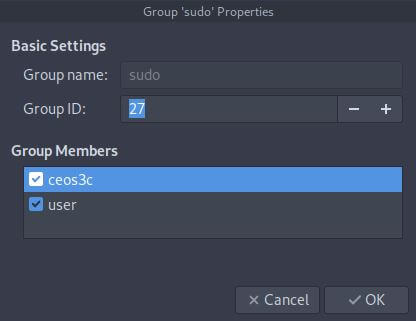
Select your new User Account and click on Manage Groups. Scroll down until you find the sudo group and double-click on it.

Make sure to tick your new User Account. Click on OK.
Close all dialogues and menus.
Changing the Root password
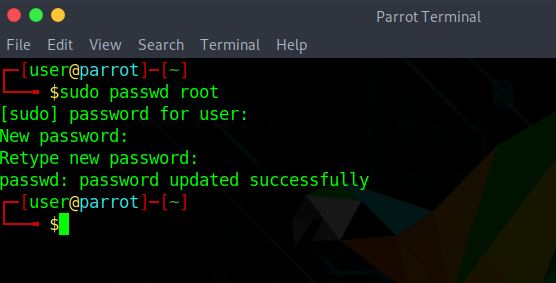
Open a terminal and type:
sudo passwd rootEnter the sudo password for the User account “toor” and enter the new root password. You can choose the same password as the one of your new User Account. If you are a beginner, it’s a bit less confusing this way.
Step 7 – Deleting the Default User
Log out by navigating to Menu -> End the current session -> Log Out. Log in with your new user account.
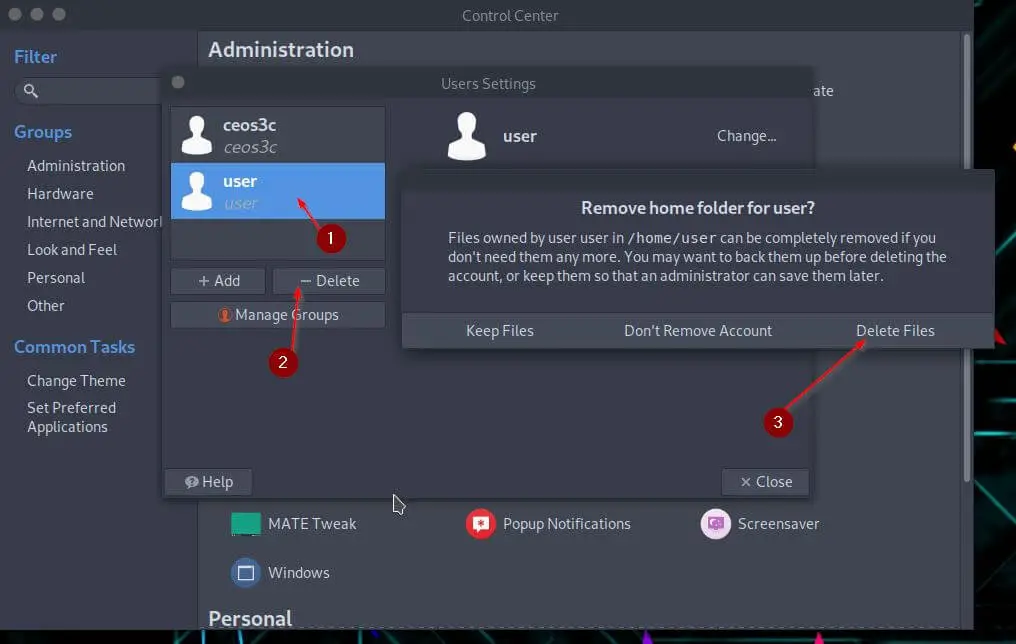
Choose a Keyboard Layout once again. Open the Menu -> Control Center -> Users and Groups. Select the default User and click on -Delete. Enter your new user account password and click on Ok. Select Delete Files. Close all dialogues.
Conclusion
Congratulations, you successfully installed Parrot Security OS and secured it with a low-privilege user account. I highly recommend checking out The Top Things to do after installing Kali Linux article that I wrote. The exact same steps apply to Parrot Security OS. Also, check out my YouTube Channel for more Cyber Security Tutorials!
👀 This Tutorial has some related Articles!
👉 How to get started in Cyber Security – The Complete Guide
👉 How to get started with Bug Bounties
👉 Terminal Customization Series
👉 Best Ethical Hacking Books
👉 Download Kali Linux Safe & Easy
👉 Best Ethical Hacking Tools
👉 Install VSCode on Kali Linux
👉 Dual Boot Kali Linux with Windows
👉 Install Kali Linux on VirtualBox – Complete Beginner Guide
👉 Top Things to do after installing Kali Linux
👉 WiFi Adapter for Kali Linux – The Ultimate Guide
👉 Nmap Beginner Guide Series
👉 Metasploit Tutorial Series
👉 Burp Suite Beginner Guide