In this Complete Step-by-Step Guide, we will show you how to build your very own Open Source Imaging Solution using FOG Server. You learn how to install FOG Server on Ubuntu Server from scratch. The second part of this tutorial covers how to create a Windows Image using FOG Server.
Table of Contents
🐧 There are some related articles!
👉 Top Things to do after installing Kali Linux
👉 Linux on Windows – The Complete WSL 2 Tutorial Series
👉 Create Generalized Windows Images with FOG Server
👉 Install FOG Server on Ubuntu
👉 Install Kali Linux on Windows – Complete Guide
👉 The Complete Kali Linux and Windows Dual Booting Guide
👉 Cronjob – The Complete Guide to Cronjobs
👉 Open Bitlocker Drive on Linux – Quick & Easy
Introduction
Just to warn you beforehand – this Guide will be a behemoth. I was thinking about writing up the whole thing in just one article, but I felt it would be a bit overwhelming so I want to split it up into two parts:
Part 1 will cover everything from installing Ubuntu Server on VirtualBox(or any other instance of Ubuntu Server), and installing & configuring FOG Server on the same server.
Part 2 will cover everything about generating your Generalized Windows 10 Image and capturing and deploying it with FOG.
There are a few guides out there but none of them (at least none that I found) were a 100% complete walkthrough, always minor things missing or not covered. This is about to change.
So without further ado, grab a kettle full of Coffee (Yes, a kettle.), and let’s get started!
Regarding the DHCP Server
Also, an important factor to consider is the DHCP situation you are in. If you want to Network PXE boot into your FOG Server, the Network has to somehow know how to handle this PXE Boot Request coming from a client.
I use pfSense as a router and it is no problem whatsoever to set it up to cooperate with FOG. You simply need to add a forwarder to your FOG Server in your pfSense DHCP Settings that point clients to your FOG Server IP for PXE requests. I will show you exactly how to do that in this tutorial.
But what I want to say is, find out how to do it with your DHCP Server, if you don’t use pfSense yourself. I will just cover the combination with pfSense and no other DHCP Servers. So make sure you know how to add a DHCP Server forwarder on your DHCP Server before starting, as this could throw you off.
What you need
Before we start to Install FOG Server on Ubuntu Server, make sure you’ll have everything ready. We are big fans of Open-Source software, so everything you need to follow along with this tutorial is free.
We use VirtualBox for the sake of this tutorial, you can use this tutorial to install FOG Server on any kind of Ubuntu Server you like (Physical or Virtual), it will work all the same.
Many of you are already familiar with VirtualBox, but I will guide you through each step anyway (except the installation of VirtualBox itself).
Step 1 – Creating a Virtual Hard Disk (VDI) for Ubuntu Server
Start up your VirtualBox Manager and click on New.
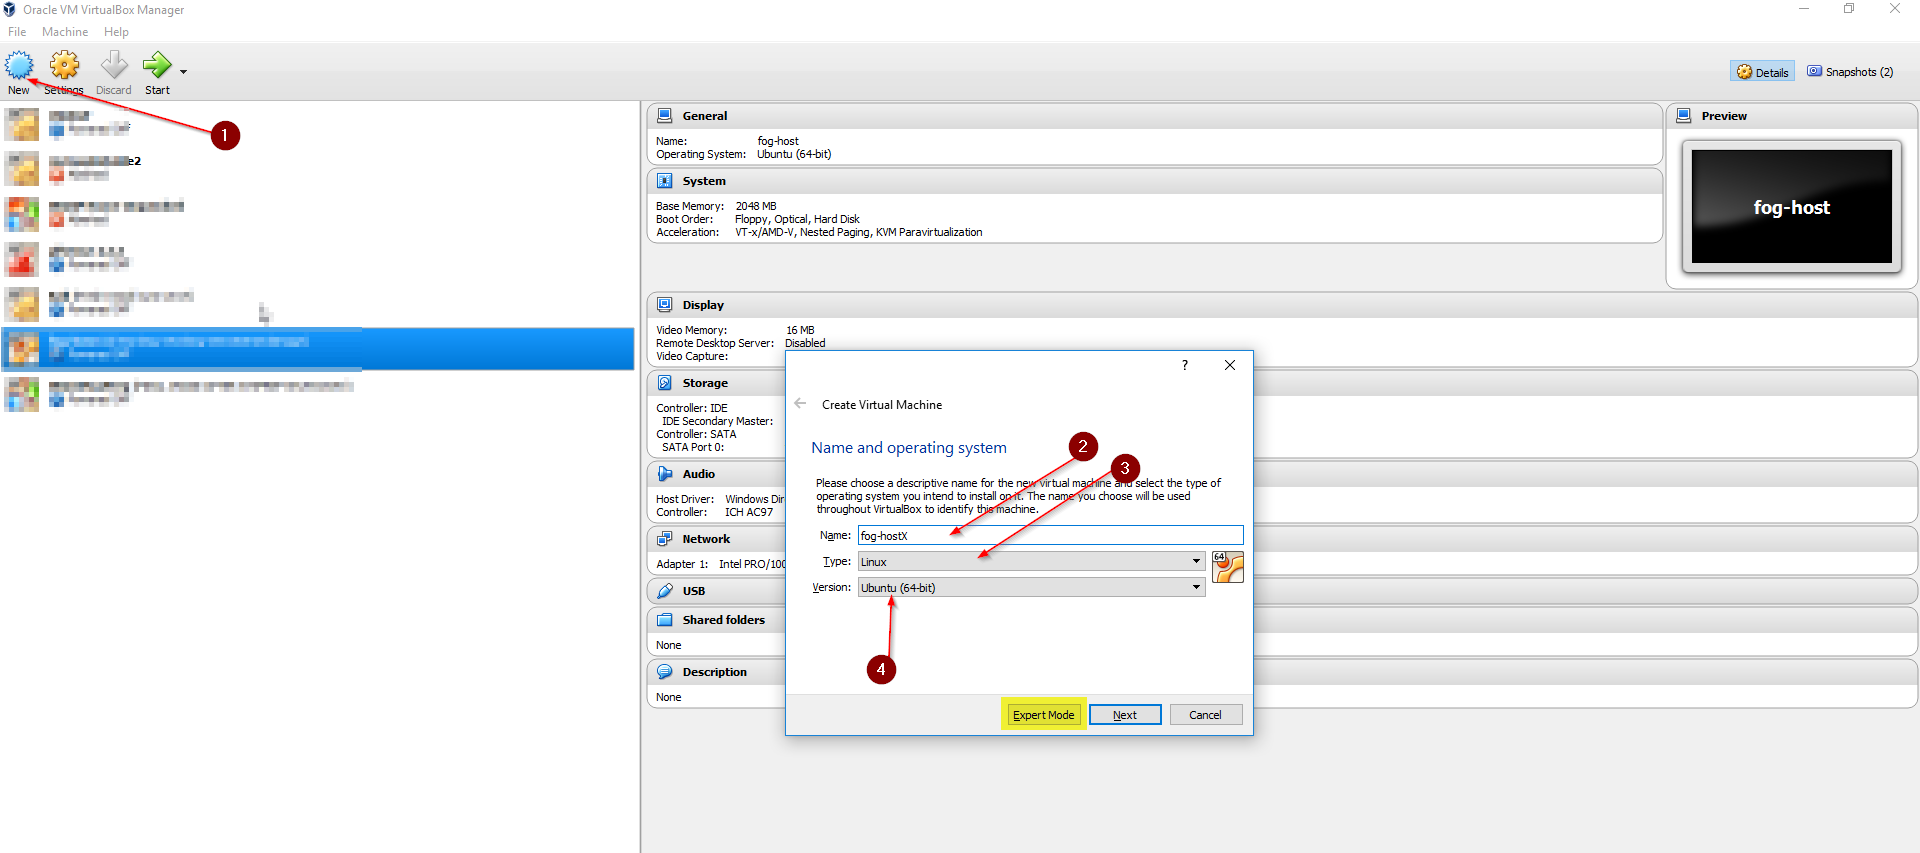
Make sure you are in the Guided and not in the Expert mode for this Tutorial.
Give your Host System a Name, I go for fog-host for the Ubuntu Server because the fog-server that will be installed on the machine will be named fog-server. Don’t wonder about the X I put behind my names, it’s because I already got a Fog-Host and Fog-Server up and running.
- Select Linux and Version Ubuntu (64-bit) and click Next.
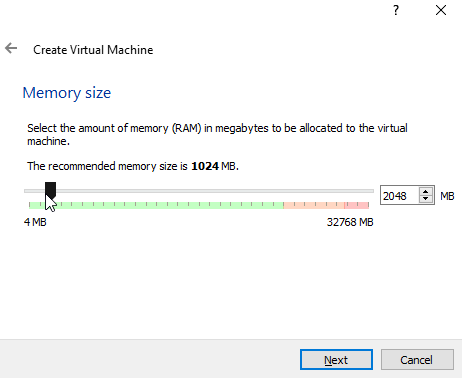
I run my Server on 2048MB of Ram without a problem. You probably could go with only 1024, but let’s give it a bit of space.
Click Next.
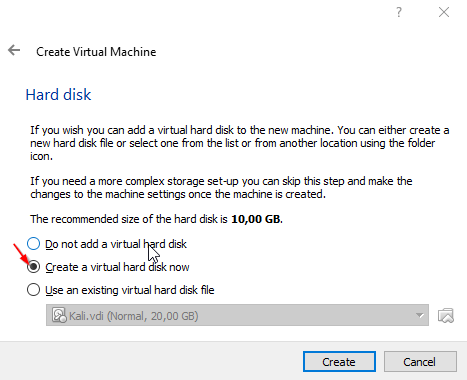
- Select Create a Virtual Hard Disk now and click Create.
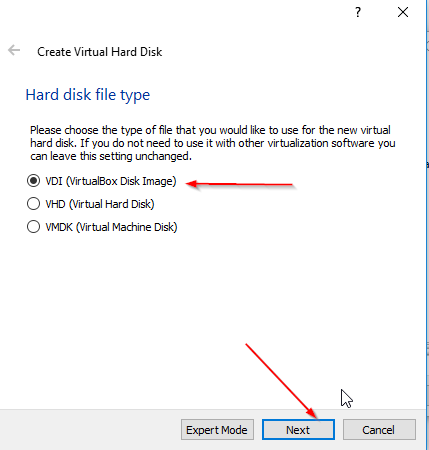
Choose VDI and click on Next.

Select Dynamically allocated and click Next.
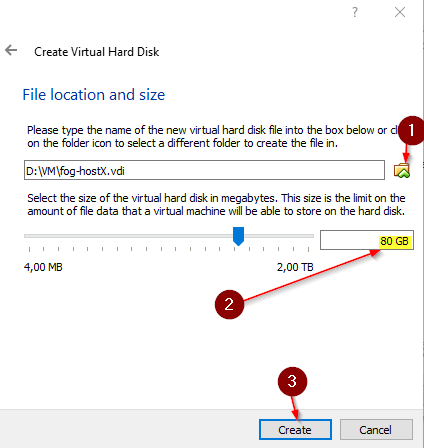
Choose a location where you want to Save your VDI file and allocate Disk Space.
Now, this is entirely up to you and what your goals are. If you just want to have 1 single Windows 10 Image on your FOG Server, around 40 GB would probably be enough.
I chose 80 GB to have a little more room if I want to use more images later. The Disk Space is allocated dynamically anyway, which means that just the amount of space that is used on the Virtual Machine is actually subtracted from your physical Hard Drive.
Click on Create once you decided.
Step 2 – Installing Ubuntu Server
So now that we have created our VDI, we can fire up that VM and get started with installing our Ubuntu Server before we can Install FOG Server on Ubuntu Server.
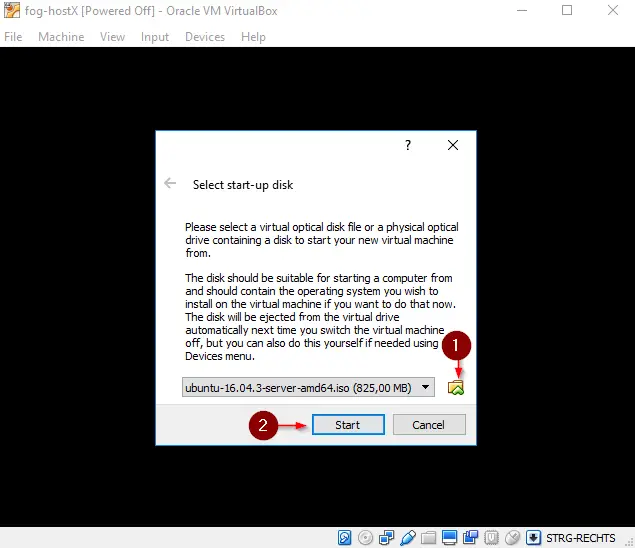
Click on Start to Start the FOG host.
Find the Ubuntu Server Image you downloaded earlier and click Start.
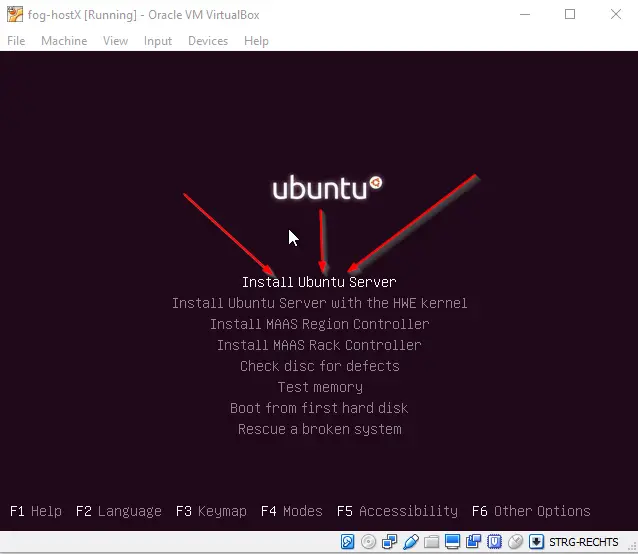
Select a Language and select Install Ubuntu Server.
By the way, if you are stuck with your mouse inside of your VM, press your right CTRL Key to release it!
Select your Language, Location, and Locales next and select a Keyboard Layout of your choice.
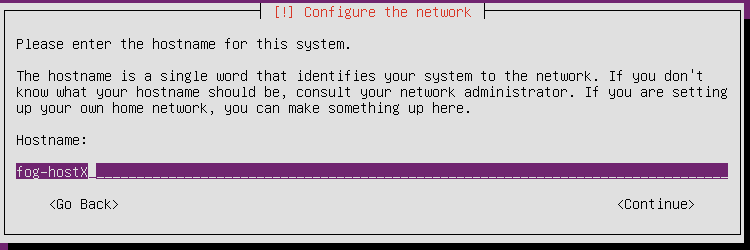
Once you are done with all of that and your Server got an IP Address from your DHCP Server (Or you configured one manually) we give our FOG server a hostname.
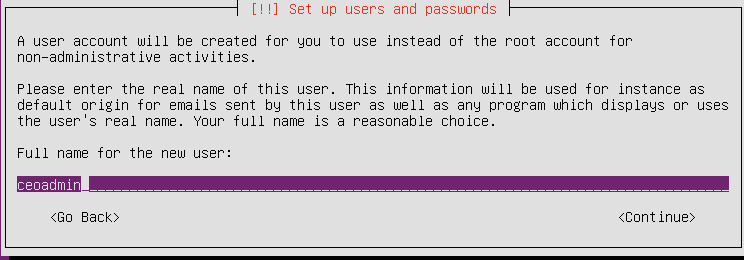
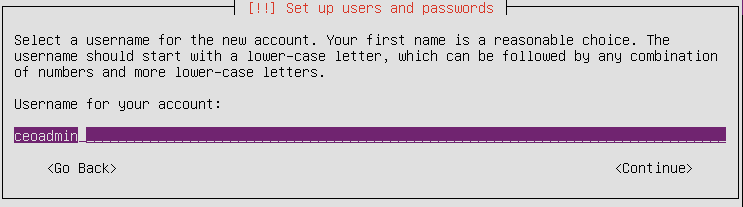
Give the New Admin a Full Name and a Username.
That Username will be used instead of the root user.
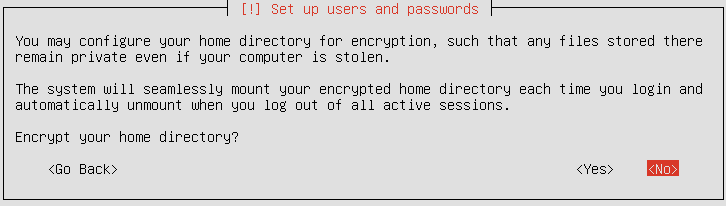
After you choose a safe password decide whether or not to encrypt your Home Directory. I won’t do that for this installation.
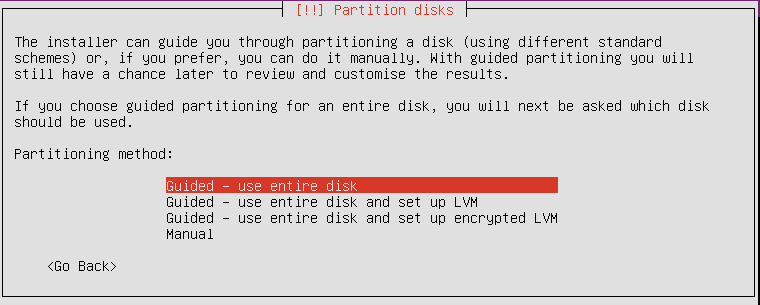
When we come to partitioning Disks, we will use Guided – Use Entire Disk.
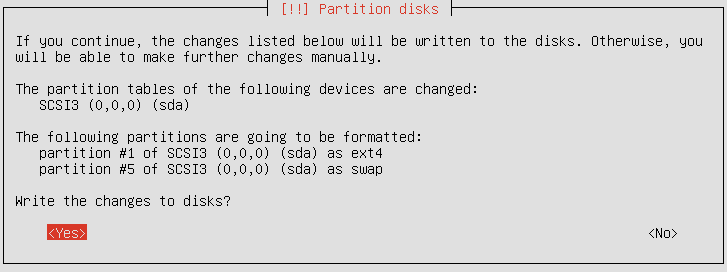
Finally, agree with Yes that you accept that all Data on the selected Hard Drive will be erased in the installation process.
Now Ubuntu Server will be installed on your VDI. Refill your coffee, we’re getting there.
Choose a Proxy Server if you have one, if not leave it empty.
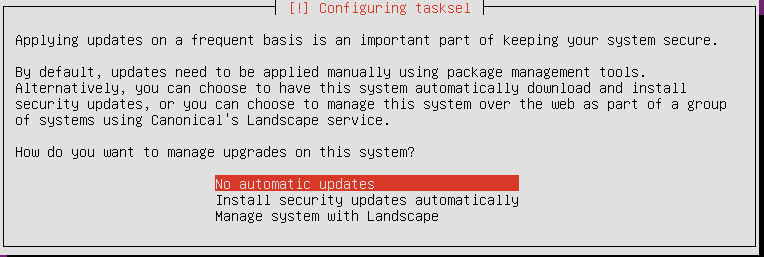
Next, you can choose if you want Updates to be automatically installed.
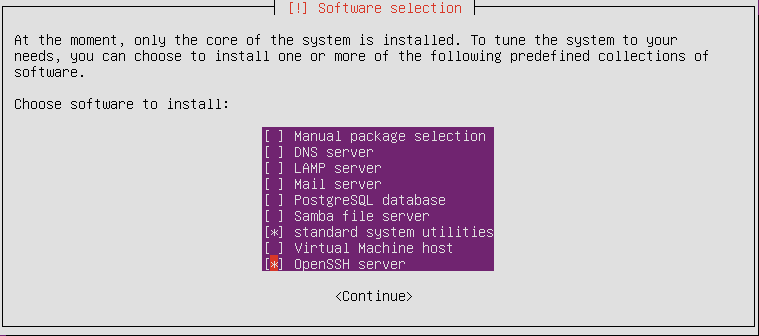
We want to make sure to install the following Software:
- OpenSSH Server
- Standard System Utilities
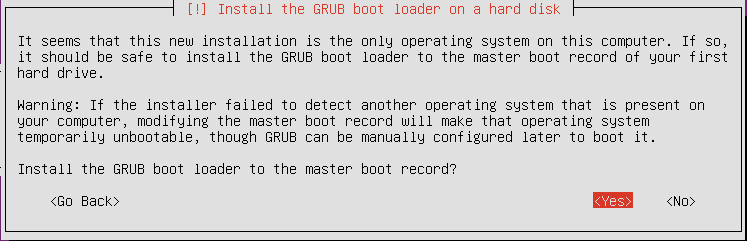
Next, we want to Install the GRUB boot loader to the master boot record.
After confirming to remove the Installation Media and clicking on continue, your new Ubuntu Server will boot up.
Enter the Username and the Password you created earlier and log in.
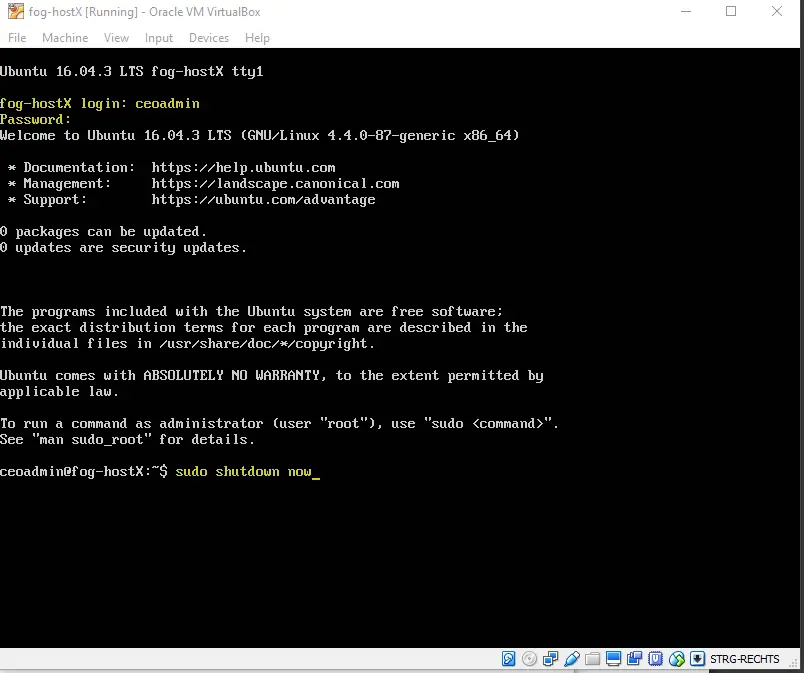
The absolute first thing we want to do is to shut our Server down again.
Type:
sudo shutdown nowCode language: Bash (bash)We do this to take a Snapshot of our fresh installation in case we mess things up. We will take more snapshots as we proceed but this will be the first one. If you completely mess your installation up, you can always go back to a working state without having to install everything again.
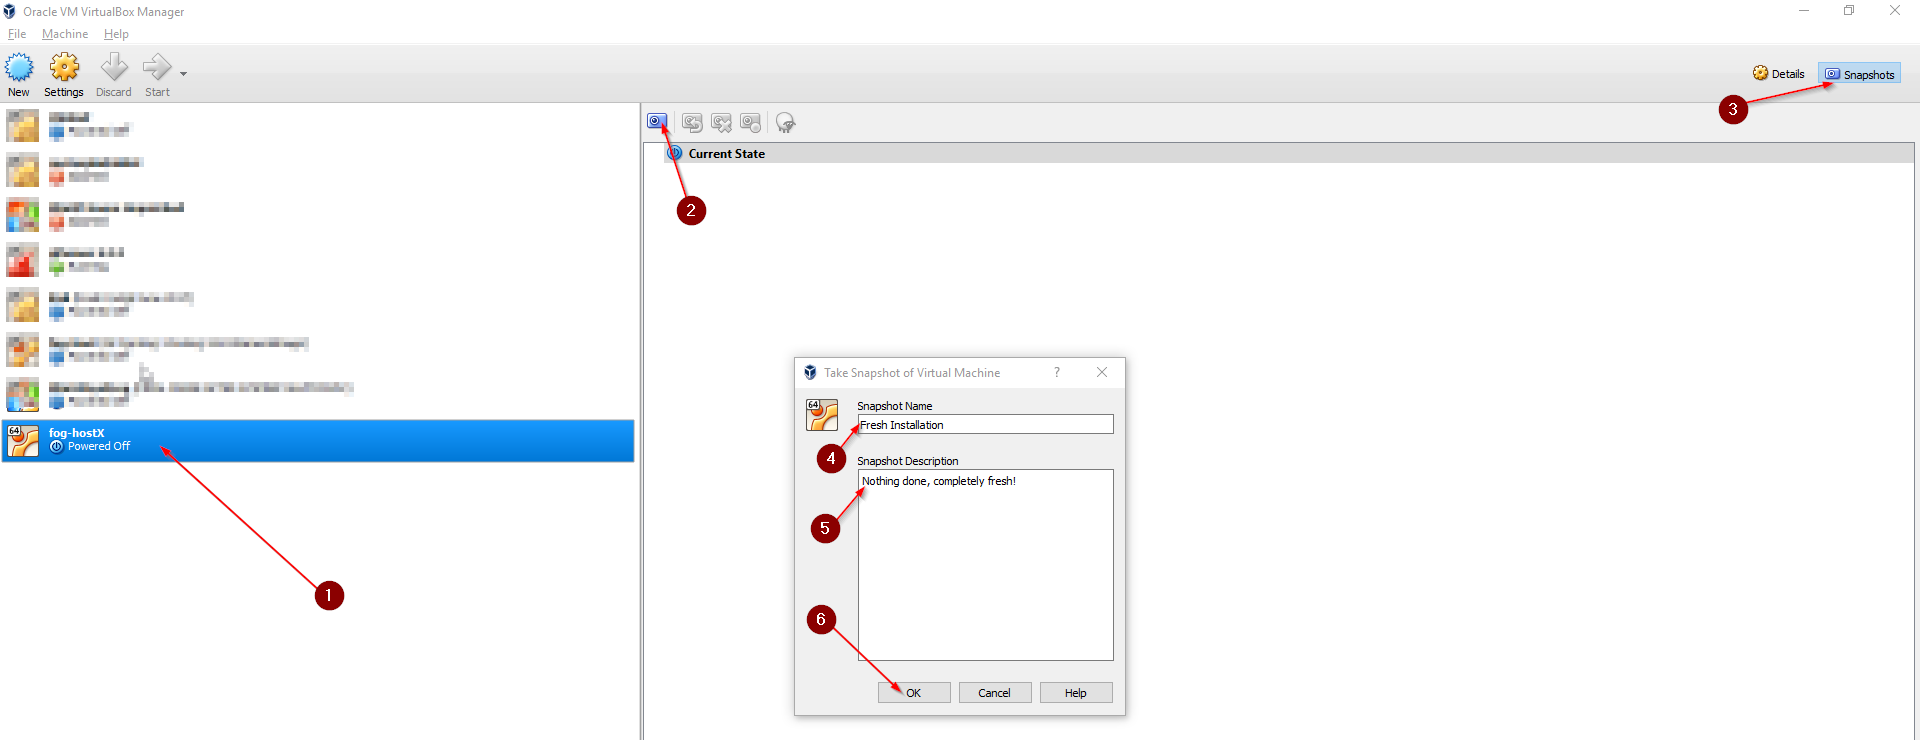
Select your VM, click on the little Camera Symbol in the upper right corner and Create a fresh Snapshot. Give it a descriptive name.
Step 3 – Preparing Ubuntu Server for FOG Server Installation
After you have taken your Snapshot, start up the machine again and log in with your credentials.
Before we can Install FOG Server on Ubuntu Server, we are going to update our system to make sure everything is on the latest patch level.
sudo apt-get update
sudo apt-get dist-upgrade -yCode language: Bash (bash)
After you finished the update, let’s run:
sudo -iSo we don’t always need to put sudo in front of our commands for now.
cd /opt/Code language: Bash (bash)First, navigate to the /opt/ folder so we are not using the root home for downloading and unzipping our FOG Server.
Now we are going to download FOG:
git clone https://github.com/fogproject/fogproject.git fogproject-masterCode language: Bash (bash)Now before we are going to Install FOG Server, we are going to change our IP Address, because it gets significantly harder to do that after FOG is installed. Way more things you need to change. If we do it now, we just do it once and the FOG Installation takes over the IP.
We do this by typing:
nano /etc/network/interfacesCode language: Bash (bash)If you have DHCP activated, you should see something along those lines:
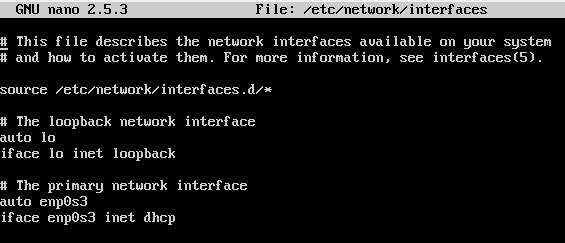
Which we are going to change to look like this:
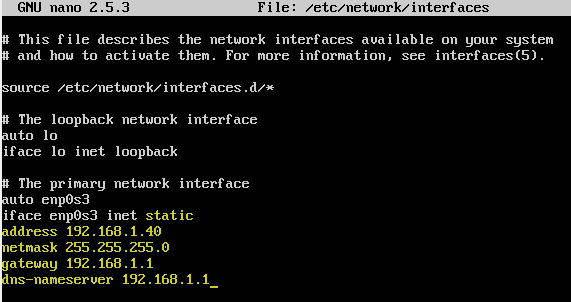
Of course, adjust according to whatever IP Addresses you are using. Change all the stuff in yellow.
Now press CTRL + O and confirm with Enter to save the file, hit CTRL + X to leave the editor.
Now reboot the Server by typing:
reboot nowCode language: Bash (bash)I know you could just restart the networking services, but that failed on me a few times so let’s restart to be sure.
After logging back in with your credentials type:
sudo -i
cd /opt/fog-master/binCode language: Bash (bash)
If all is good, we are now ready to Install our FOG Server.
I recommend you take another Snapshot of your VM now while it’s running. Just to be safe. Follow through the Snapshot process we covered earlier again and take a new one.
I call it something like: “Before FOG Installation, everything prepared”. Simple.
Step 4 – Install FOG Server on Ubuntu Server
As I mentioned in the beginning, our FOG-Server will NOT be installed as a DHCP Server, because our pfSense Firewall will still handle DHCP for us. The setup routine will ask you a few questions and I will exactly tell you what to choose. Follow along carefully as this is a crucial step.
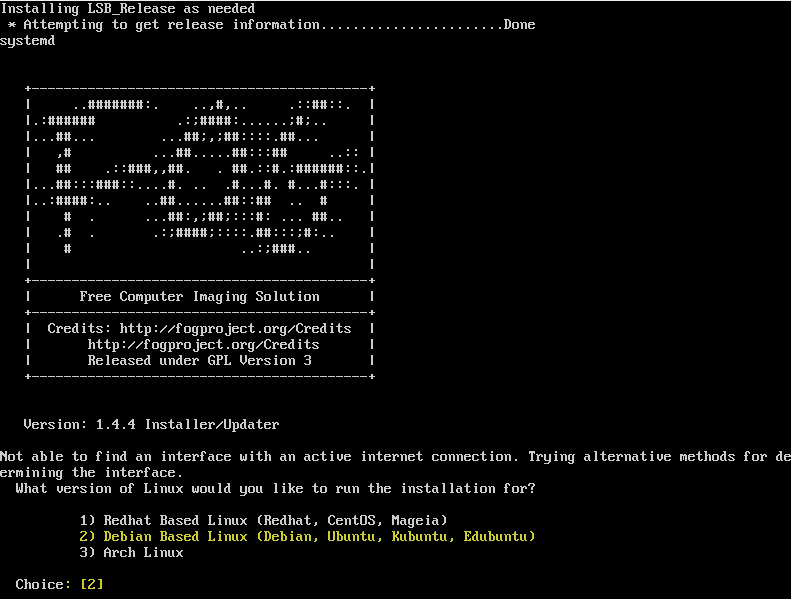
Inside of your /opt/fog-master/bin folder type:
./installfog.shOn the first prompt you make the obvious choice: 2 – for Debian Based Linux – Hit Enter.
Next, in my case, I will follow the recommendation of a potential reinstall of Apache and PHP files. So, agree with Y.
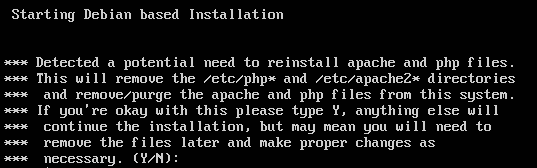
Stopping Web Services will likely fail, don’t worry about it now.
Now I’ll give you a list of questions and answers that the routine will ask you.
- What type of installation would you like to do? [N/s (Normal/Storage)]
- Choose: N
- What is the IP address to be used by this FOG Server? [TheIpYouSetUpEarlier]
- Confirm with Enter
- Would you like to change the default network interface from [YourNetworkInterfaceName]?
- Choose: N
- Would you like to setup a router address for the DHCP Server? [Y/n]
- Choose: Y and enter the IP Address of your Router / DHCP Server
- Would you like DHCP to handle DNS?
- Choose: Y
- What DNS address should DHCP allow? [IP of your Router or DNS Server you use]
- Confirm with Enter or Change the IP Accordingly
- Would you like to use the FOG Server for DHCP Service? [y/N]
- Choose: N
- This version of FOG has internationalization support, would you like to install the additional language packs? [y/N]
- Choose: N, or Yes if you need it.
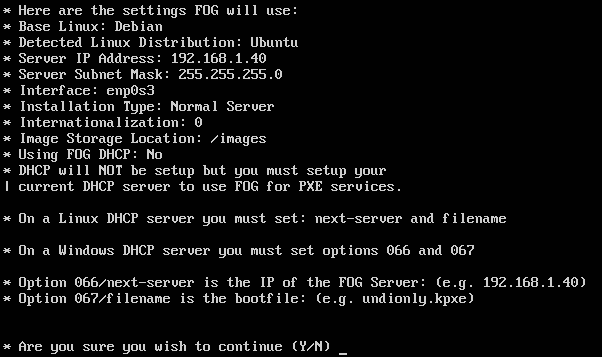
- Are you sure you wish to continue (Y/N)
- Check if everything is correct and confirm with Y
Double Check:

In some older versions of Ubuntu Server, you will get asked to set a MySQL password in the installation process. I wasn’t asked for it in Ubuntu. In case, you can leave it empty and just hit enter without a security risk. You can still change it later, too.
Next, before everything is finished, you get asked to update your Database.
For this you navigate to your FOG Server via a Web Browser of your choice:
http://192.168.1.40(or your FOG SERVER IP)/fog/management/
Log in with the default credentials:
- Username: fog
- Password: password
Confirm any prompts to Update the Database before or after logging in. After this is done, confirm that the installation is finished on your FOG Server by pressing Enter.
To give it a fresh start type:
reboot nowCode language: Bash (bash)On your FOG Server.
After the Server is back up, log in with the default credentials again via your Web Browser.
Navigate to your User Manager and change the default credentials of your fog user.
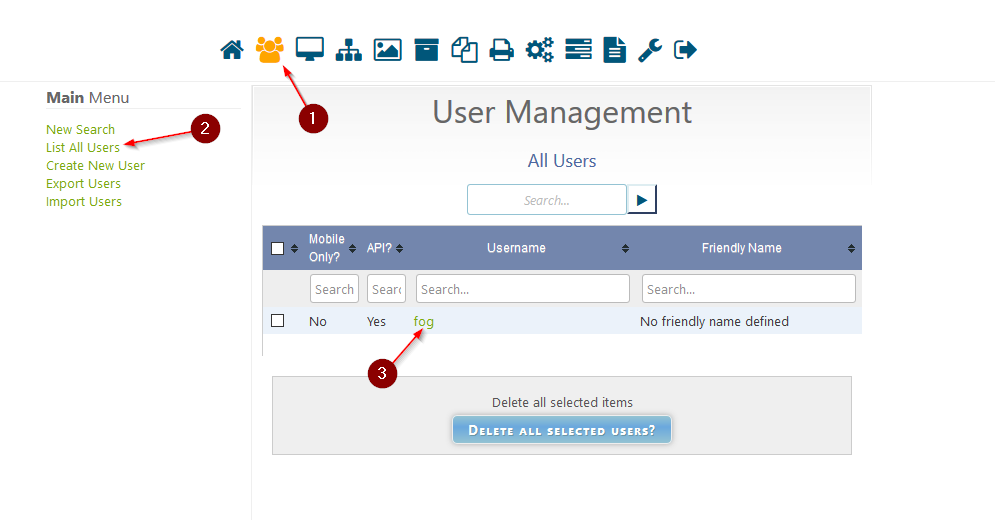
Congratulations, you just successfully installed your first FOG Server.
THE NEXT PART ONLY APPLIES IF YOU USE pfSENSE FIREWALL
Step 5 – Setting up a DHCP forwarder in pfSense
This will be very quick.
Log in to your pfSense Firewall and Navigate to Services / DHCP Server
Scroll down until you find Network Booting and click on Display Advanced.
Tick Enable Network booting and Enter your FOG Server IP Address as the Next-Server Address.
Set the Default BIOS file name to undionly.kpxe
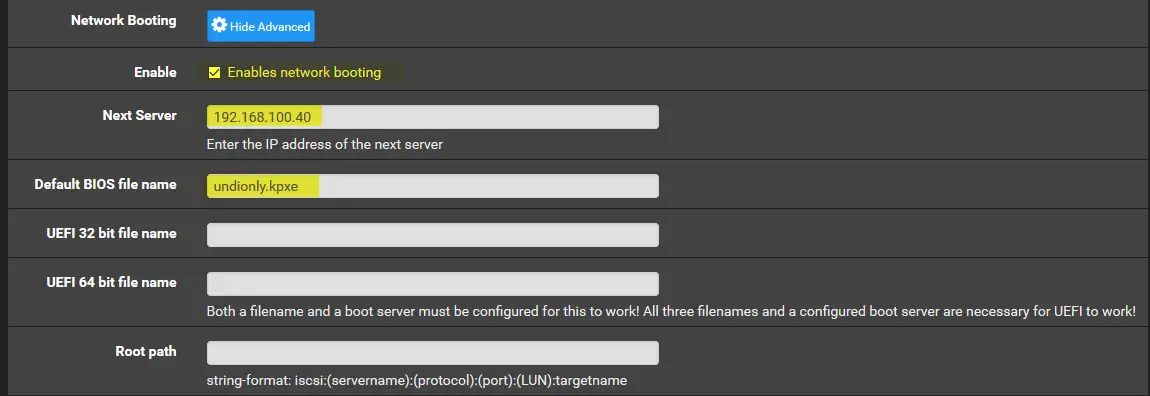
Save everything.
What this does is, every time pfSense recognizes a device that wants to PXE Boot over Network, it forwards the request to our FOG Server.
Easy, right?
Conclusion
This should cover all the steps of the FOG Server installation.
The next part, how to create your generalized Windows 10 Image and how to capture your first Host in FOG and deploy your Image, can be found here.
🐧 There are some related articles!
👉 Top Things to do after installing Kali Linux
👉 Linux on Windows – The Complete WSL 2 Tutorial Series
👉 Create Generalized Windows Images with FOG Server
👉 Install FOG Server on Ubuntu
👉 Install Kali Linux on Windows – Complete Guide
👉 The Complete Kali Linux and Windows Dual Booting Guide
👉 Cronjob – The Complete Guide to Cronjobs
👉 Open Bitlocker Drive on Linux – Quick & Easy
You tell everyone to install https://github.com/fogproject/fogproject.git to fogproject-master
Then tell them to go to /opt/fog-master/bin.
But the folder you specified when telling everyone to install fog is “fogproject-master”. So you should be telling people to go to /opt/fogproject-master/bin
Great guide, just wanted to address this 1 bit. I used an older guide of yours back in 2020 and it was awesome so came back in 2026 to build Fog again.
As checked in the above article the IP address of your FOG server you have set is 192.168.1.40 and in your pf sense, you have entered Fog server IP as 192.168.100.40. How it is possible could you please explain?
Thanks so much, man, for doing such a nice step-step. I’ve trying to find an updated version of FOG tutorial, since i feel am forgetting something in the middle of the process.
Hey Cris,
thanks! Did it still work for you, or did you find any mistakes in the guide? I’m planning on giving it an update shortly!
Where’s the link to Part 2? I think it got lost when you updated this page.
Sorry! I forgot to actually include it. You can find it right here: https://www.ceos3c.com/sysadmin/create-generalized-windows-10-image-deploy-fog-server/
I’m looking to replace my clonezilla with FOG server. At moment I setup clonezilla as pxe network boot which connects to my samba server to save images. Would u like to help me with this