
In this first part of this new Astro JS Tutorial Series, we will talk about what Astro JS is, and then we will jump right in and build a very simple static website together that we will then deploy for free on Netlify.
This Astro JS Tutorial Series
We will build a couple of projects during this Astro JS tutorial series. The first few parts will cover the basics of Astro JS, and we will take it really slow. Once we are familiar with all the basic functionality, we will build some or all of the following projects:
- A basic static website (this tutorial).
- A LinkTree clone that you can use for your links and host for free!
- A complete blog with CMS (Netlify CMS).
- A dynamic website that uses SSR to fetch and display API data.
You will also learn how to implement Google Analytics into your Astro project and how to use Tailwind CSS with Astro.
We will, in fact, be only using Tailwind CSS in this entire tutorial series. We will only show you how to add classic CSS styles to your project so that you are familiar with it, but for building out our projects, Tailwind CSS will be used exclusively.
Also, all of the parts of this tutorial series will include a video, as it is a tradition on our blog. This makes the experience more interactive and fun!
Lastly, if you want to stay up-to-date and get informed about new parts of the series being released, make sure to bookmark this website and also sign up for our newsletter, where we will inform you once a new part has been published!
You can clone the finished code of this part from the GitHub Repository. Make sure to checkout the 1-Astro-Introduction branch!
What is Astro JS?
Astro JS is a fairly new framework for building fast websites. Astro JS allows us to create websites that ship zero JavaScript, which makes loading times extremely fast. Astro JS is a great framework if you are just starting out with Web Development or if you just want to create a fast static website with minimum code.
Astro is much easier to learn than other web frameworks such as React, NextJS, or Vue. A lot of beginners jump right into big, complicated frameworks like React after learning the basics of JavaScript. This oftentimes leads to people getting discouraged and giving up.
Astro JS allows you to create projects without the need to learn a complicated framework. We think it is a great starting point for learning Web Development in a fun and motivating way.
Why Astro JS?
We love Astro JS because it’s so easy and fast to create and ship beautiful, fast-loading static websites.
Stefan has created his own portfolio website, a blog, and a LinkTree clone using Astro, and the development experience was excellent. That is why we decided to dedicate an entire tutorial series to Astro JS.
Also, the Astro discord server is a great place to get help and get involved in the Astro JS community, which is very helpful and makes for a positive overall impression of the Astro ecosystem.
Astro Requirements
Before we get started, we will make sure that your system has all the required tools installed that we need to create a new Astro project.
You should have the following tools installed:
- Node.js –
v16.12.0, or higher.- Use our guide to install Node on any system.
- Code Editor – Visual Studio Code with the Official Astro Extension.
- Terminal – You can follow this tutorial by using your macOS terminal, WSL 2 on Windows, or with any Debian-Based Linux distribution.
Deployment Requirements
To be able to deploy our project on Netlify, you have to have the following requirements in place:
- A GitHub account.
- A Netlify account.
- Git installed on your computer (we recommend using GitHub Desktop!)
Creating a new Astro Project
Once we have the requirements in check, we can initiate a new Astro project by running the following command in the terminal:
npm create astro@latest
Code language: CSS (css)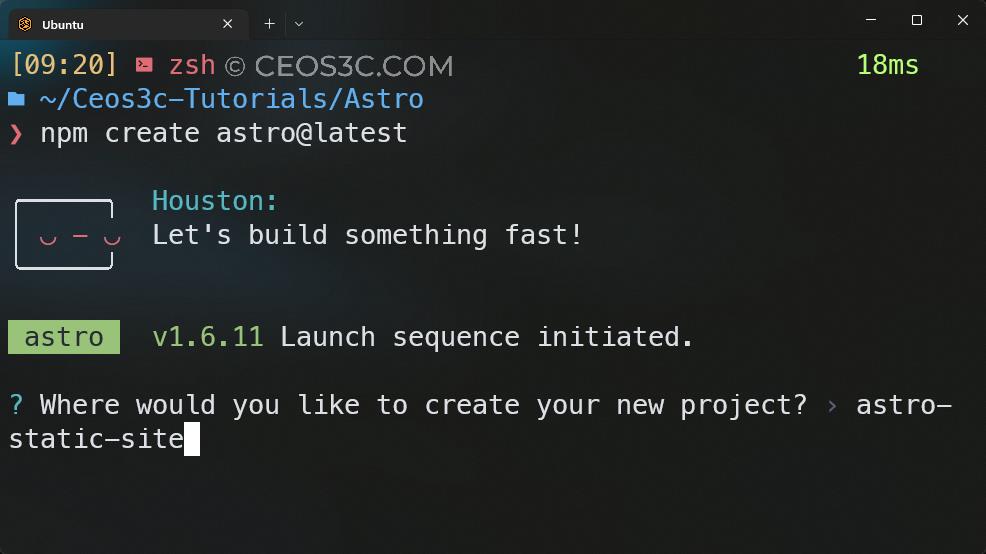
This will launch the Astro project creation wizard. Next, we get to choose a name for our project, followed by some more prompts:
- ? Where would you like to create your new project?
- astro-static-site
- ? How would you like to setup your new project?
- an empty project
- ? Would you like to install npm dependencies?
- Y
- ? Would you like to initialize a new git repository?
- Y
- ? How would you like to setup TypeScript?
- Relaxed (or Strict if you are familiar with TypeScript)
After this process has been finished, we can now navigate to our Astro project by typing:
cd astro-static-site
Code language: JavaScript (javascript)
Running the Dev Server
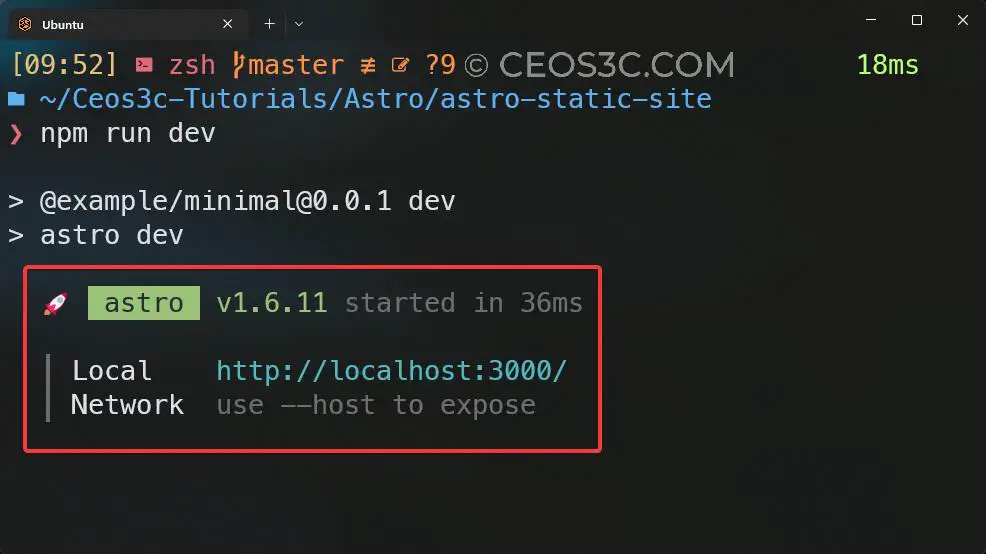
Now we can start the development server by typing:
npm run dev
Our Astro site is now served locally at http://localhost:3000/
Opening the Project in VSCode
Next, open the project in VSCode or any editor of your choice.
TIP: If you are using WSL 2 on Windows, you can launch VSCode directly out of your project directory by typing code .
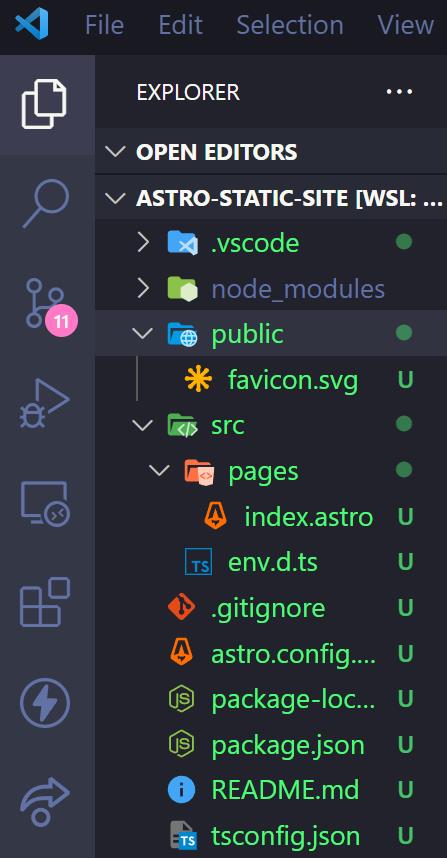
Since we have created an empty project, our folder structure should look pretty uncomplicated:
Astro JS Project Structure
It is important to understand the general folder structure of our Astro JS project before we continue to add new files and folders to our project. While it is not a requirement, it is always a good idea to adhere to the recommended file and folder structure when working with a framework.
While Astro is using an opinionated folder layout, you should have at least the following folders and files in the root directory of your project:
- src/* – For project source code like components, pages, styles, and so on.
- public/* – For unprocessed assets like fonts, icons, and so on.
- package.json – The Project Manifest.
- astro.config.mjs – The Astro configuration file.
- tsconfig.json – The TypeScript configuration file.
Astro JS Folder and File Tree
According to the Astro documentation, an Astro folder structure could look like this:
├── src/
│   ├── components/
│   │   ├── Header.astro
│   │   └-─ Button.jsx
│   ├── layouts/
│   │   └-─ PostLayout.astro
│   └── pages/
│   │   ├── posts/
│   │   │   ├── post1.md
│   │   │   ├── post2.md
│   │   │   └── post3.md
│   │   └── index.astro
│   └── styles/
│       └-─ global.css
├── public/
│   ├── robots.txt
│   ├── favicon.svg
│   └-─ social-image.png
├── astro.config.mjs
├── package.json
└── tsconfig.json
Code language: plaintext (plaintext)
Basic Astro Frontpage
Now that we have the basics covered, let’s create our front page. Open the src/pages/index.astro file in VSCode and open http://localhost:3000 in a browser window. You should just see a <h1> with Astro.
The content of the index.astro file looks like this:
---
---
<html lang="en">
<head>
<meta charset="utf-8" />
<link rel="icon" type="image/svg+xml" href="/favicon.svg" />
<meta name="viewport" content="width=device-width" />
<meta name="generator" content={Astro.generator} />
<title>Astro</title>
</head>
<body>
<h1>Astro</h1>
</body>
</html>
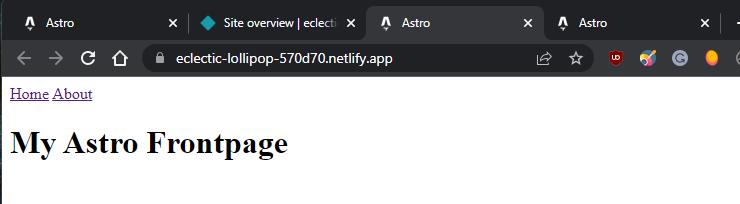
Code language: HTML, XML (xml)1 – Now, we make our front page a bit more personalized. Change the text between the <h1> tag to something else:
<body>
  <h1>My Astro Frontpage</h1>
</body>
Code language: HTML, XML (xml)
2 – Check your browser to see if your text has changed after saving the index.astro file:
Great! You just wrote your first line of Astro code! Let’s move on.
Adding a new Astro Page
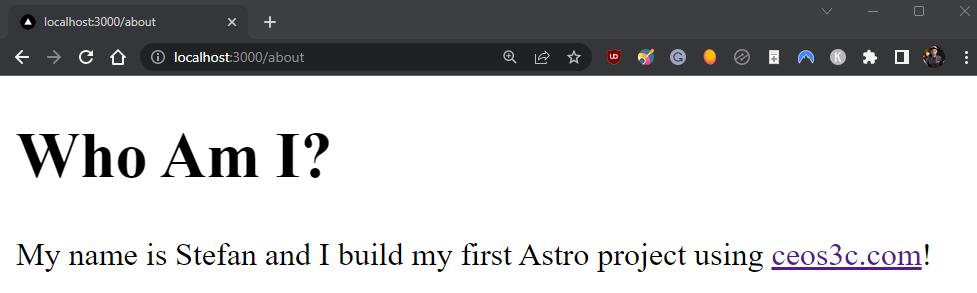
Since Astro uses file-based routing, every file that you create inside your src/pages folder will become a new endpoint on your website. Let’s create a new file inside src/pages called about.astro and add the following content:
<body>
  <h1>Who Am I?</h1>
  <p>
    My name is Stefan and I build my first Astro project using <a
      href='https://www.ceos3c.com'>ceos3c.com</a
    >!
  </p>
</body>
Code language: HTML, XML (xml)
Now visit your about page by navigating to http://localhost:3000/about, and you should be able to see your newly created about page:
To make things easier, let’s add some navigation to our project.
Adding Navigation Links
To keep things simple, we just include the links to our pages inside of the <body> tags in both, src/pages/index.astro:
<body>
  <a href='/'>Home</a>
  <a href='/about/'>About</a>
  ...
</body>

Code language: HTML, XML (xml)
and src/pages/about.astro:
...
<body>
    <a href='/'>Home</a>
    <a href='/about/'>About</a>

    <h1>My Astro Frontpage</h1>
  </body>
...

Code language: HTML, XML (xml)
Now you should be able to navigate between your front page and your about page by clicking on the respective links! Don’t worry; we are going to make this much easier in the next tutorial using Astro layouts and by adding a navigation bar.
Challenge
To put everything together, we have just learned, try to solve the following steps on your own:
- Create a new page called
hobbies.astro. - Add
<body>tags to it. - Add a
<h1>with “My Hobbies.” - Add a
<ul>below the<h1>. - Add your hobbies inside of
<li>elements inside of the<ul>tags. - Add navigation links and update the links in
index.astroandabout.astroto include your newhobbies.astropage!
Solution
Your src/pages/hobbies.astro file should look like this:
<body>
  <a href='/'>Home</a>
  <a href='/about'>About</a>
  <a href='/hobbies'>Hobbies</a>
  <h1>My Hobbies</h1>
  <ul>
    <li>Playing Video Games</li>
    <li>Watching Movies</li>
    <li>Playing Sports</li>
    <li>Reading</li>
    <li>Listening to Music</li>
  </ul>
</body>

Code language: HTML, XML (xml)
Deploying to Netlify
To not make this first part of the tutorial too long, we are going to deploy it to Netlify and continue to build our static website in the next part of this tutorial series.
The beauty of this deployment method is that Netlify uses continuous deployment. That means, once you have deployed your project to Netlify, Netlify will automatically update your website after you run git push without the need to do anything.
This allows us to quickly make changes to our websites and have them live in seconds.
To be able to deploy your project to Netlify, you have two options:
- Option 1 – Upload your project to GitHub and then deploy it on Netlify using the Netlify website.
- Option 2 – Deploy your project using Netlify CLI. (GitHub needs to be set up in your terminal)
There really isn’t an advantage or disadvantage of using one over the other, but we are going to show you both methods so you can choose which you like better!
If you already know how to deploy your project to GitHub, you can skip the step below and upload your project on your own!
Option 1 – GitHub and Netlify Dashboard
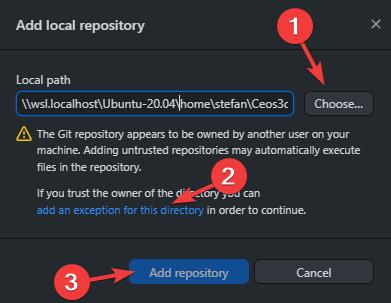
Open up GitHub Desktop and add your repository by clicking on File → Add Local Repository. Navigate to the path where you have your astro-static-site project stored and select the project root folder.
TIP: If you use WSL 2, you can use the wslpath -w . command to display your current directory and just paste this into GitHub Desktop.
You might have to click on “add an exception for this directory” to tell GitHub that your trust this folder. Click on Add Repository.
Next, enter a commit message and click on Commit to master. Finally, click on Publish repository.
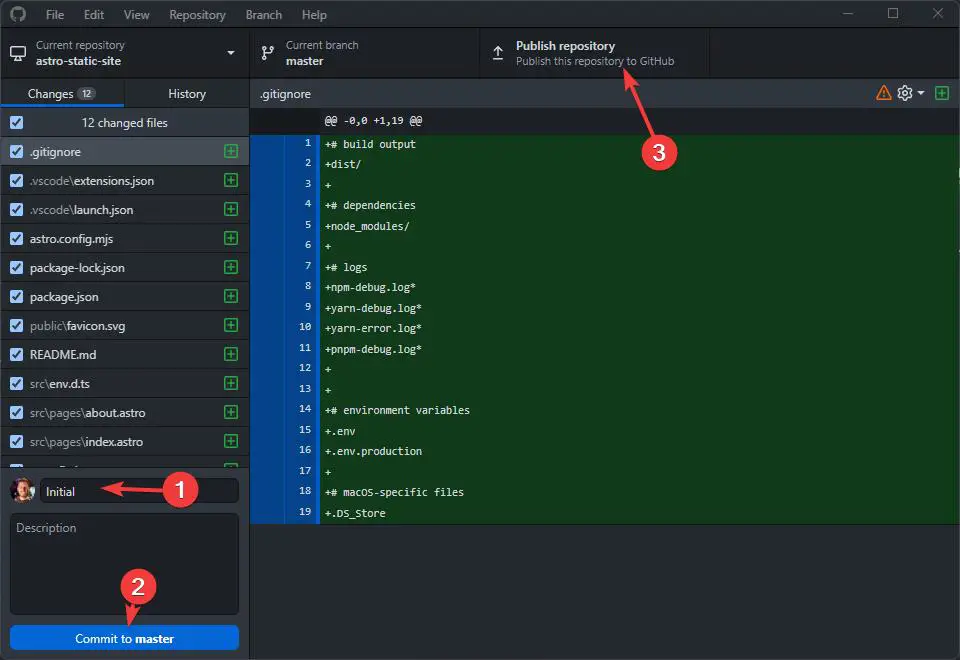
You can either choose to keep the code private or not. Then click on Publish repository again.
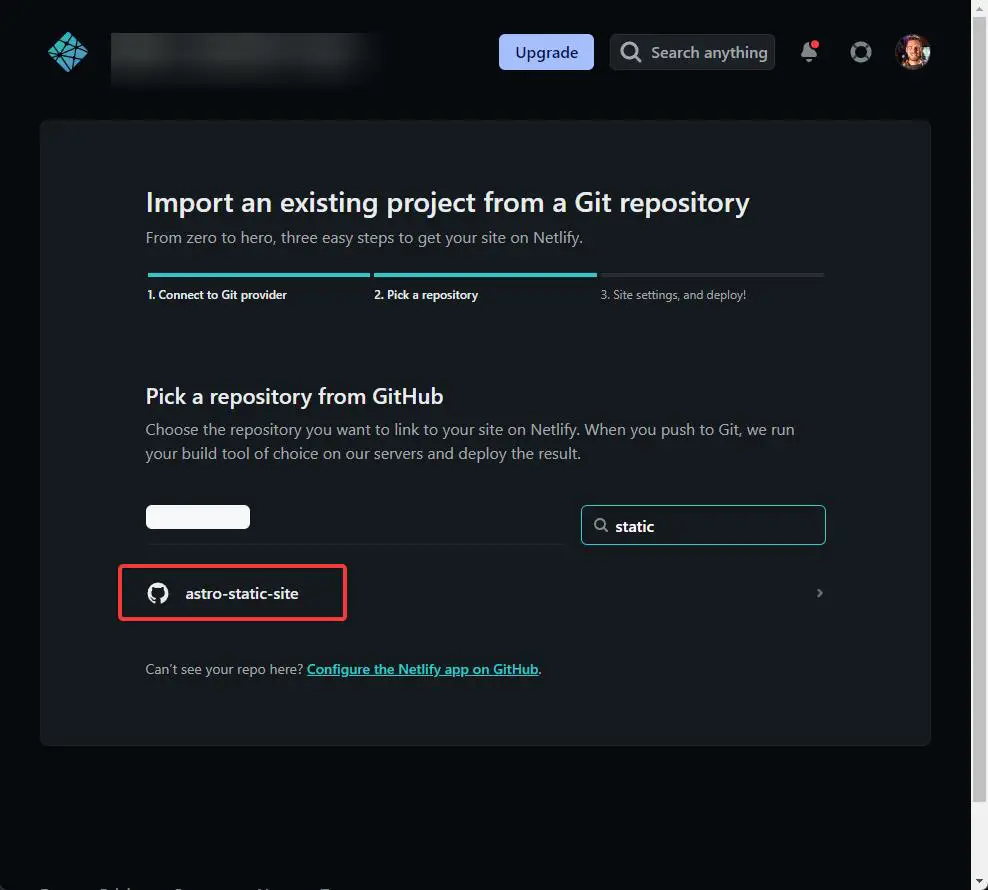
Now open up Netlify and click on Sites. Click on Add new site and click on Import an existing project. Click on GitHub. Give Netlify the authorization to access your GitHub profile.
You need to specifically allow Netlify access to the GitHub repository you want to publish. Therefore, click on Configure Netlify on GitHub. You can now either choose to give Netlify access to all repositories or to a specific one only. We recommend the latter.
Click on Select repositories and choose your astro-static-site repository. Click on Save. Back on Netlify, select your astro-static-site repository.
After selecting your repository, make sure the settings are as in the screenshot below. They should be correct by default.
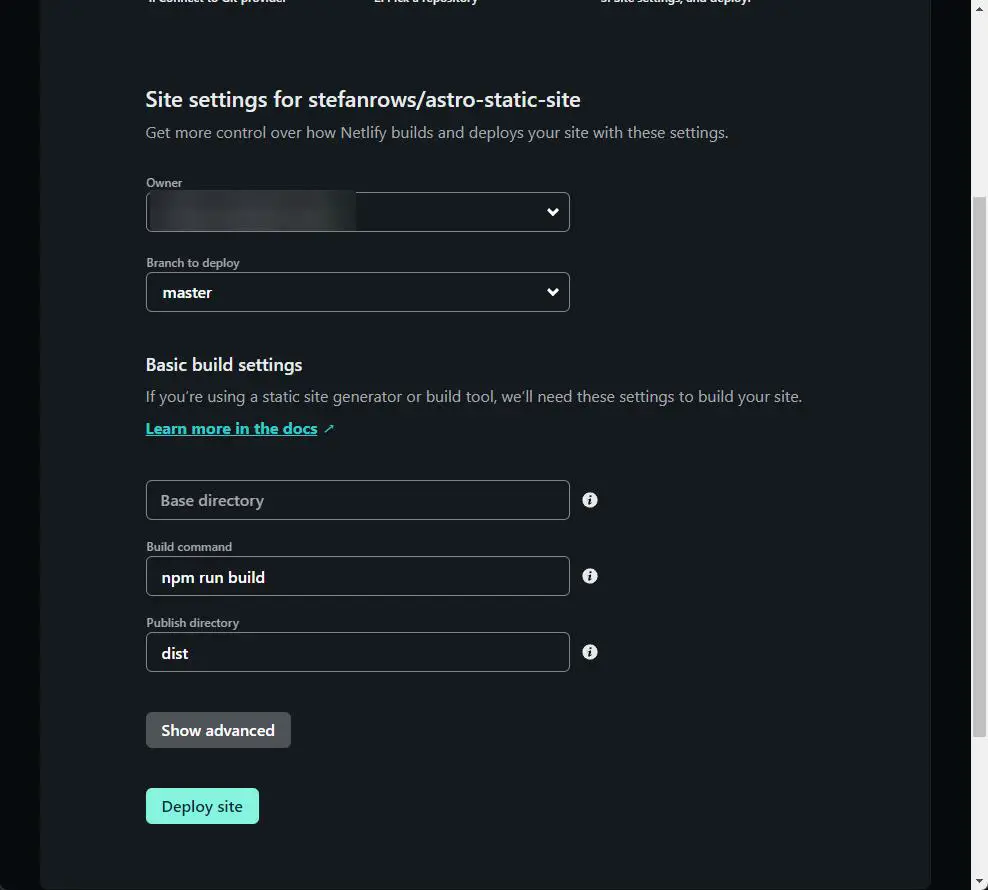
If all is correct, click on Deploy site.
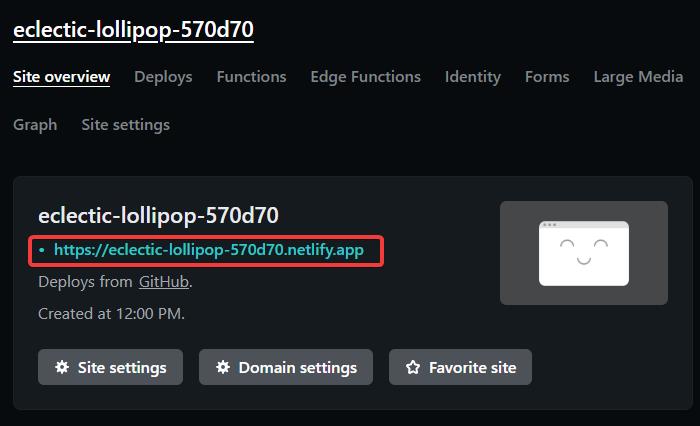
Now your site will be deployed, and once it’s ready, you can access it via the link on the dashboard.
Option 2 – Netlify CLI
To deploy your project using the Netlify CLI, follow the steps below.
Note: You have to have GitHub set up in your terminal for this to work!
Install Netlify CLI:
npm install netlify-cli -g
Next, we need to log in to Netlify:
netlify login- Run
netlify initand follow the instructions- Create & Configure a new site
- Select your team
- Give the site a name or leave blank
- Agree to all following prompts by pressing Enter, leaving them as default.
- Run
netlify buildto build your project. - Run
netlify deployto deploy your project.
Now every time you make changes to your project and run git push, Netlify will automatically update your Astro site!
Deployed Site
Now your site should have been deployed and live! You can access your site via the Netlify dashboard or via the link in your terminal if you have used Netlify CLI.
Astro Server Side Rendering (SSR)
Astro also offers SSR. Since SSR is not useful for our static website project, we are going to cover SSR in a later part of this Astro JS tutorial series, where we will build a dynamic website that fetches data from an API.
Next Steps
This is how easy it is to deploy an Astro website to Netlify! Once you know how it’s done, you can literally have a new project up and running within a minute.
In the next parts of this Astro JS tutorial series, we will further customize our astro-static-site project, and we will show you all of the cool things you can do with Astro. This first part was just a brief introduction to get things up and running!
Make sure to subscribe to our newsletter to get informed when a new part has been published.