
This guide will teach you how to integrate Google Analytics into your Astro project. We are going to do our Astro Google Analytics integration with the help of the Partytown package.
Table of Contents
- Step 1 – Create Google Analytics Property
- Step 2 – Partytown Setup
- Step 3 – Astro Google Analytics Integration
- Conclusion
Step 1 – Create Google Analytics Property
First, you need to create a new Google Analytics 4 property for your website. The process is straightforward. Just follow the official Google documentation.
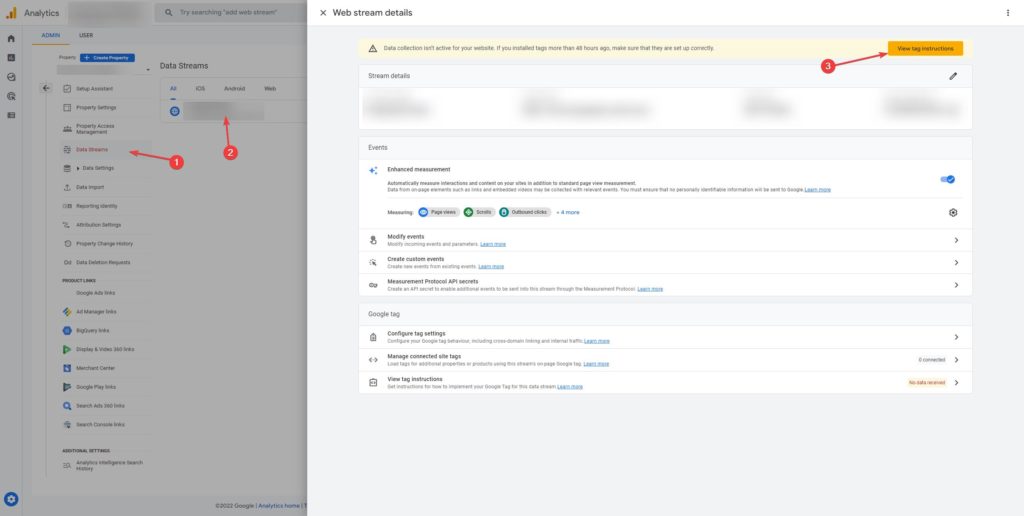
Once you have created the property, navigate to Data Streams and click on your property. Then click on the View tag instructions button:
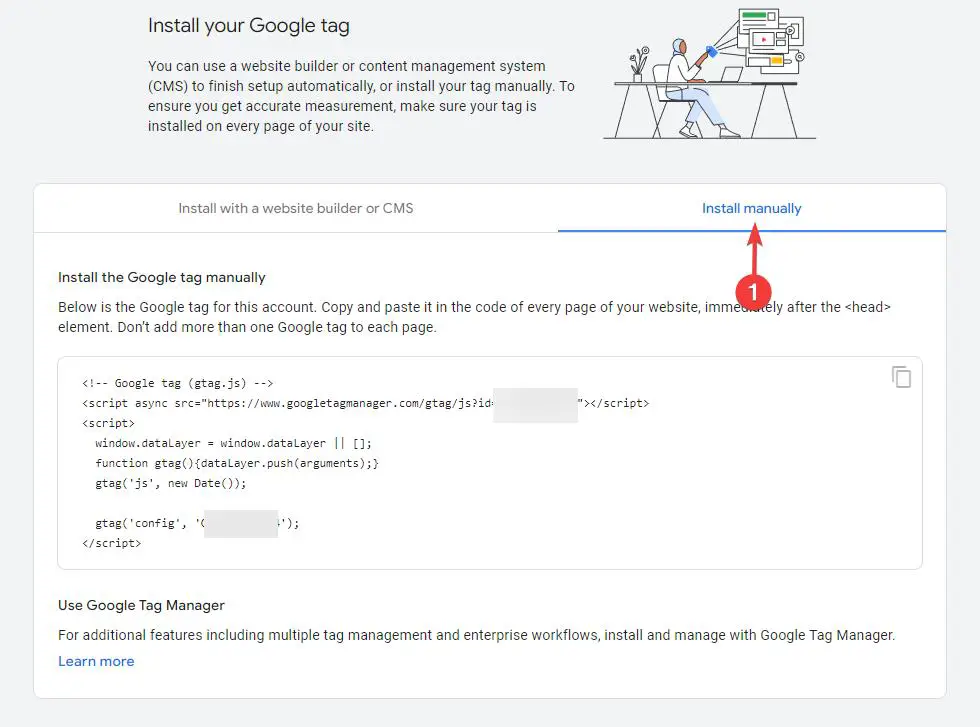
Once you are there, click on Install manually and copy the code to your clipboard:
Step 2 – Partytown Setup
Now we install Partytown and include it in our astro.config.mjs file. To install Partytown in your Astro project, run:
npm install -D @astrojs/partytownCode language: CSS (css)Open your astro.config.mjs file and add the partytown object to the integrations array:
import { defineConfig } from "astro/config";
import partytown from "@astrojs/partytown";
export default defineConfig({
  integrations: [
    partytown({
      // Adds dataLayer.push as a forwarding-event.
      config: {
        forward: ["dataLayer.push"],
      },
    }),
  ],
});Code language: JavaScript (javascript)
Step 3 – Astro Google Analytics Integration
Now we put everything together. Your original Google Analytics code looks like this:
<!-- head -->
<script
  type="text/partytown"
  src="https://www.googletagmanager.com/gtag/js?id=GA_MEASUREMENT_ID">
</script>
<script type="text/partytown">
  window.dataLayer = window.dataLayer || [];
  function gtag() {
    dataLayer.push(arguments);
  }
  gtag("js", new Date());
  gtag("config", "GA_MEASUREMENT_ID");
</script>
<!-- more head -->Code language: HTML, XML (xml)
We need to slightly modify this code and add some Partytown code for it to work:
- Make sure to replace the
GA_MEASUREMENT_IDplaceholder with your actual Google Analytics tracking ID. - Add a
typeattribute to both<script>tags and set it to the value of"text/partytown".
Now we only need to include our Google Analytics script inside the <head> element of our project as the first entry. You can either do this in a layout, on a page, or in a component. In the example below, we use the Layout.astro file. The final code should look something like this:
<!-- head -->
<script
  type="text/partytown"
  src="https://www.googletagmanager.com/gtag/js?id=GA_MEASUREMENT_ID">
</script>
<script type="text/partytown">
  window.dataLayer = window.dataLayer || [];
  function gtag() {
    dataLayer.push(arguments);
  }
  gtag("js", new Date());
  gtag("config", "GA_MEASUREMENT_ID");
</script>
<!-- more head -->Code language: JavaScript (javascript)
Conclusion
This should be everything. As soon as Google Analytics updates or you get some traffic to your website, your Astro project should be successfully hooked up to Google Analytics. Want to learn how to properly format Astro files using VSCode? We got you covered.
What if I receive “TypeError: Failed to fetch at partytown-ww-sw.js?v=0.7.6:1746:41” in console?
Clear, concise, and very helpful. Thanks for saving me some time, Stefan.
You are most welcome, Nick. Thanks for leaving a comment!