
In this article, you will learn how to Dual Boot Kali Linux with Windows 10 or 11. This is a complete step-by-step instructional that you can follow along.
Read This Before Starting
This is a disclaimer. There are so many people out there who think it’s a great idea to have their first Linux experience with Kali (Hint: It isn’t!). While things got better and Kali came more secure out of the box, if you haven’t installed Linux or any other operating system before, you’ll set yourself up for trouble.
While I will try to cover every single step as detailed as possible, there is a chance that you lose your existing Windows Installation and all of your files when following this tutorial. Why? Because every computer is different, everyone has different stuff installed, different partitioning schemes, and different BIOS settings. I can’t possibly cover everything. Be very aware of this and obviously I won’t help you or be responsible if your system gets messed up. Please DO NOT E-Mail me with Kali questions. I am not your personal tech support.
But don’t be scared either, my Kali tutorials generally have a very high success rate. Just make sure you take the right precautions and backup your files before starting.
Table of Contents
- Read This Before Starting
- Requirements
- Checking if your Laptop runs on UEFI or LEGACY
- Step 1 – Downloading the Kali ISO file
- Step 2 – Downloading Rufus & Creating a Bootable USB Drive
- Step 3 – Creating a new partition on Windows 10
- Step 4 – Booting from our USB Drive
- Step 5 – Install Kali Linux in Dual Boot with Windows 10
- 5.1 – Select a language
- 5.2 – Select your location
- 5.3 – Configure locales
- 5.4 – Configure the keyboard
- 5.5.1 – Detect Network Hardware (Probably Optional Step)
- 5.5 – Configure the network
- 5.5.1 – Configure the Network
- 5.5.2 – Configure the Network
- 5.6 – Set up users and passwords
- 5.6.1 – Set up users and passwords
- 5.6.2 – Set up users and passwords
- 5.7 – Partition disks (Follow this very carefully, don’t make a mistake here)
- SWAP Step 1 – Partitioning Method
- SWAP Step 2 – Selecting the partition we created in Step 3
- SWAP Step 3 – How to use this free space
- SWAP Step 4 – Setting up the SWAP partition
- SWAP Step 5 – Location for the new Partition
- SWAP Step 6 – Naming the Partition
- SWAP Step 7 – Setting the partition to use as SWAP
- MAIN Step 1 – Selecting the Main Partition
- MAIN Step 2 – How to use this free space
- MAIN Step 3 – Partitioning Scheme
- MAIN Step 4 – Finishing
- 5.8 – Configure the package manager
- 5.9 – Software selection
- 6 – Finish the installation
- Step 6 – Booting up Kali Linux
- Step 7 – Updating Kali Linux
- Step 8 – Booting into Windows
- Troubleshooting
- Where to go from here
Requirements
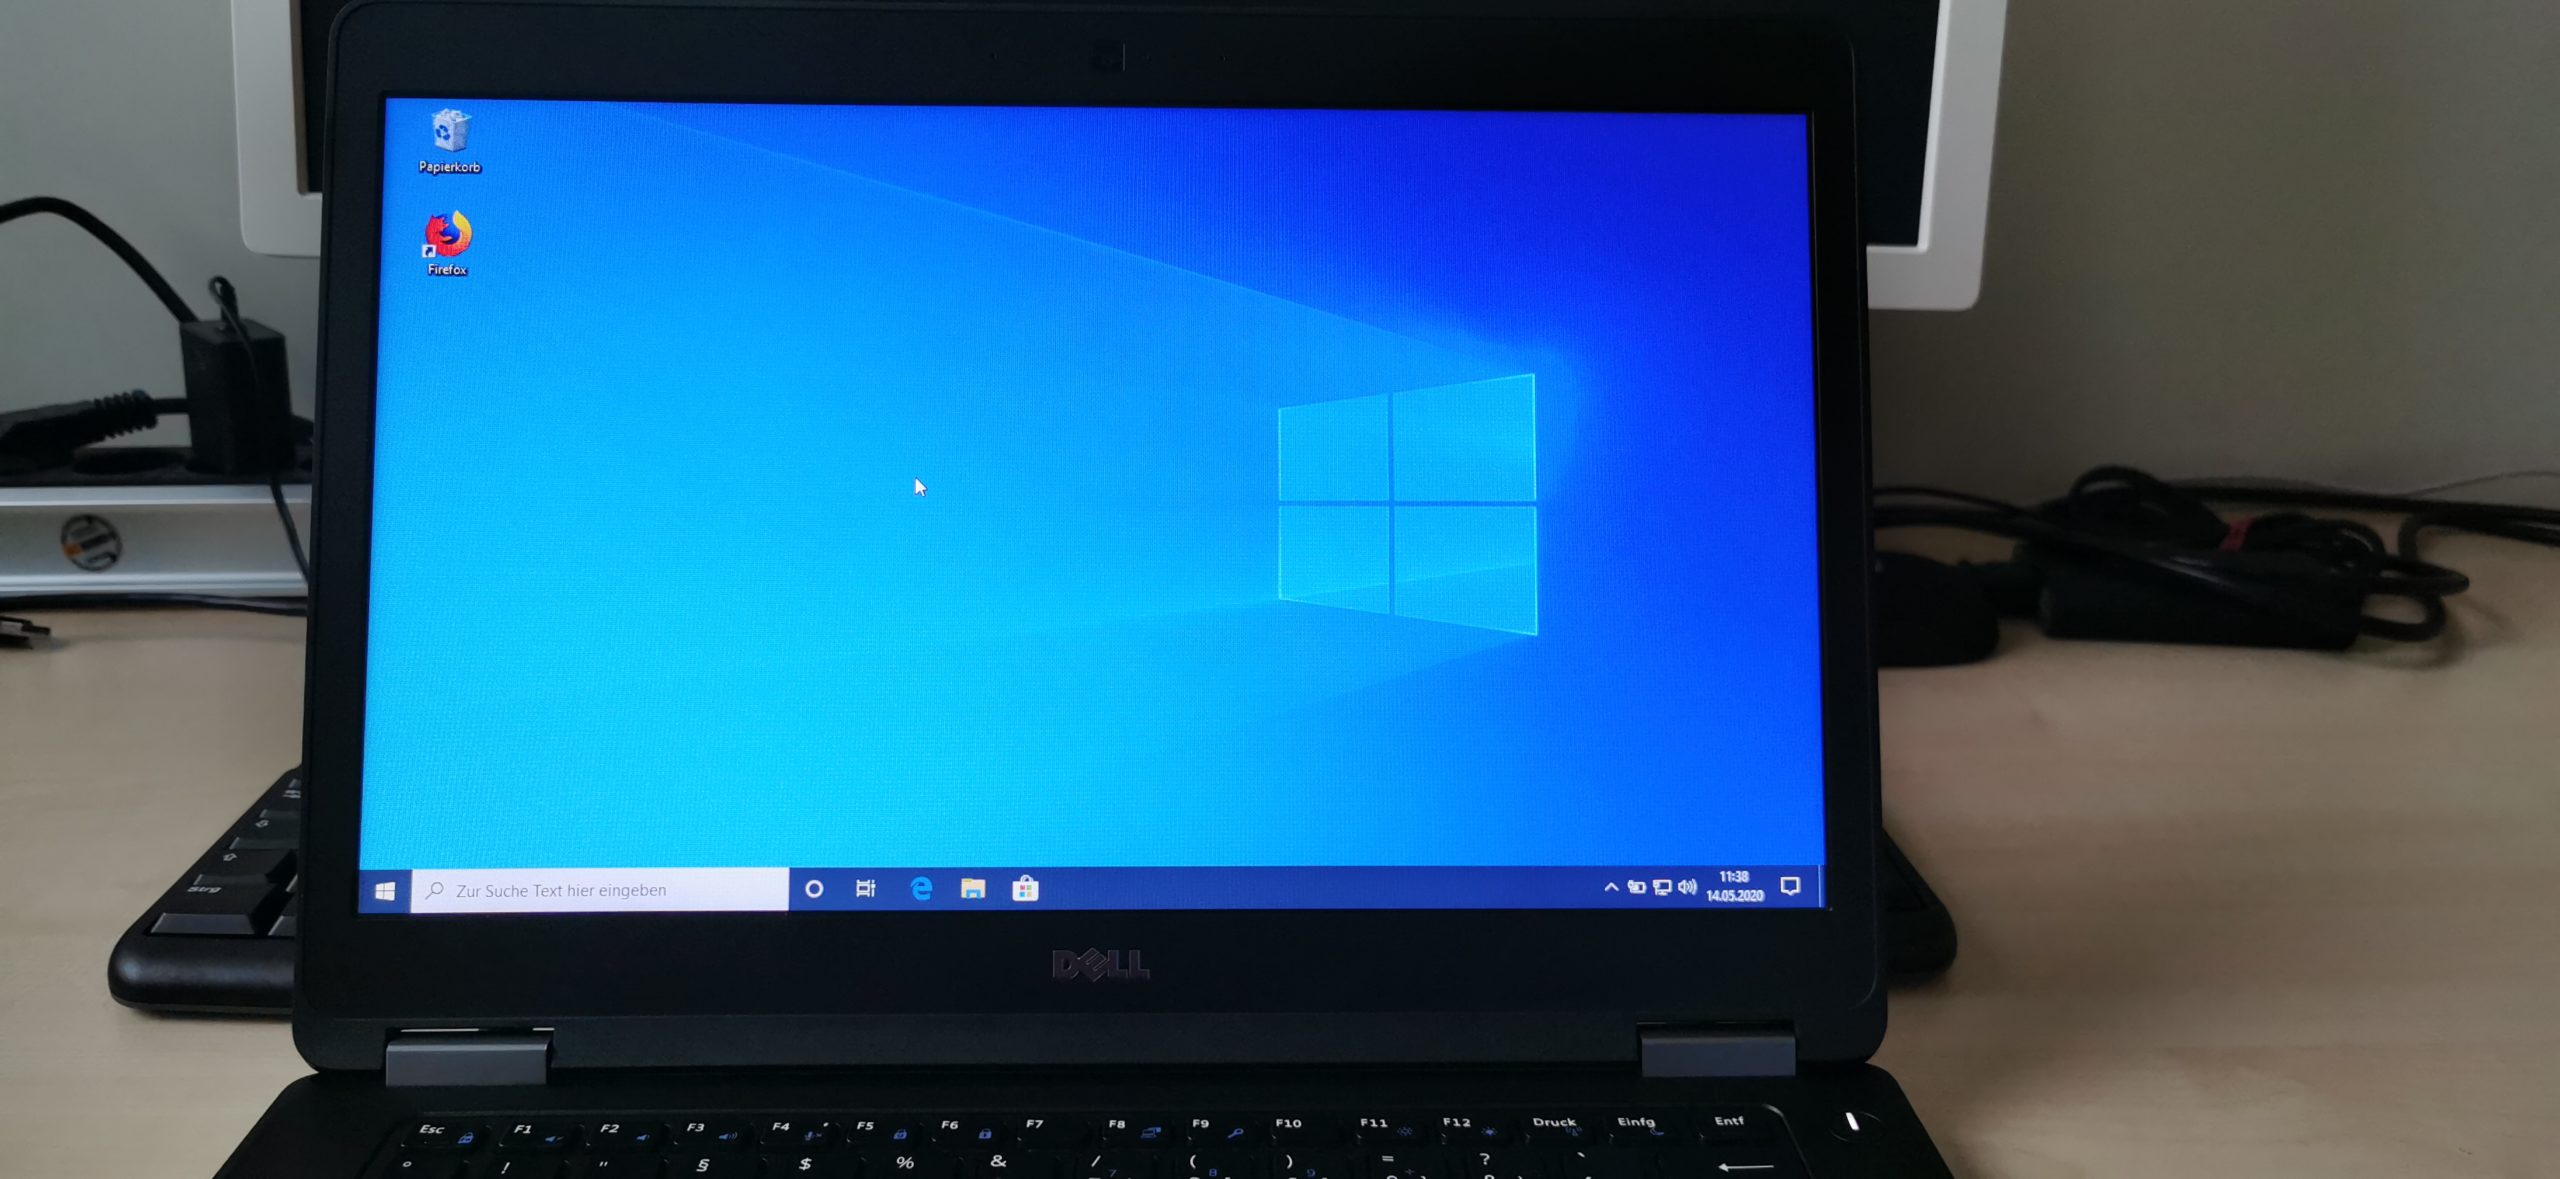
Now, I won’t create a tutorial for LEGACY Bios. I think legacy is slowly getting obsolete and if you bought a Laptop in the last ~7-10 Years, it’s probably capable of running UEFI. I am using a Dell Latitude E5470 with a vanilla Windows 10 installation for this tutorial.
- UEFI Bios capable Laptop
- 8GB USB Flash Drive (EMPTY!)
- Access to LAN or WiFi during installation
- A backup of all your important Windows 10 files
Checking if your Laptop runs on UEFI or LEGACY
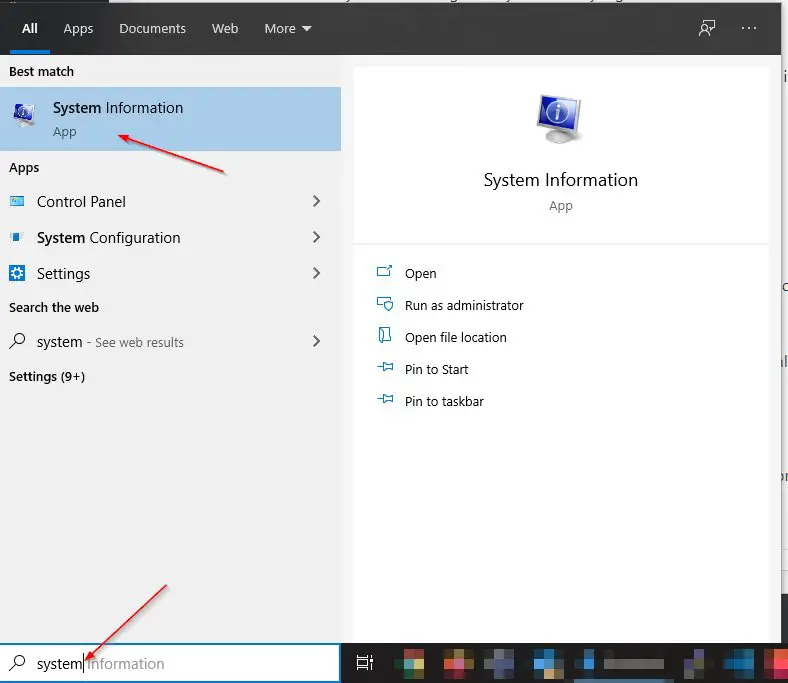
If you are unsure if your Laptop runs on UEFI or LEGACY, it’s easy to find out. Press the Windows key and search for “System“. Open the System Information tool.
On the right side, you find all your System’s information. What interests us is BIOS Mode.
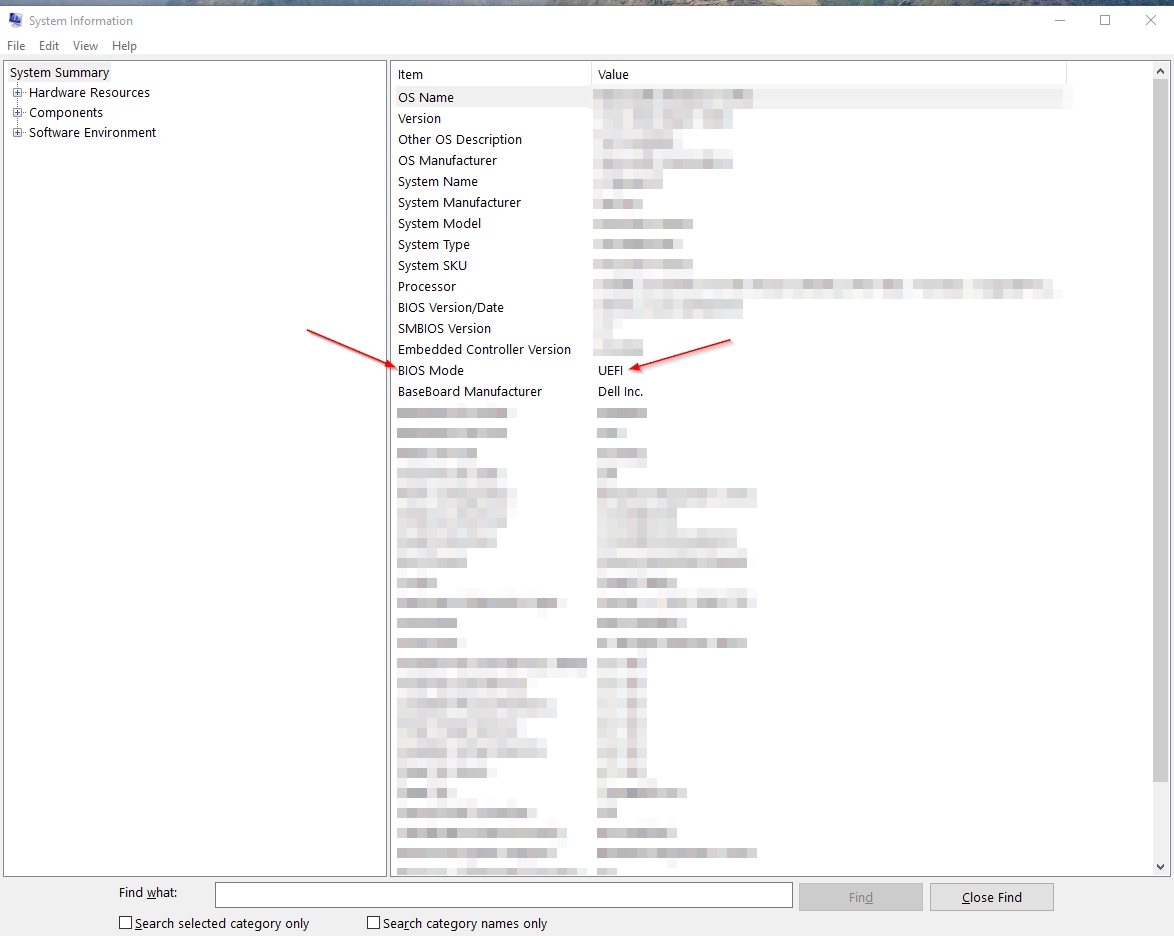
As you can clearly see, my BIOS is running on UEFI.
I say this out loud: IF YOU RUN ON LEGACY AND YOU WANT TO KEEP YOUR CURRENT WINDOWS 10 INSTALLATION INTACT – DO NOT FOLLOW THIS GUIDE!
However, if you run LEGACY and you don’t care and are willing to re-install Windows 10 in UEFI to run Kali and Windows 10 in Dual Boot, go ahead and change your BIOS to UEFI, install a fresh Windows 10 and then proceed with this guide.
Step 1 – Downloading the Kali ISO file
To install Kali Linux in Dual Boot with Windows 10, we first need to download the Kali ISO File. Choose the Kali Linux 64-Bit (Installer).

Step 2 – Downloading Rufus & Creating a Bootable USB Drive
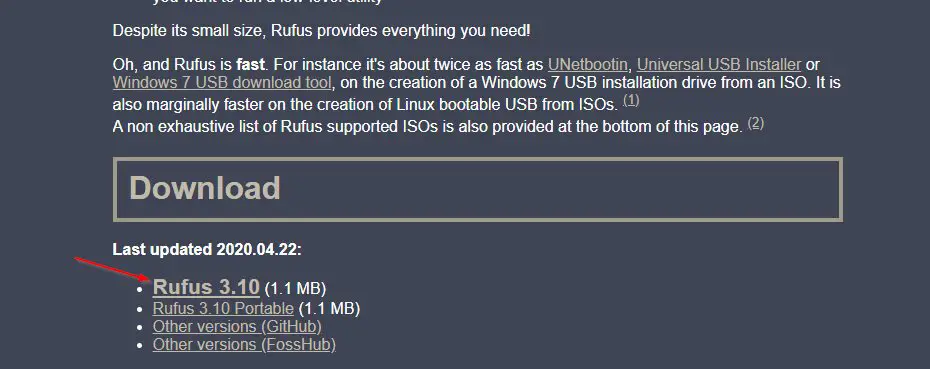
We are going to use Rufus to create our Bootable USB Drive. We do this so we can boot from it on our Laptop and install Kali Linux in Dual Boot with Windows 10. Be aware that everything on your USB Drive will get wiped.
- Download Rufus
- Plug your USB Drive into your computer
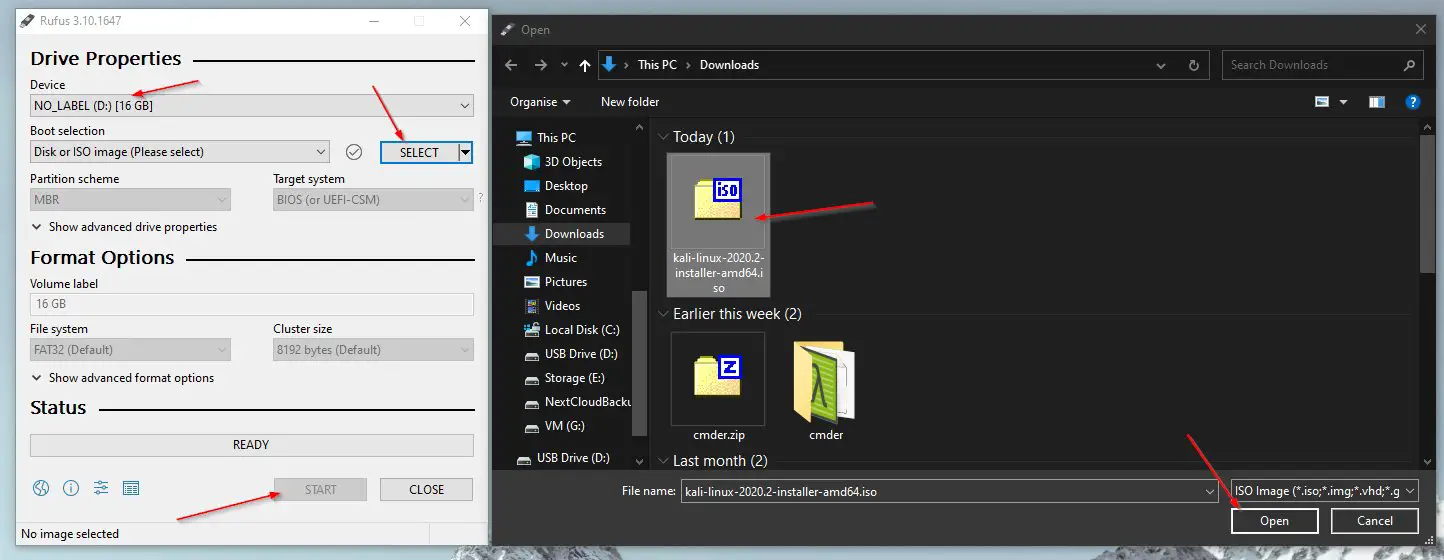
- Go to your Downloads folder and start Rufus
- Make sure your USB Drive is correctly selected (Double check the drive letter!)
- Click on Select -> Choose your Downloads folder -> Select the kali-linux-2020.4-installer-amd64.iso file click Open
- Click on Start
- Agree with Yes for the Download required warning
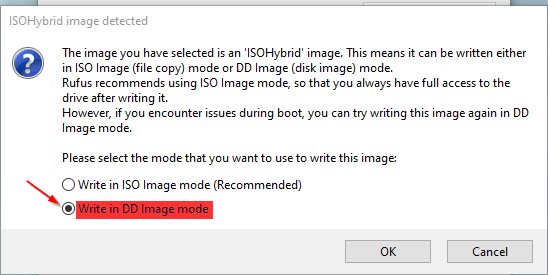
- Select Write in DD Image mode in the next dialogue (VERY IMPORTANT, otherwise the installation will fail)
- Agree to the final warning that everything on your USB Drive will get erased
- Wait for it to finish
Phew, quite some steps there. Good thing, one of the hardest parts is done.
Step 3 – Creating a new partition on Windows 10
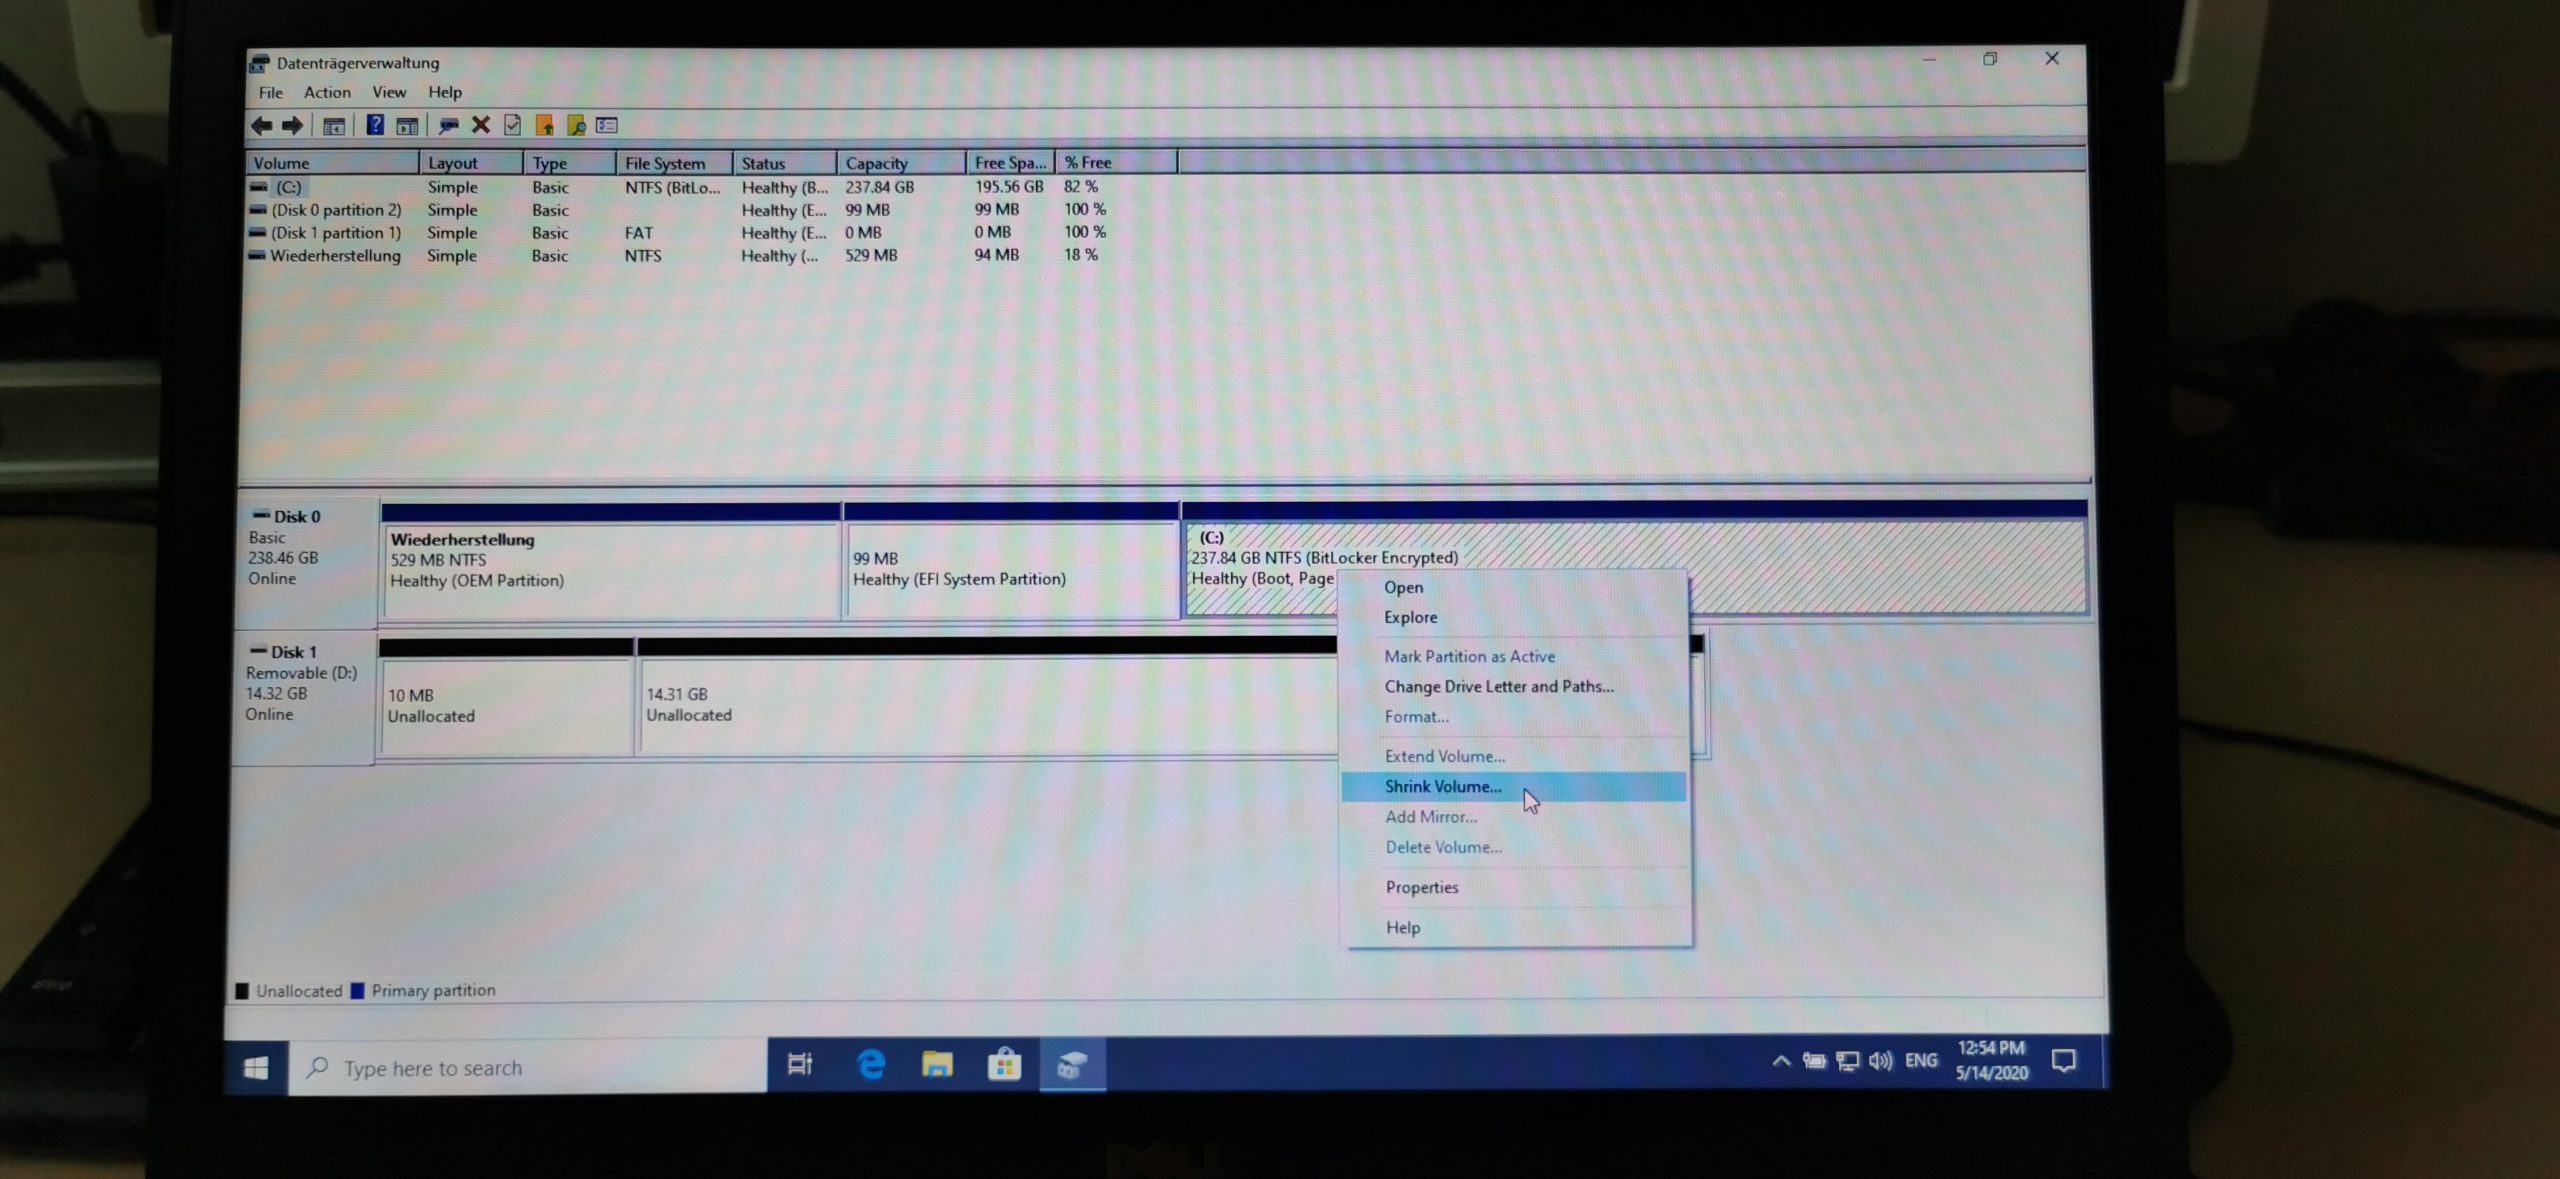
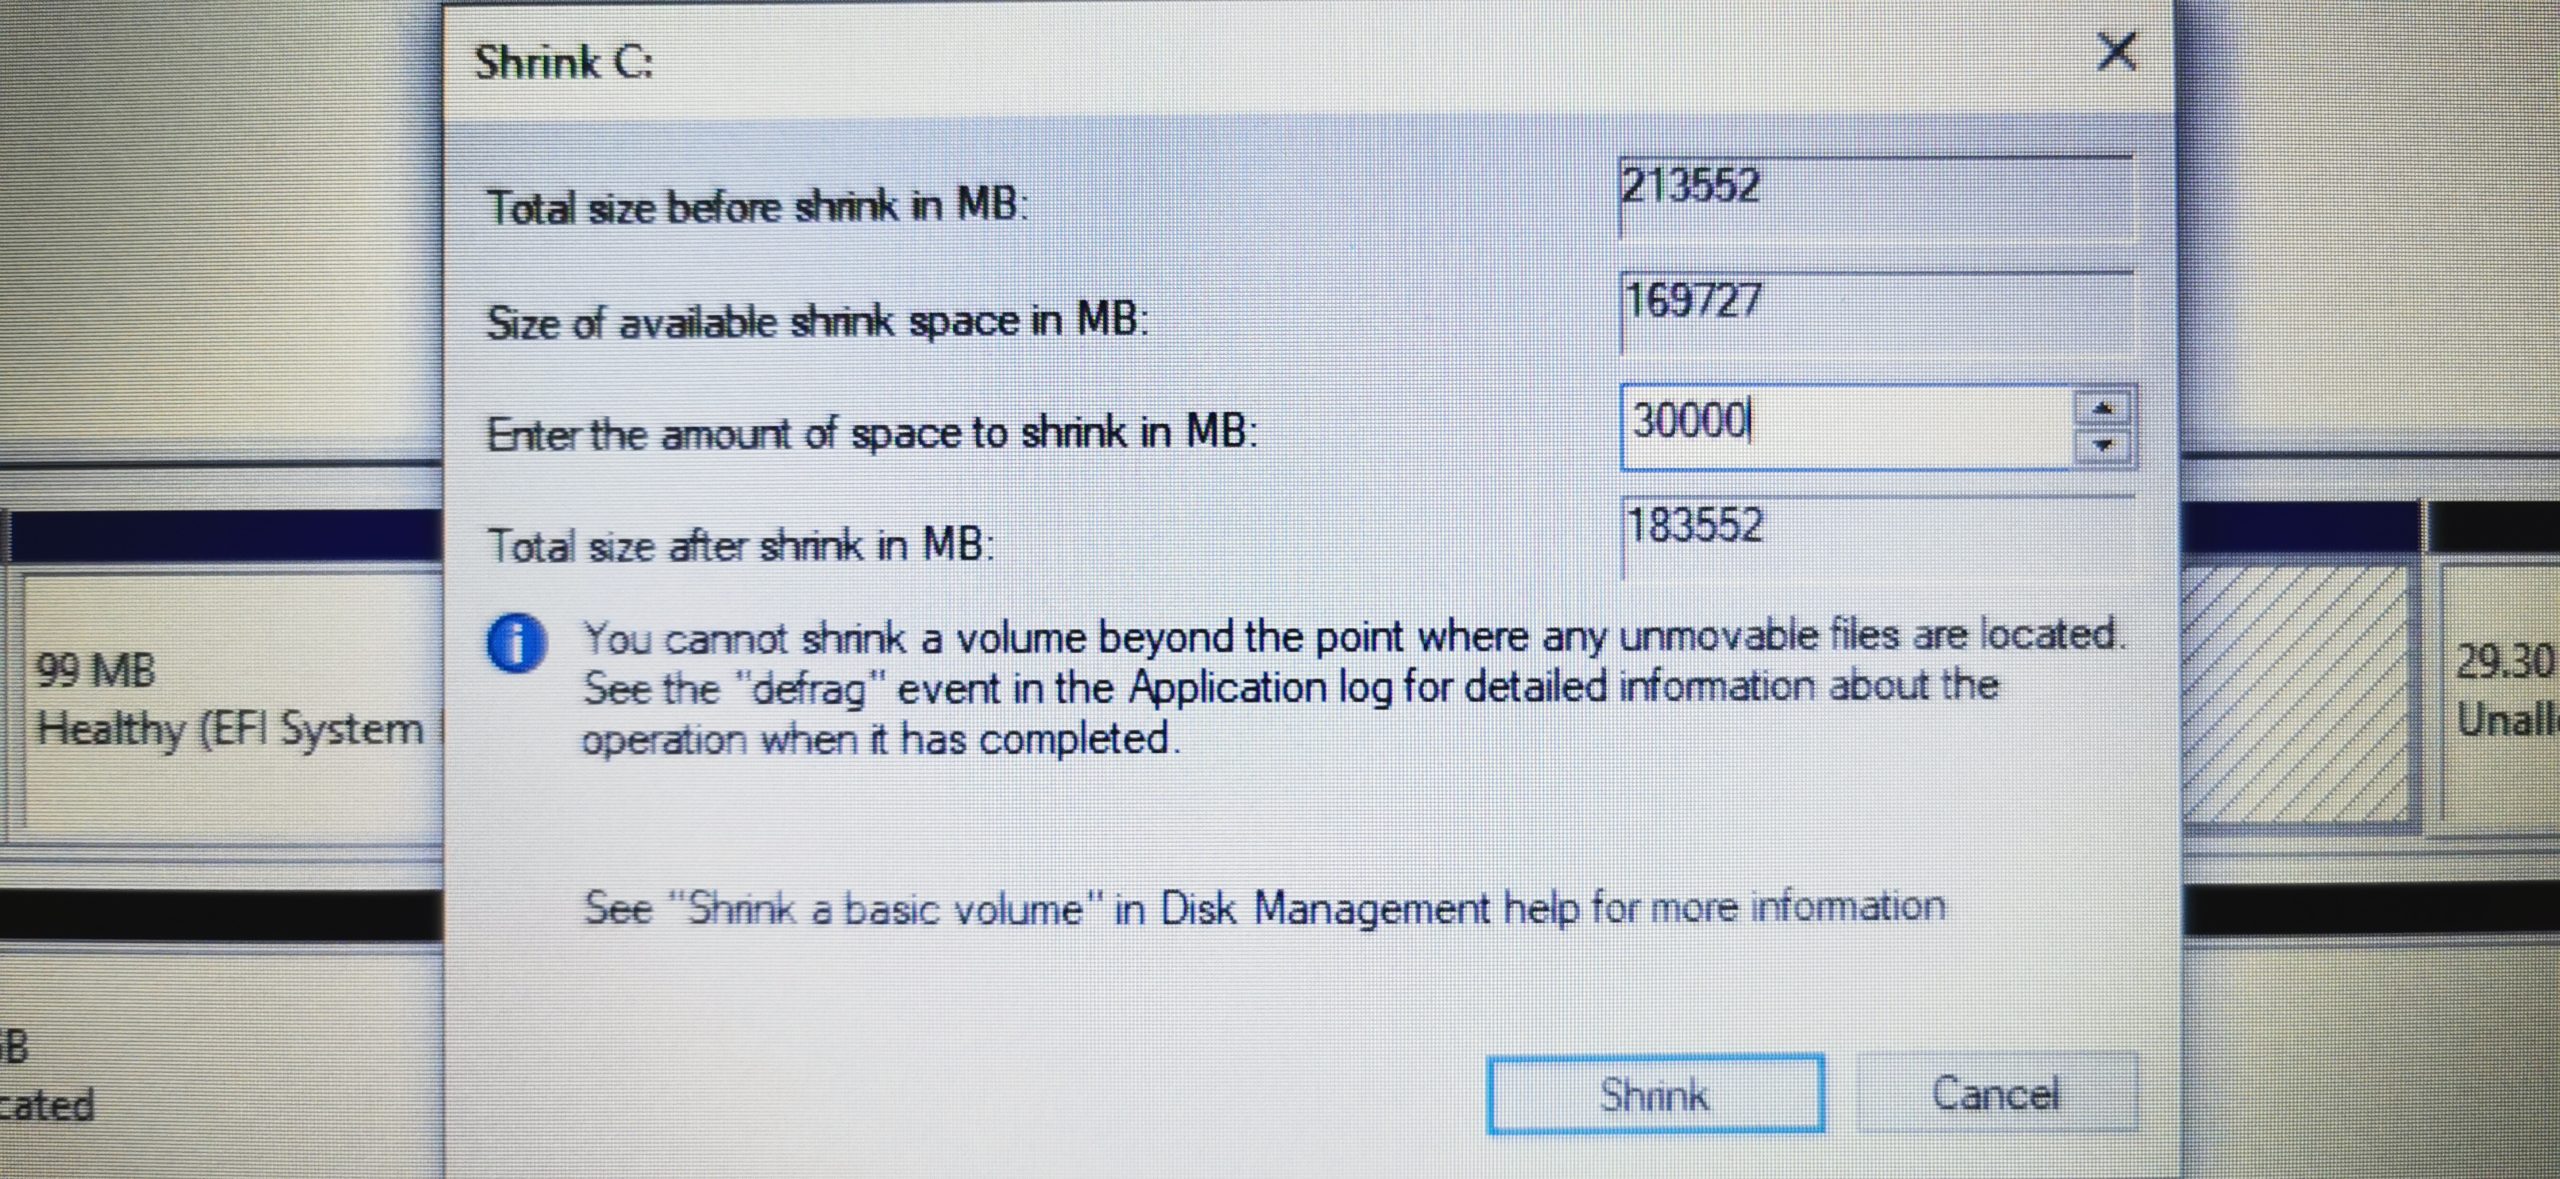
To be able to install Kali Linux in Dual Boot with Windows 10, we need to first borrow some Gigabytes from our existing Windows 10 partition on your laptop. This is really easy! Follow the steps below. You want to select the partition on which your Windows 10 is installed on. Most like the one indicated by the letter (C:). Borrow as much space as you want, but leave enough left for your Windows 10 to still function properly. Reversing this will be very difficult.
For Kali, I would suggest a minimum of 20GB if you plan to install some tools, but I rather would go higher than that. The sweet spot is probably somewhere around 50-80GB for me. Extending the volume after you run out of space, later on, is a pain in the a**.
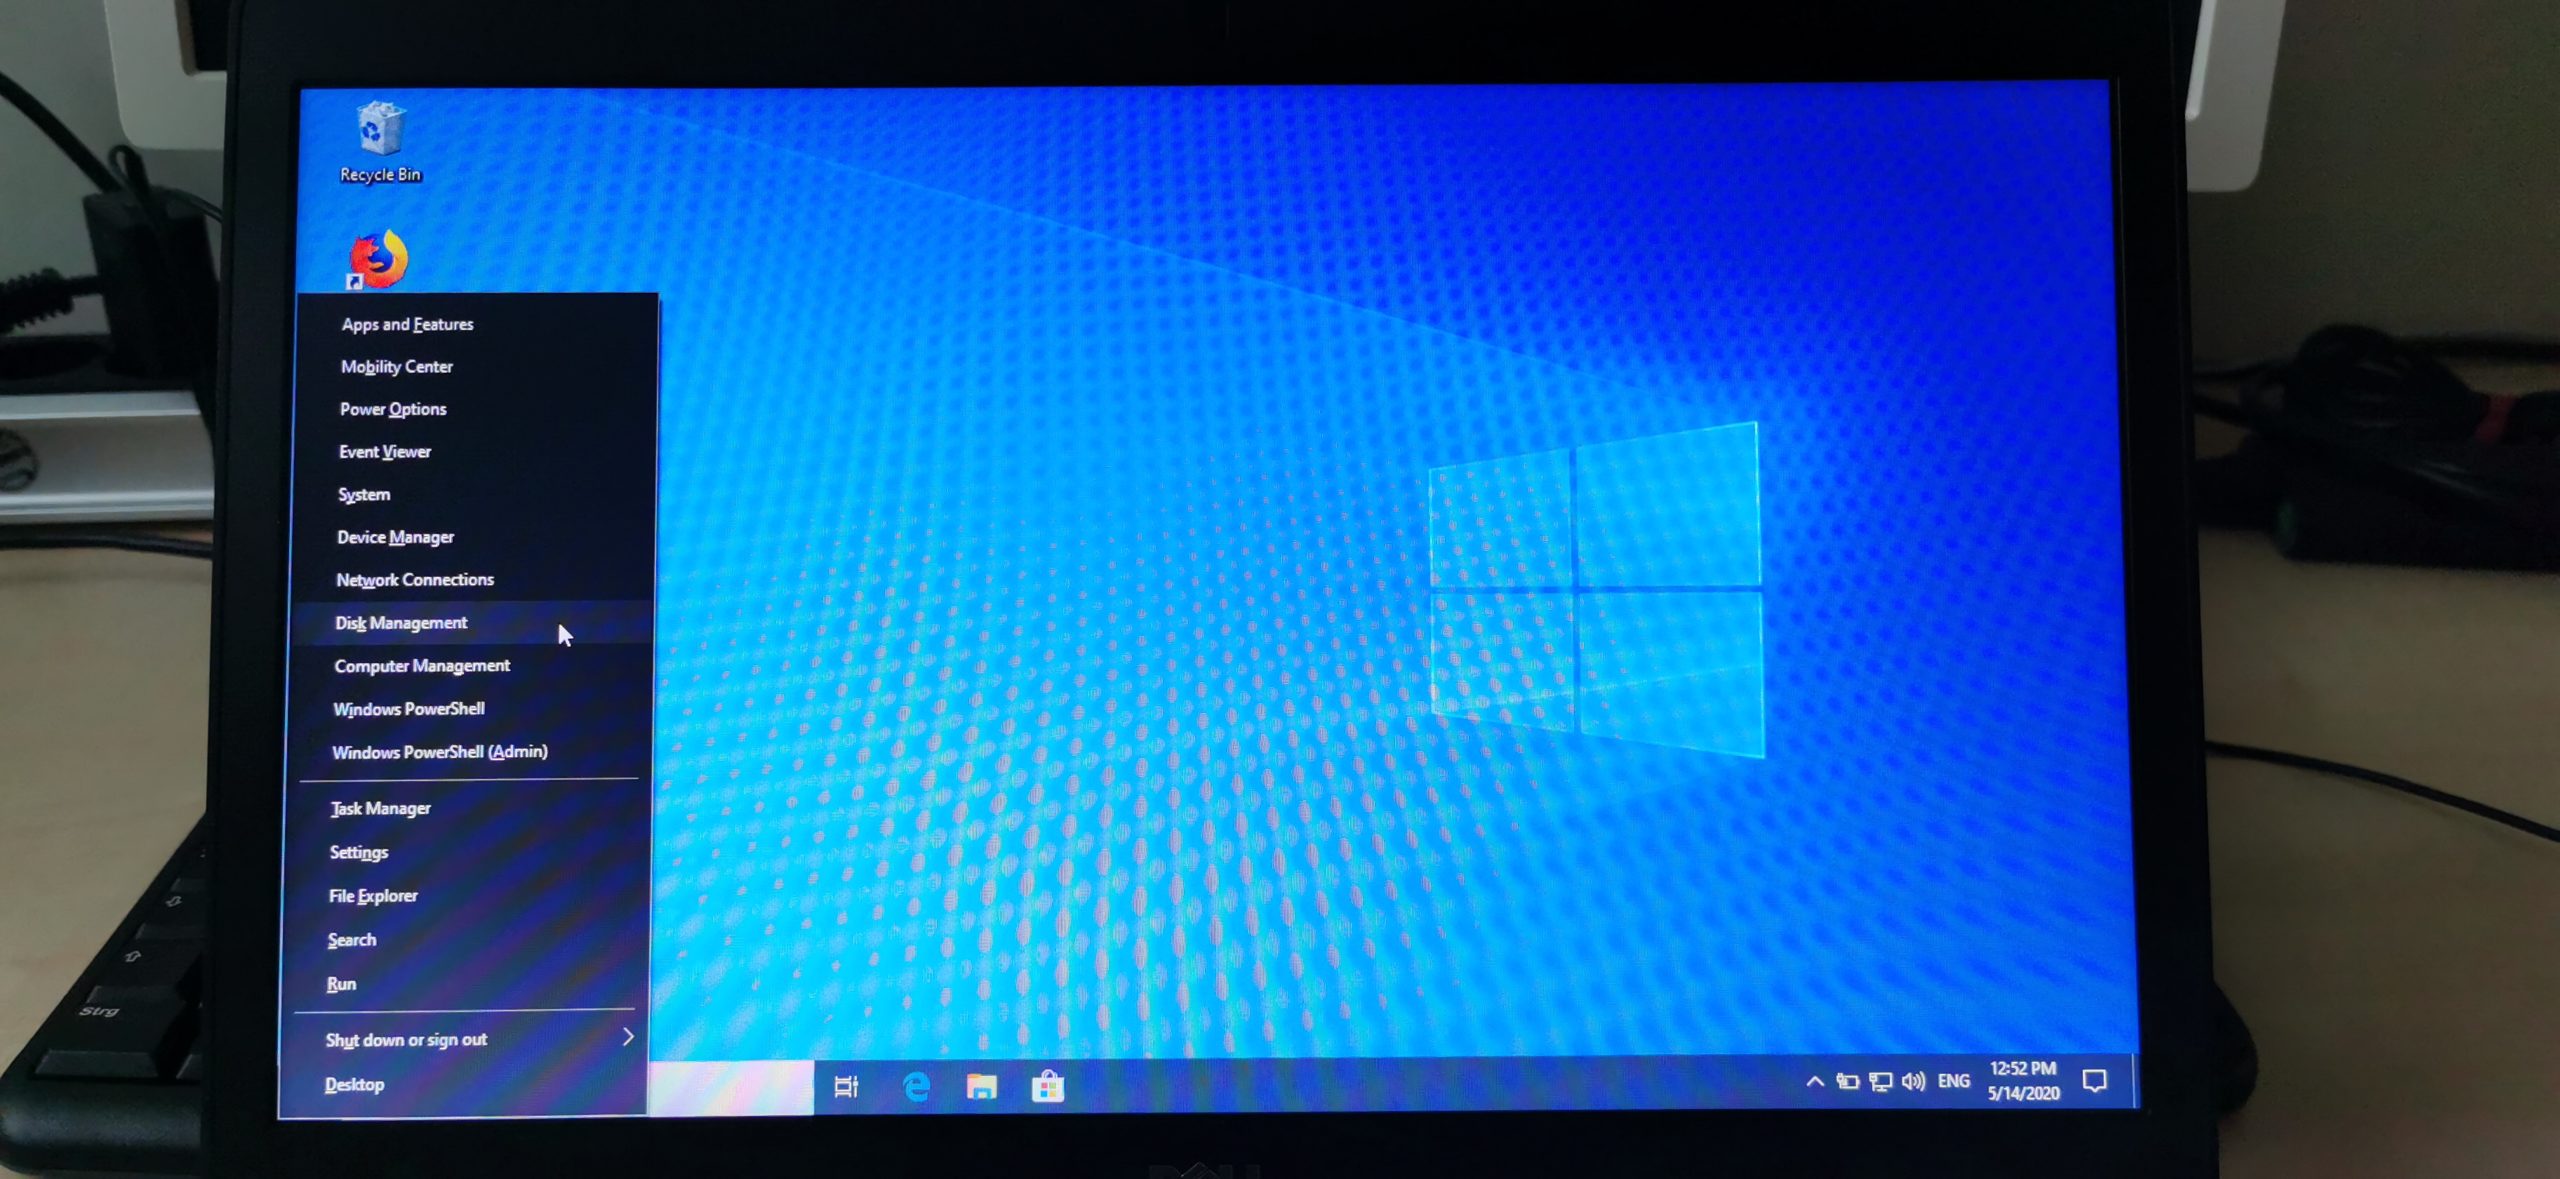
- Press Windows key + X to open up the system menu
- Select Disk Management
- Select Shrink Volume
- Change the value in the “Enter the amount of space to shrink in MB” field. I choose 30GB so I enter 30000.
Step 4 – Booting from our USB Drive
Alright, now this will differ from every Laptop manufacturer and probably even varies in different models of the same manufacturer: How to enter the BIOS Boot Menu.
Tip: It is possible that you need to deactivate Secure Boot if you run into any problems while trying to boot from your USB Drive.
The easiest way to find out which button to press is by simply Googlin‘: “YourLaptopModel Boot Menu“
For the Dell Latitude E5470 I would Google: Dell Latitude E5470 Boot Menu
4.1 – Plug the USB Drive into your Laptop
4.2 – Shutdown your Laptop
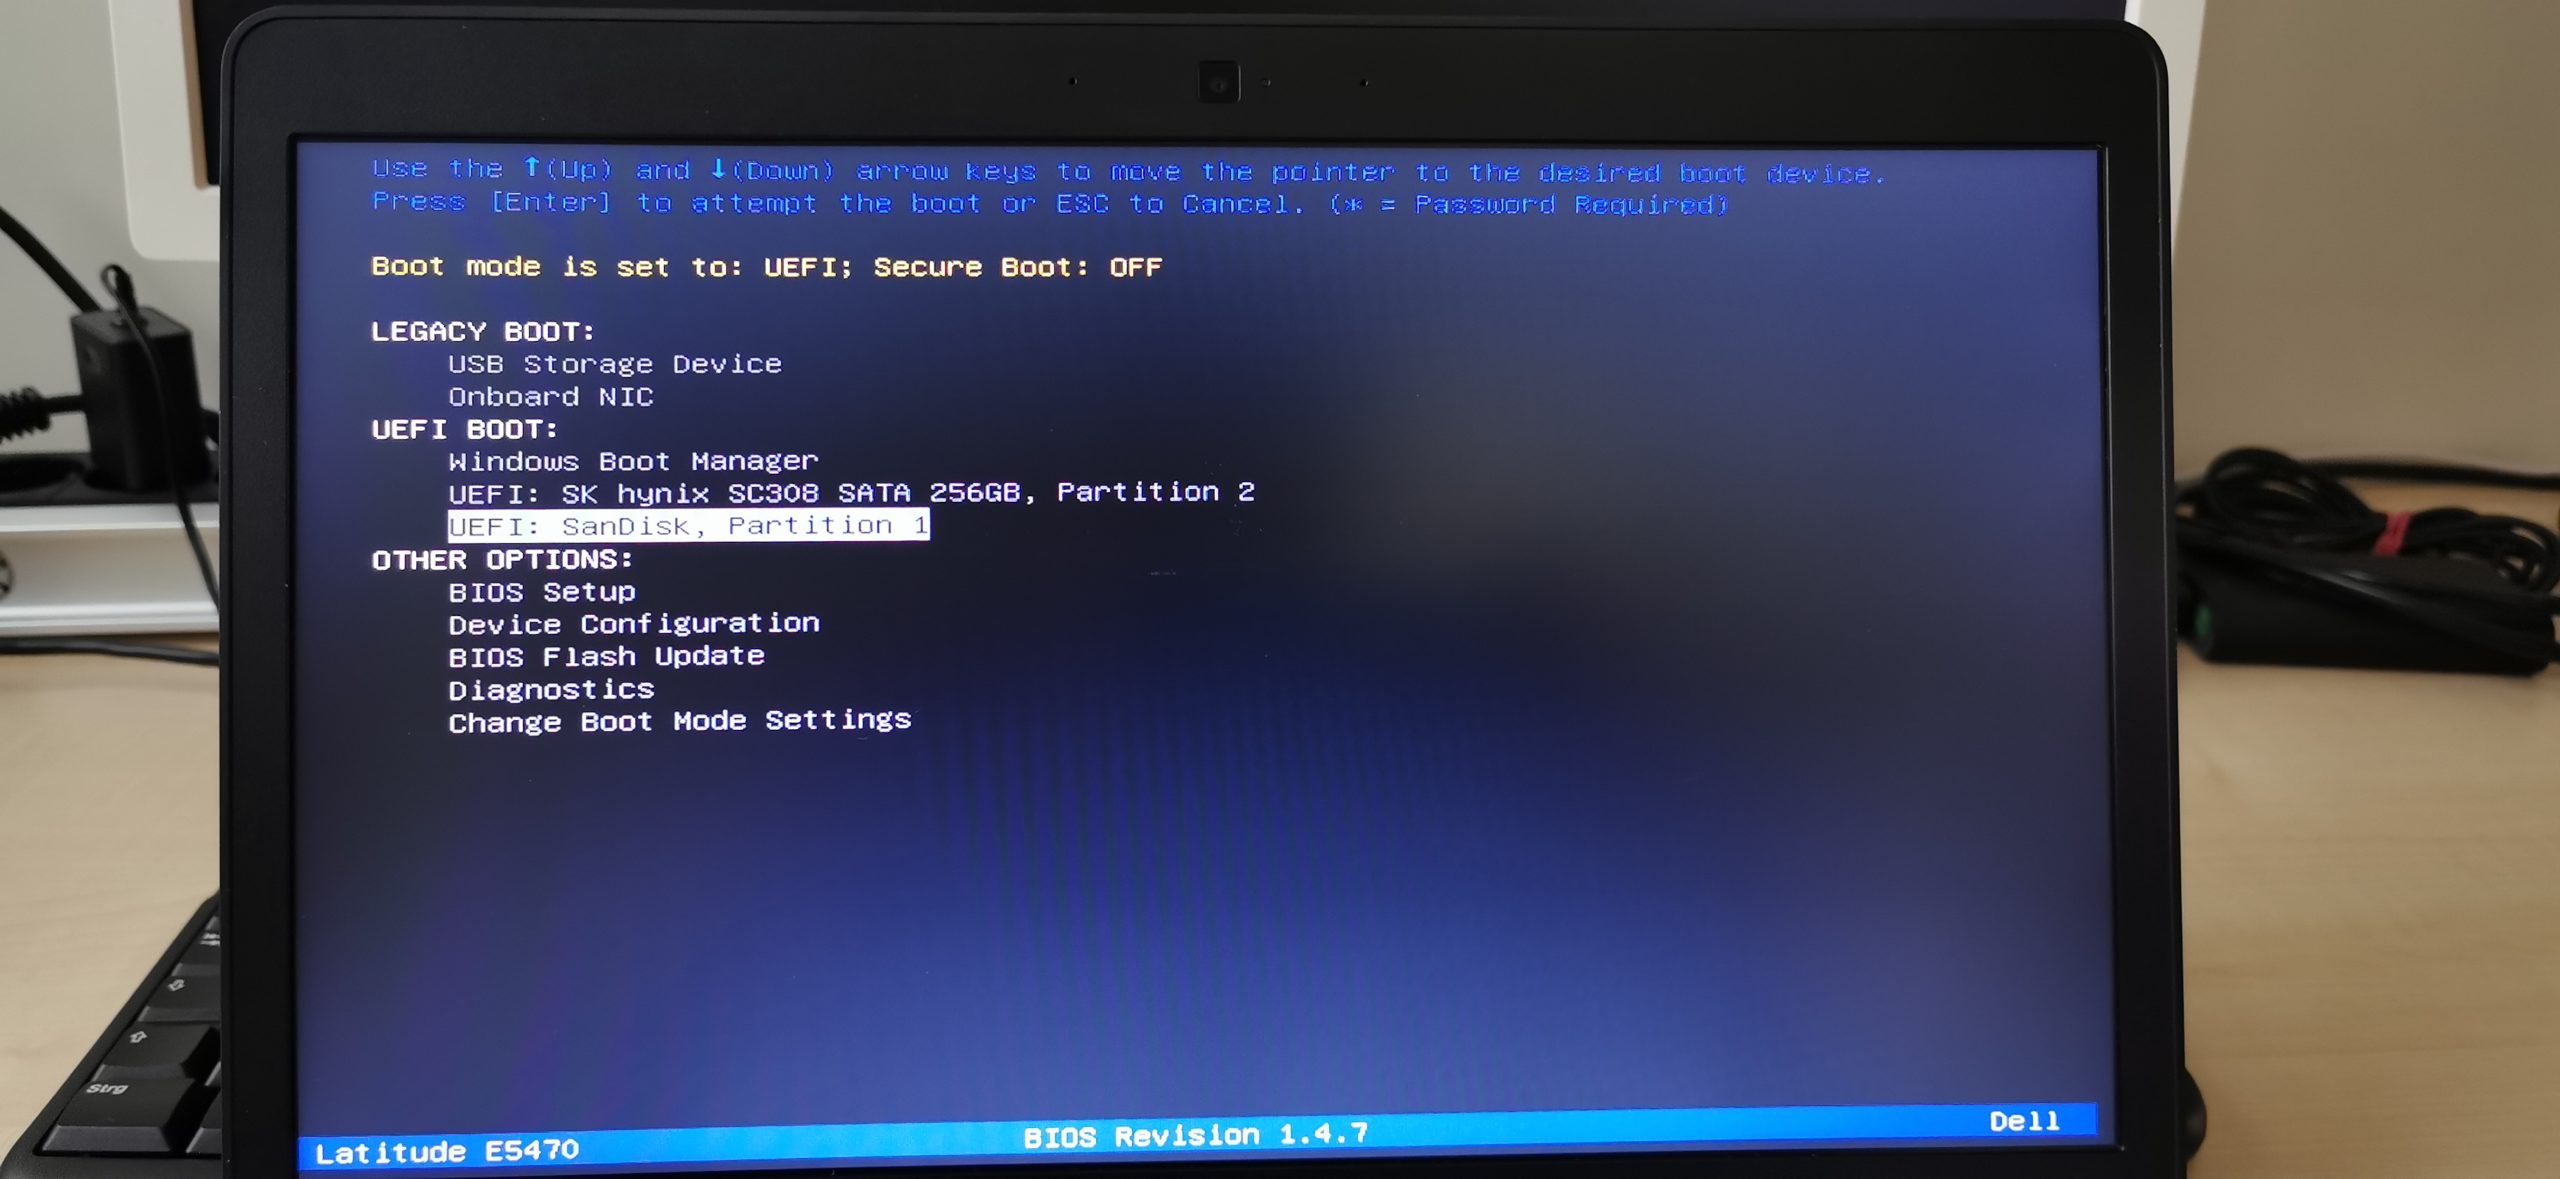
4.3 – Once it’s shut down, start it up and hit the key that brings up the Boot Menu repeatedly (For me it’s F12). Once you reach the boot menu, select your USB Drive, and hit enter.
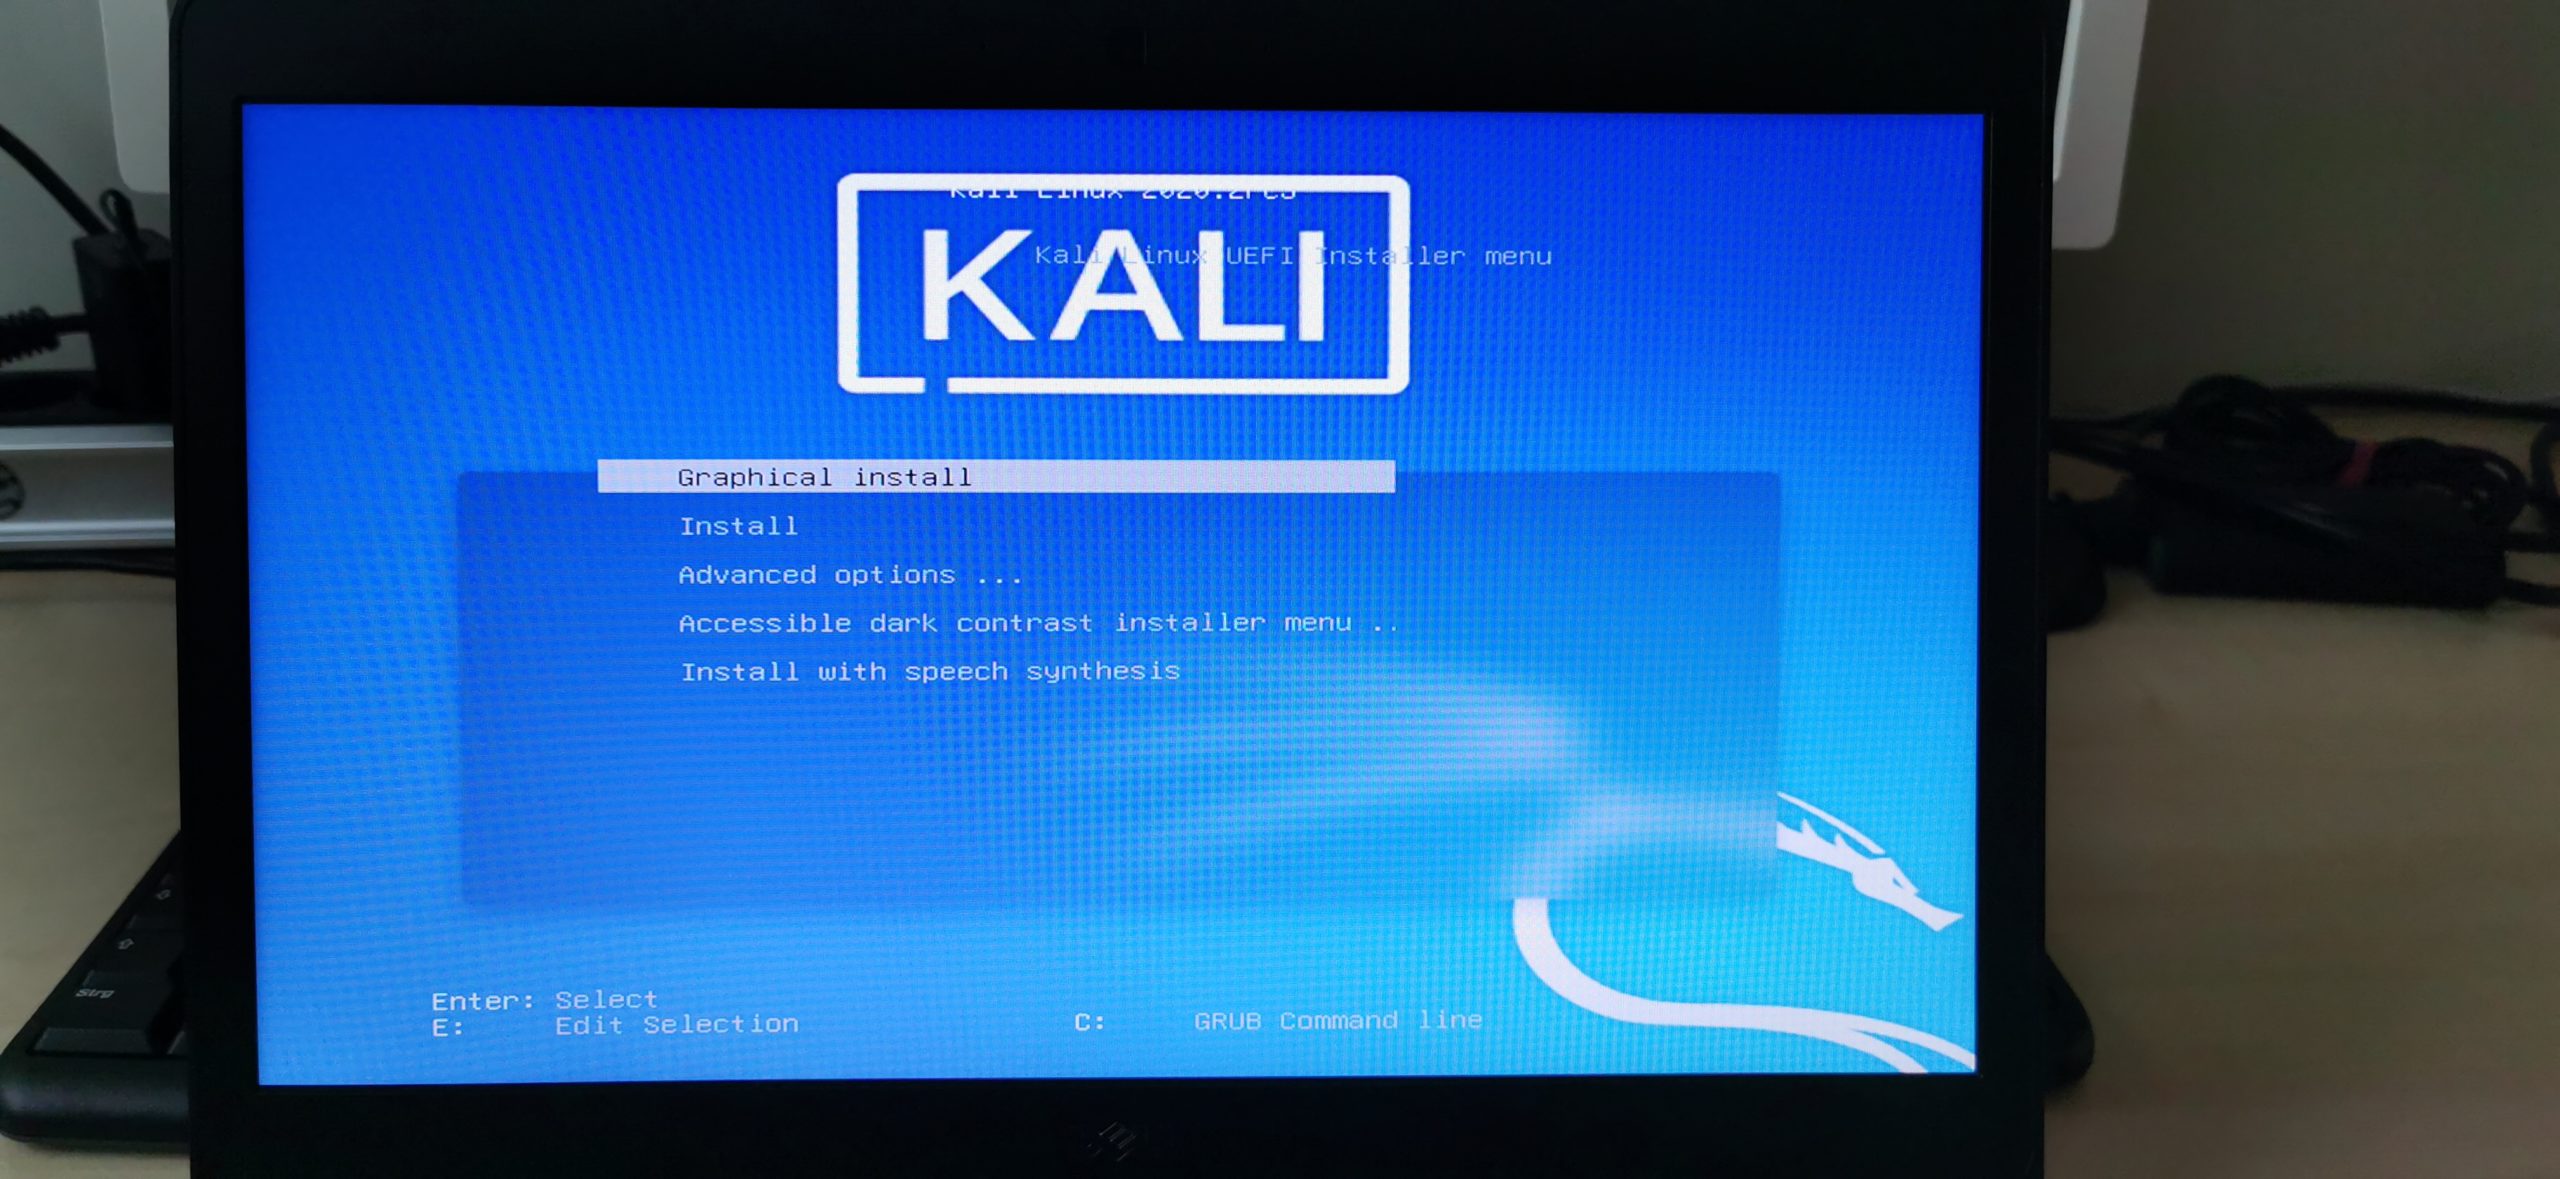
4.4 – When the Kali UEFI Installer Menu comes up select Graphical Install.
Step 5 – Install Kali Linux in Dual Boot with Windows 10
Alright, time to install Kali. I will now guide you through every step of the Installer process in the same fashion as in Step 3. Some steps will be accompanied by a screenshot, but some trivial steps won’t. You got this. Each step will be named after the window title in the Kali Installer.
Side-Note: I got reports that the Laptop Touchpad isn’t working on some models (mine included). To circumvent this, either plug a USB mouse in your laptop or navigate through the installer menus by using the tab key on your keyboard. That works well enough.
Side-Note2: I also got multiple reports that WiFi Drivers were not working during installation. Therefore, I recommend connecting your Laptop via LAN cable to your router during the installation.
5.1 – Select a language
Choose the language you want to use for your System and the Installer itself. I recommend leaving it on English as all tutorials you will ever find will be, you guessed it, in English.
5.2 – Select your location
Select your current location to set up your time zone correctly.
5.3 – Configure locales
Choose another locale or leave it on United States (I always leave this on US).
5.4 – Configure the keyboard
Choose your preferred keyboard layout.
Note: If you got an error message while Kali was loading installer components, you did not write your image in DD Image mode as described in Step 2.
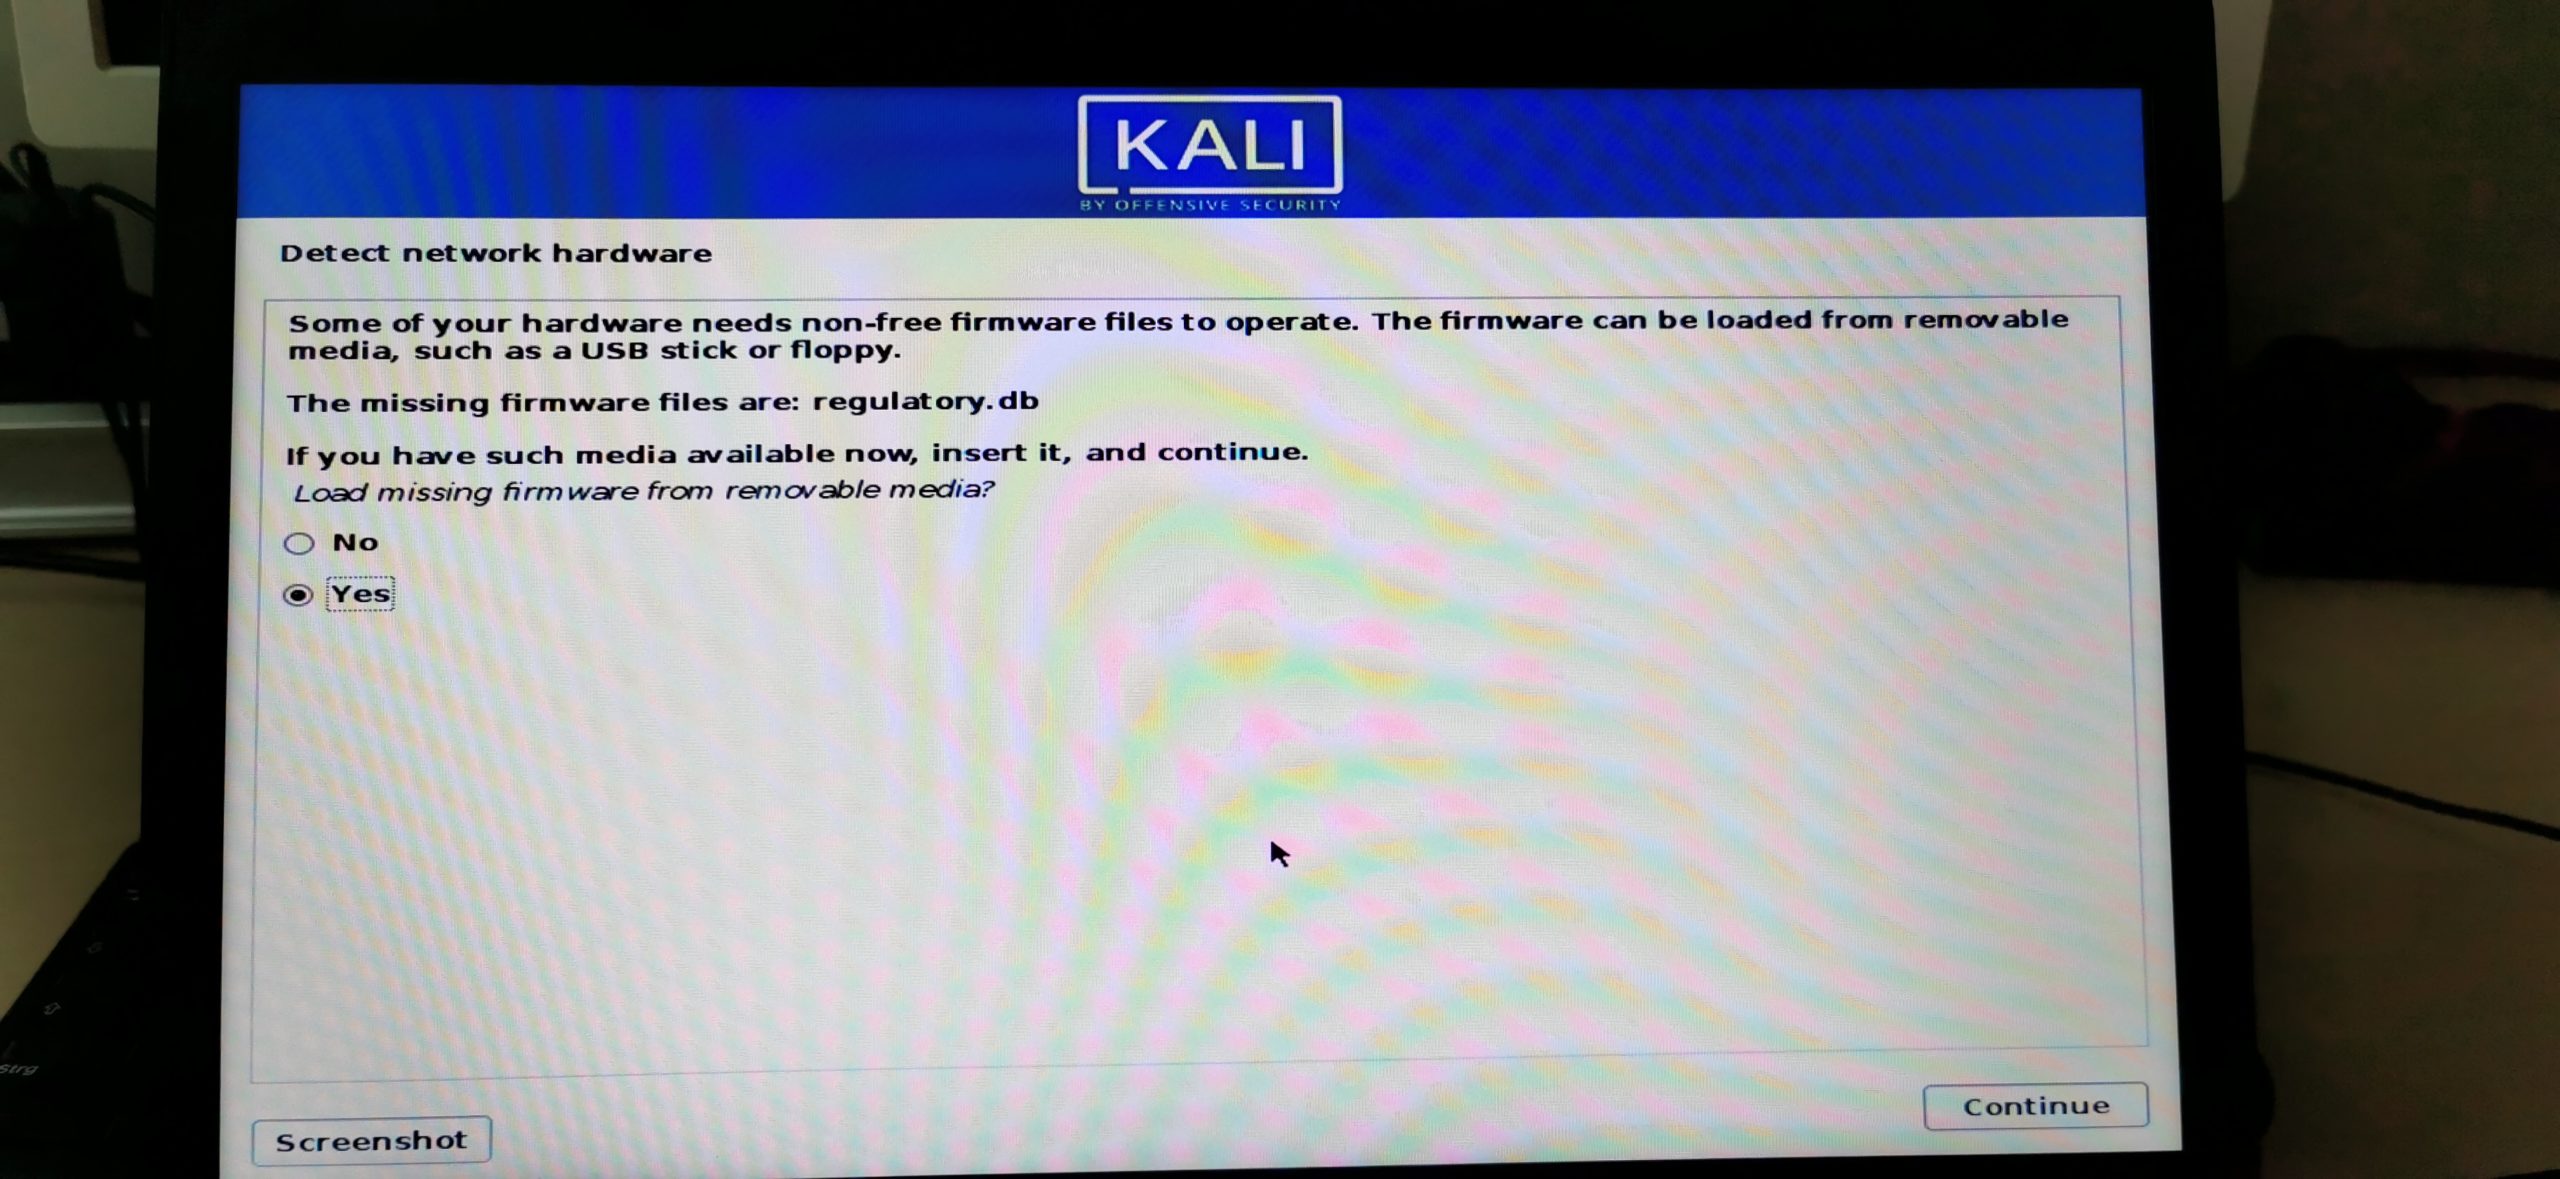
5.5.1 – Detect Network Hardware (Probably Optional Step)
You might get a message asking you if you would like to install some missing non-free firmware during installation. Select Yes if so and click continue.
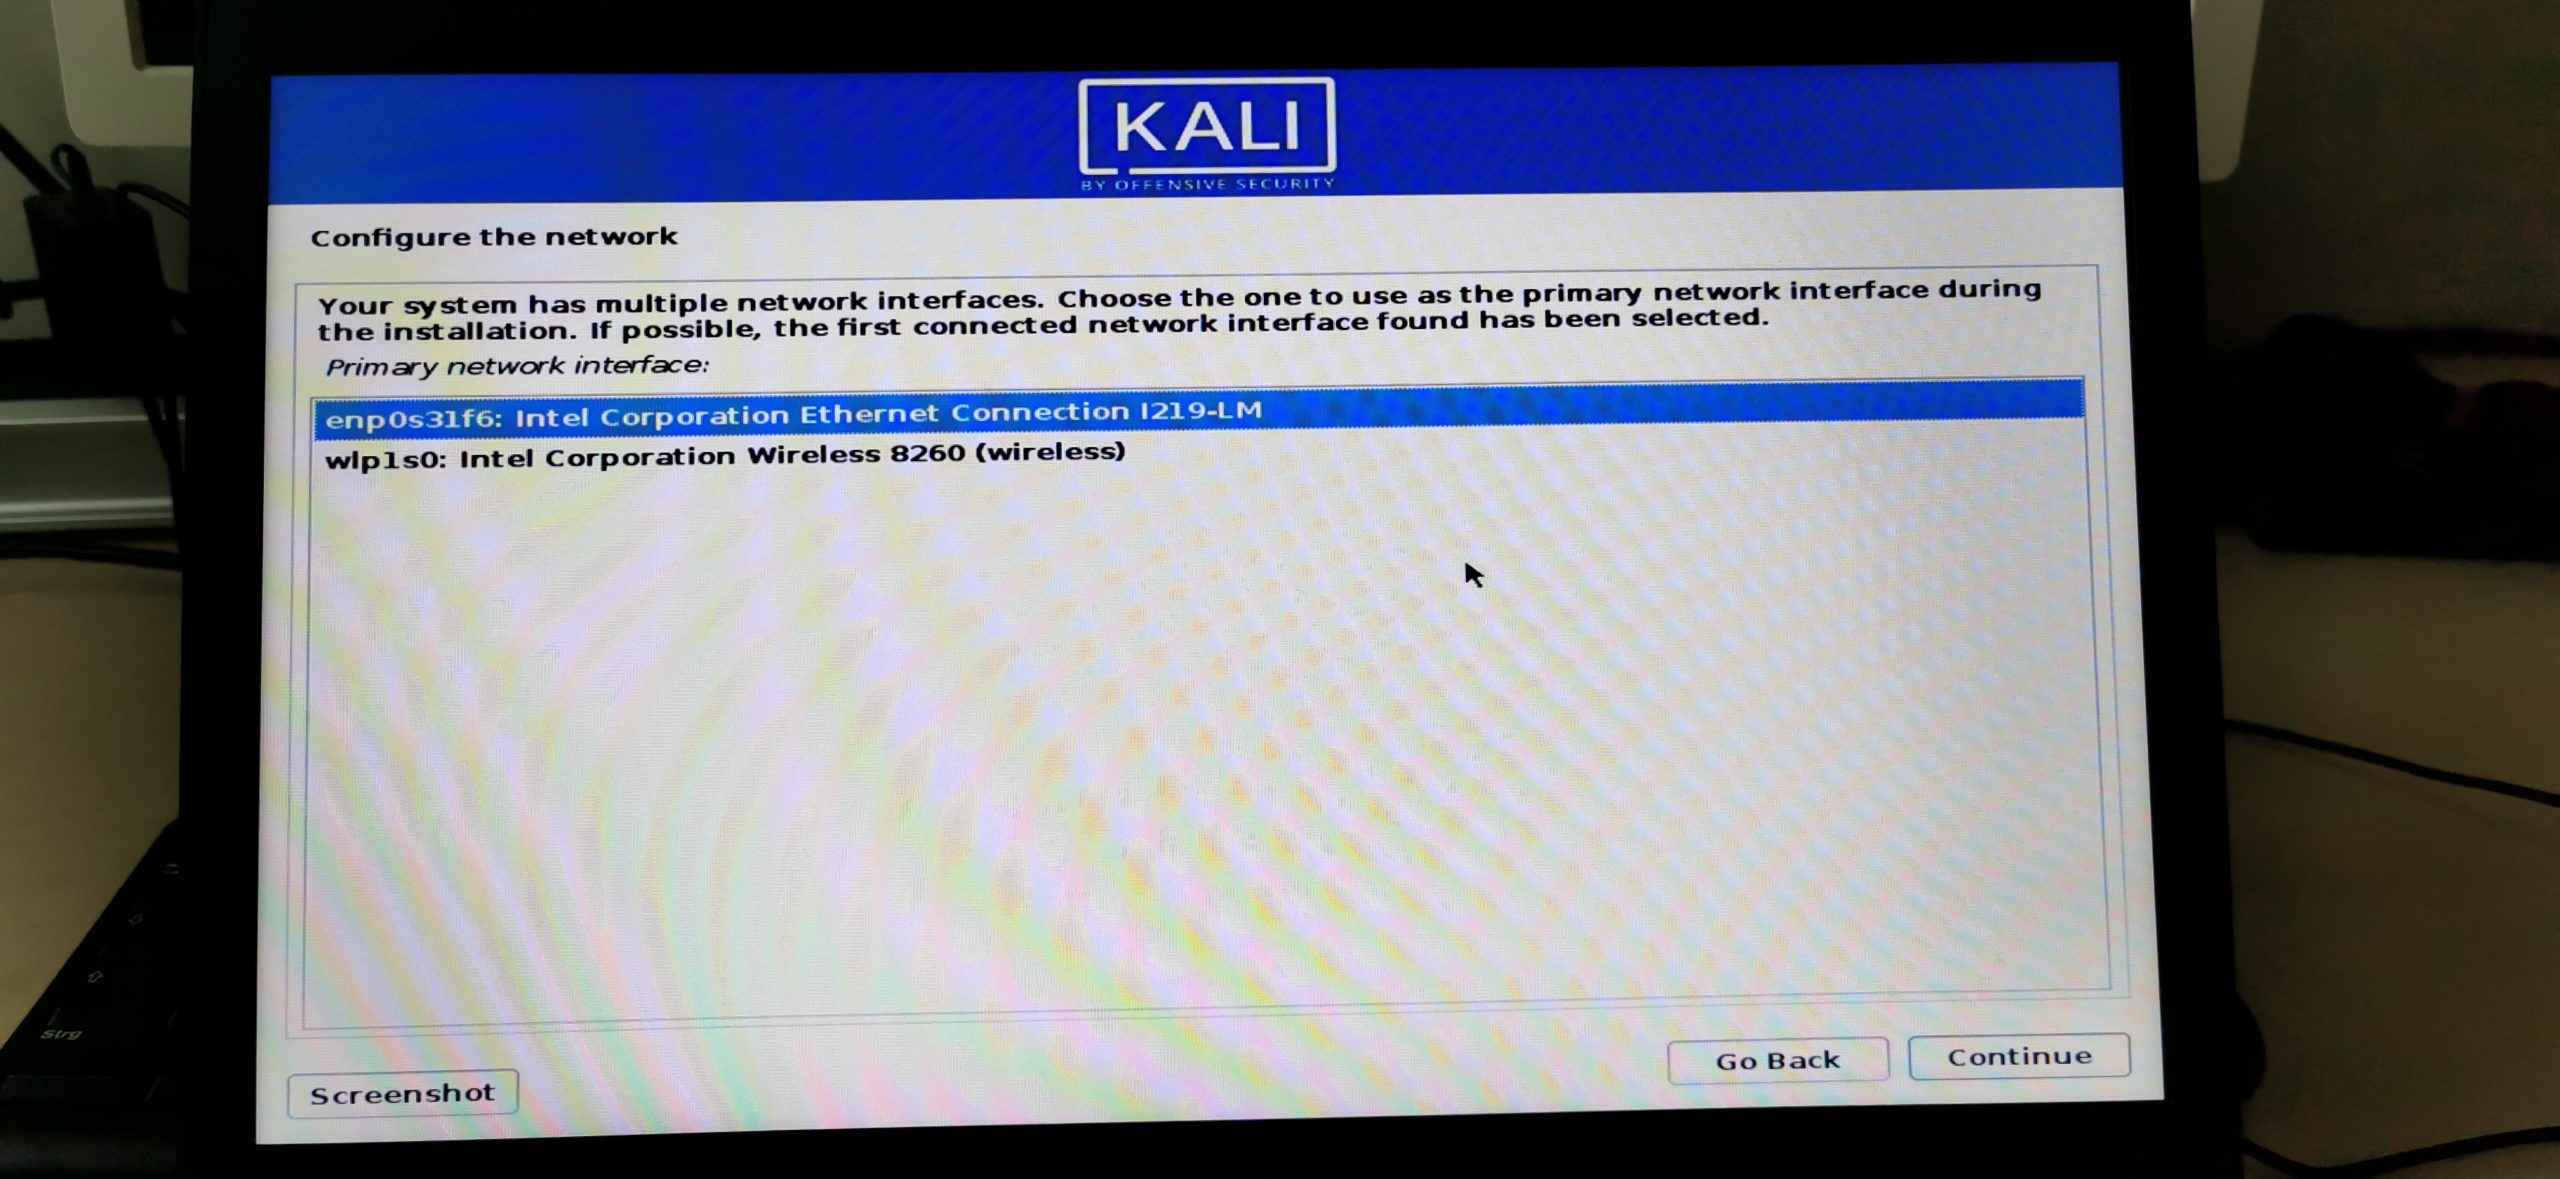
5.5 – Configure the network
Now you are able to choose between cable connection or wifi. Make your choice. I choose Ethernet Connection as I have an ethernet cable plugged in.
5.5.1 – Configure the Network
You can now choose a hostname for your Kali machine.
5.5.2 – Configure the Network
You can also enter a Domain if you’d like. If you don’t know what that means just leave it as default or enter local.
5.6 – Set up users and passwords
Here you can enter your name if you want. Like, your first name for example. Or your cat’s name.
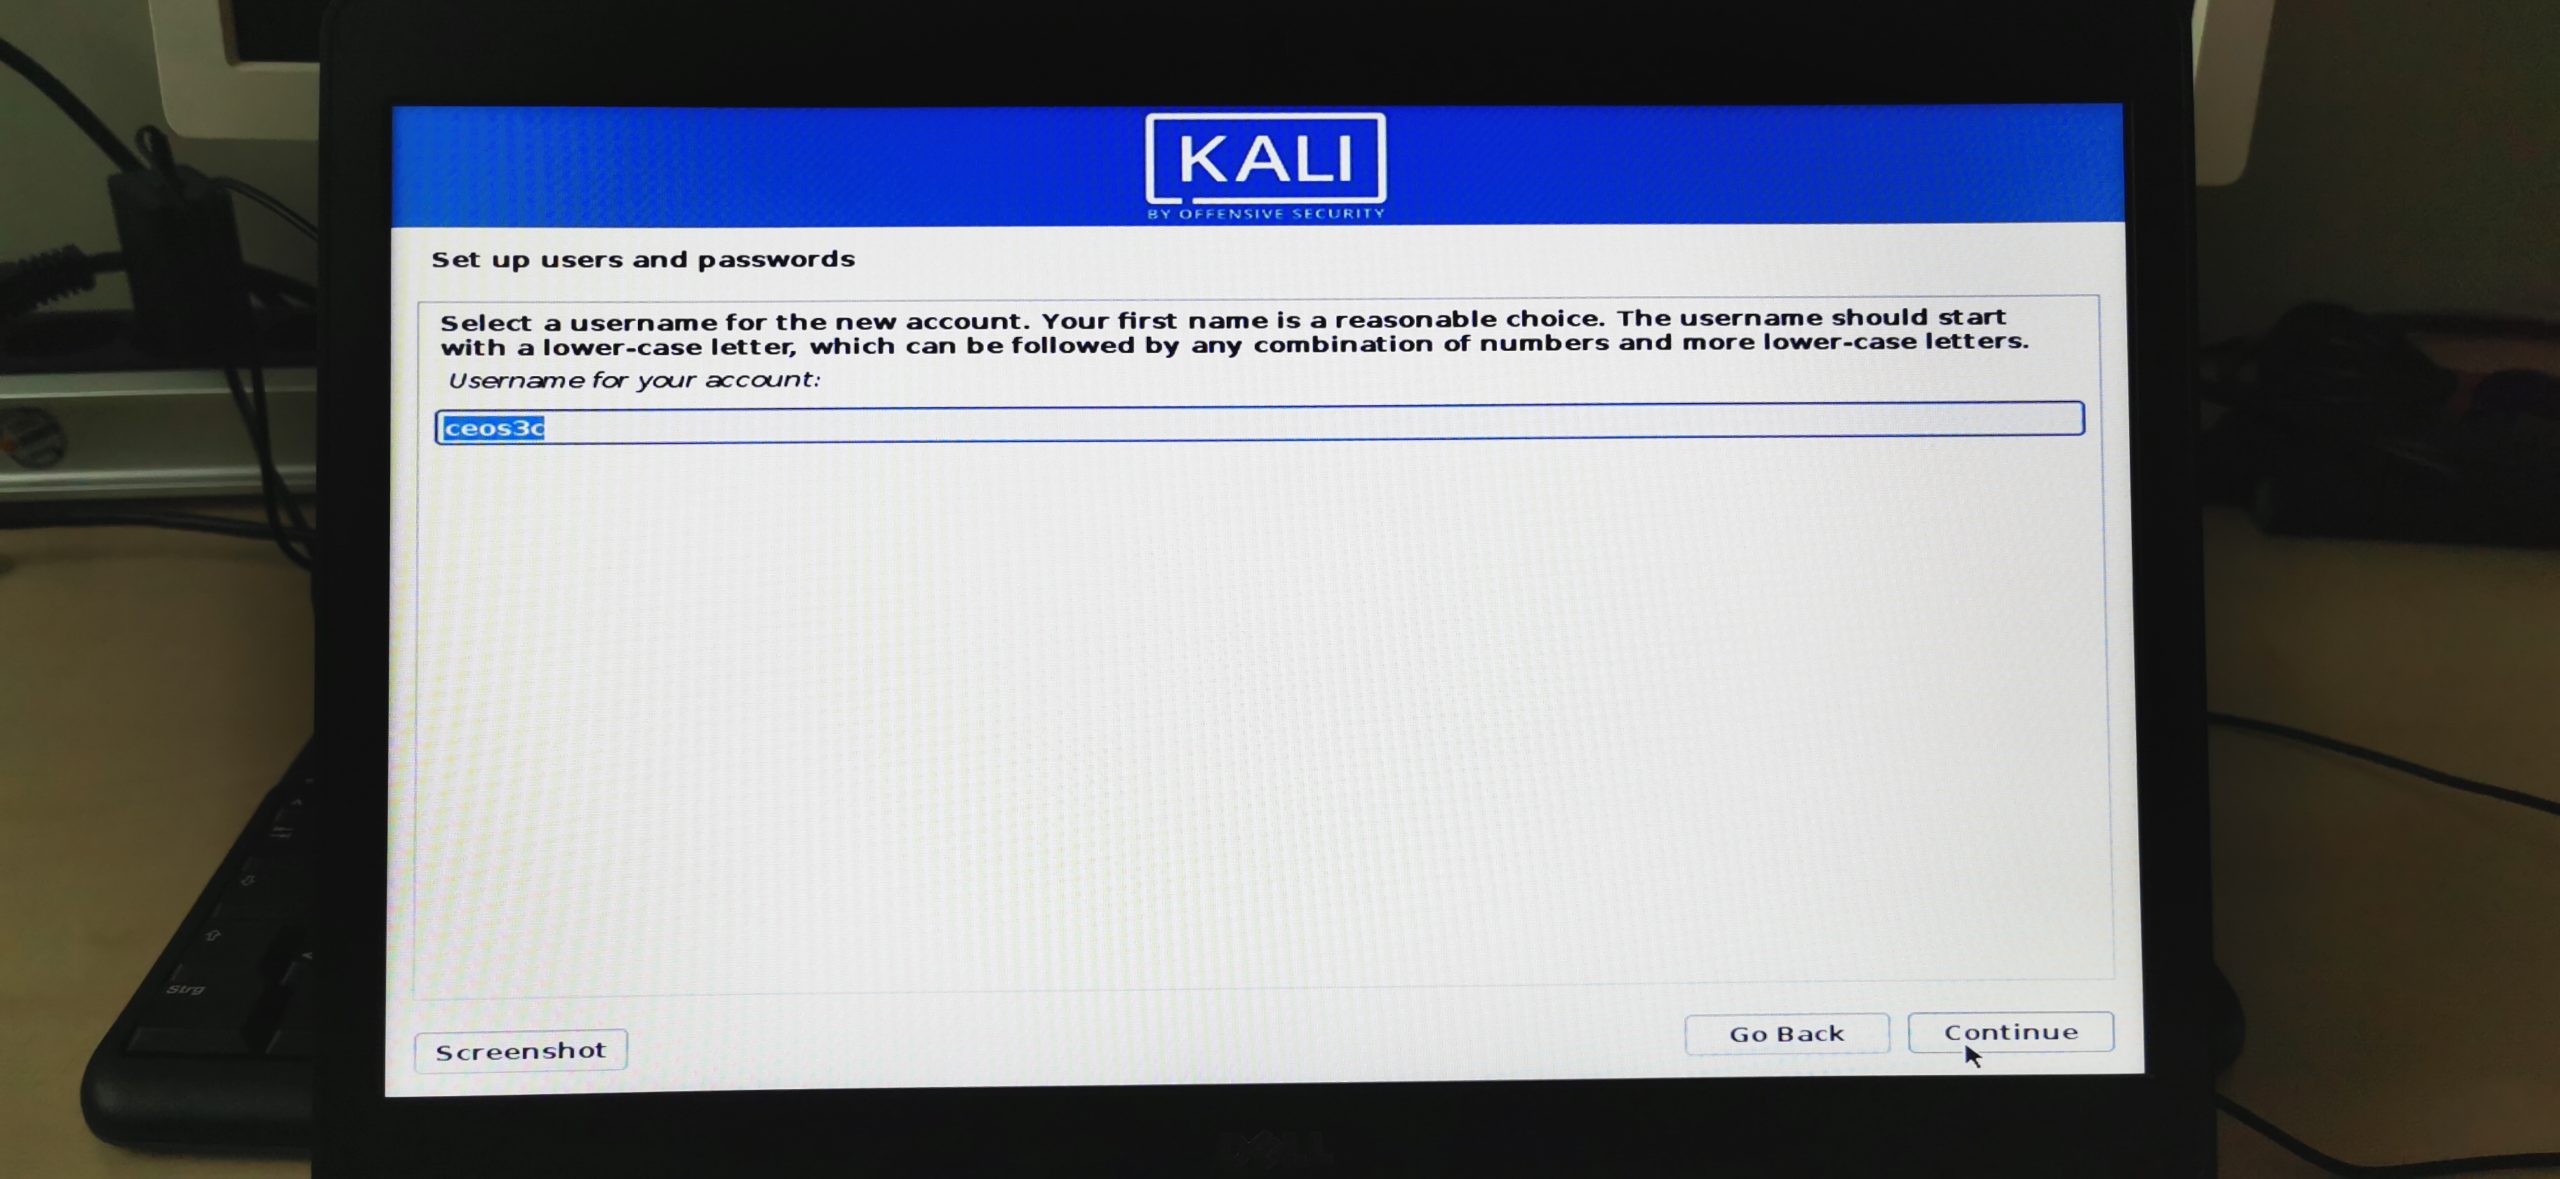
5.6.1 – Set up users and passwords
You will now create a low-privileged user account that you will use instead of the root user. This is more secure. Choose whatever username you want, for the sake of this tutorial I name my user ceos3c. Careful, usernames on Linux are Case-Sensitive.
5.6.2 – Set up users and passwords
Choose a strong password.
5.7 – Partition disks (Follow this very carefully, don’t make a mistake here)
To make this more clear, I will separate each step again. First, we will create a SWAP partition and then repeat the process to create our main partition. I will try to make it as clear as possible.
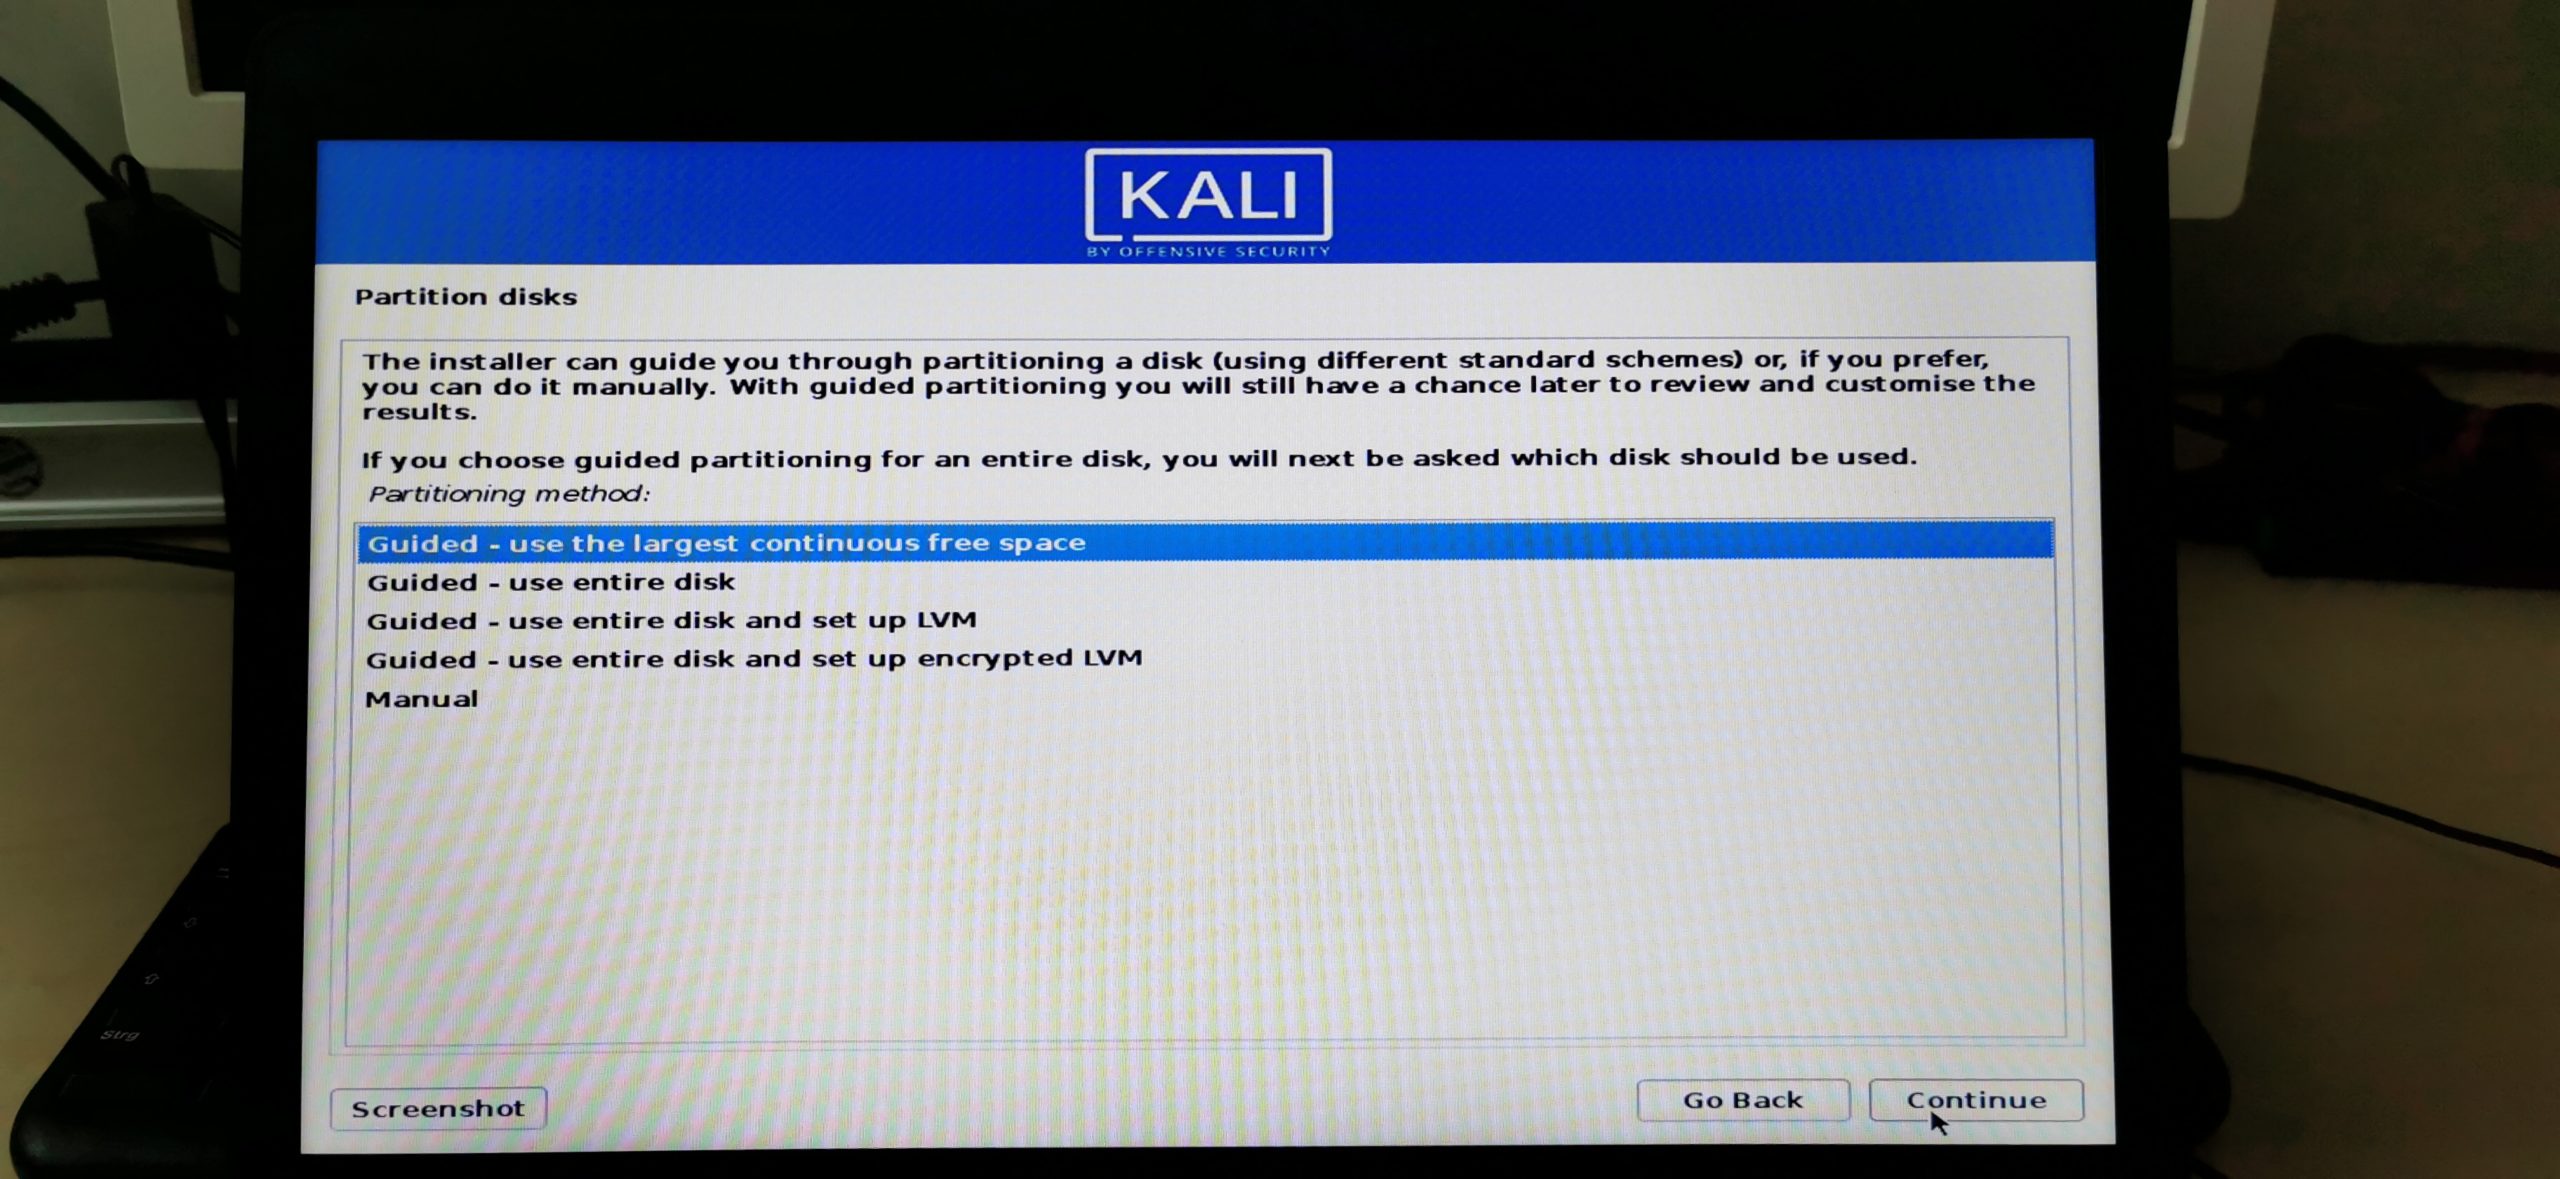
SWAP Step 1 – Partitioning Method
Choose Manual here
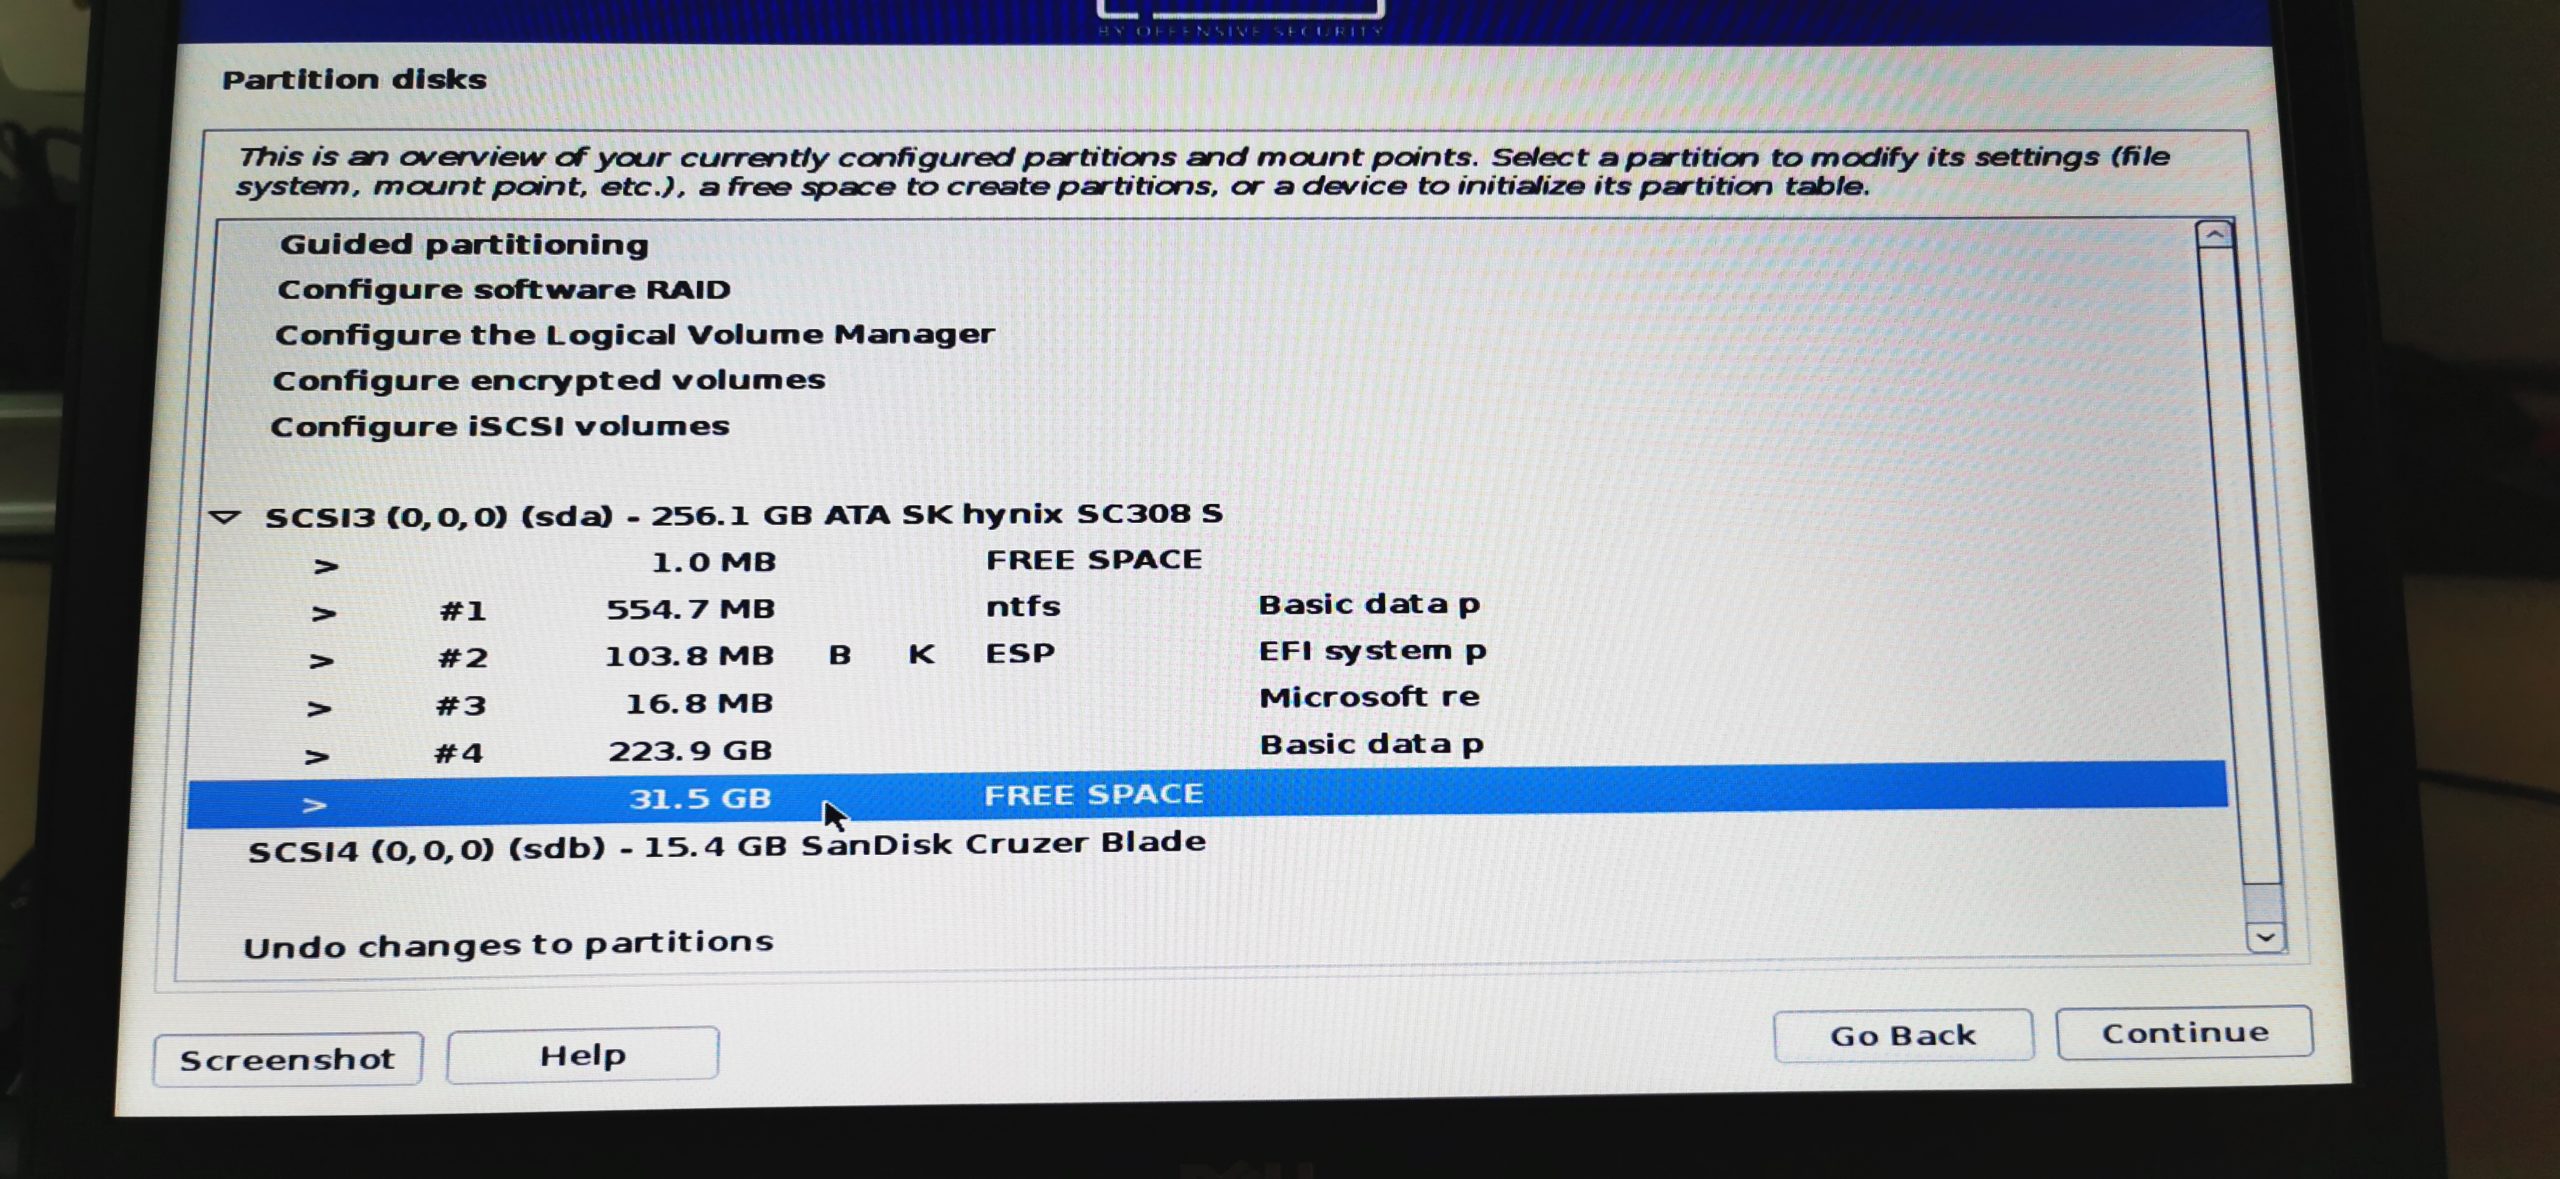
SWAP Step 2 – Selecting the partition we created in Step 3
Make sure to select the correct partition here! You can easily spot it as it should be indicated by FREE SPACE, or by the amount of GB you set in Step 3. Select it and click Continue.
SWAP Step 3 – How to use this free space
Select Create a new partition.

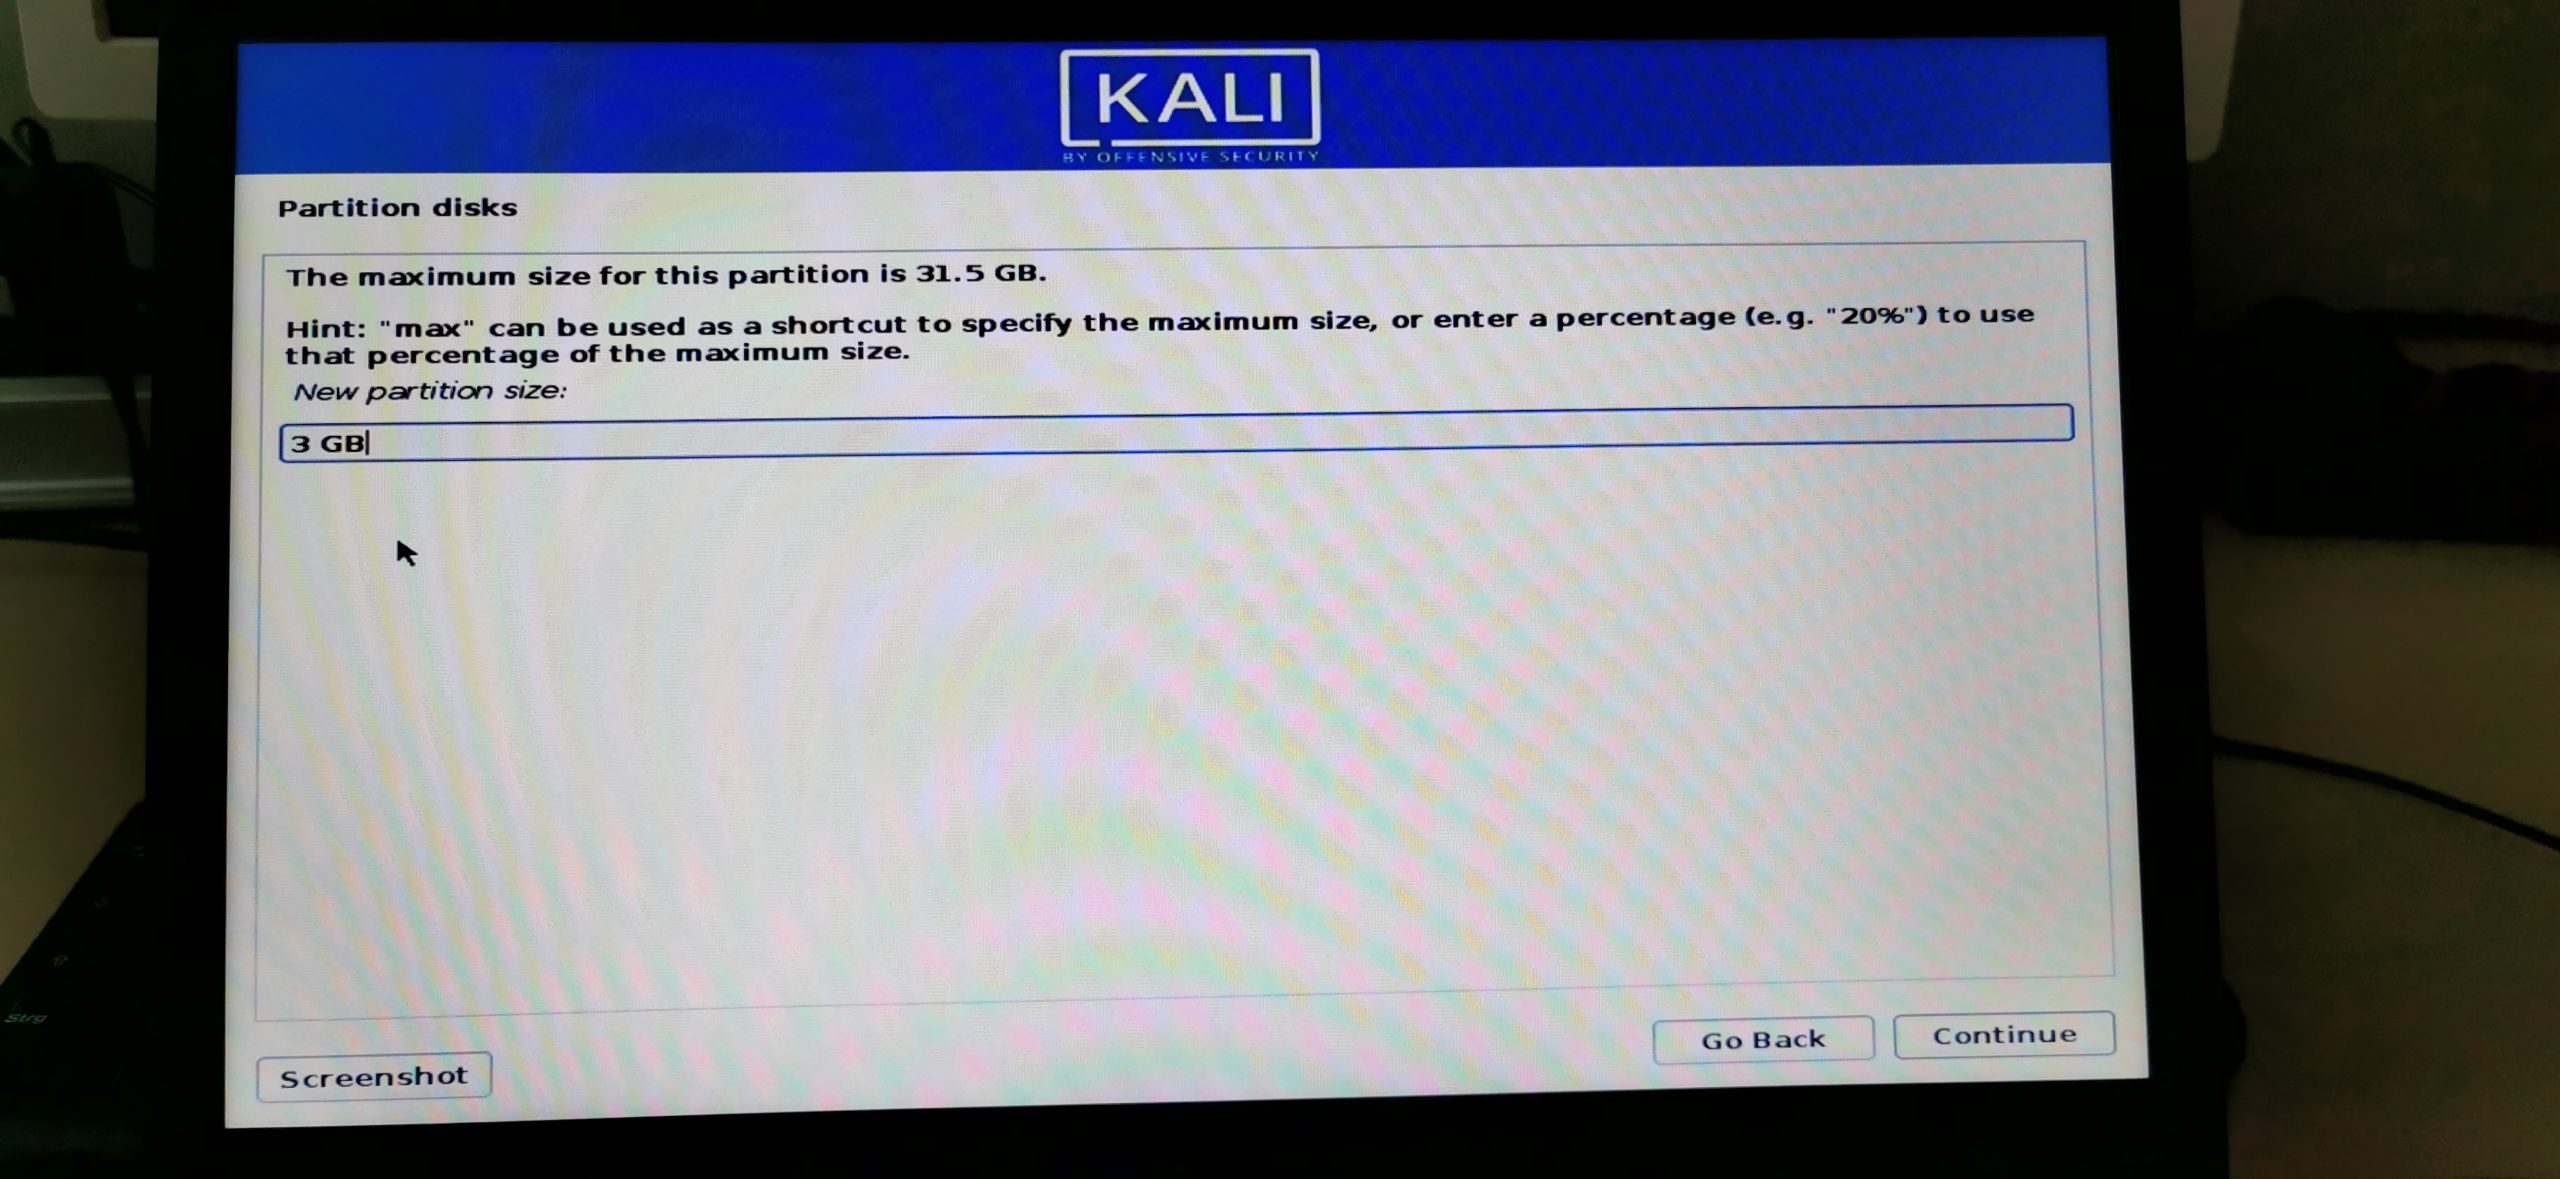
SWAP Step 4 – Setting up the SWAP partition
The SWAP partition size is set by the amount of memory you have in your computer. It’s a rather tiresome topic so I save you some time by creating the below table for you. In short: You should allocate around 20% of the amount of your system memory as your SWAP partition size. Now there is a whole topic on adjusting SWAP size if you use Hibernation vs no Hibernation you can read up on if you want, I generally stick to the No Hibernation chart and had no problems so far. You’ll find the information out there. Yea I know, I see myself out.
| RAM Laptop | Swap Size (No Hibernation) |
| 1GB | 1GB |
| 2GB | 1GB |
| 4GB | 2GB |
| 6GB | 2GB |
| 8GB | 3GB |
| 12GB | 3GB |
| 16GB | 4GB |
| 24GB | 5GB |
| 32GB | 6GB |
| 64GB | 8GB |
So, my laptop has 8GB of RAM so according to that table, I choose a SWAP size of 3GB. I hope that makes sense.
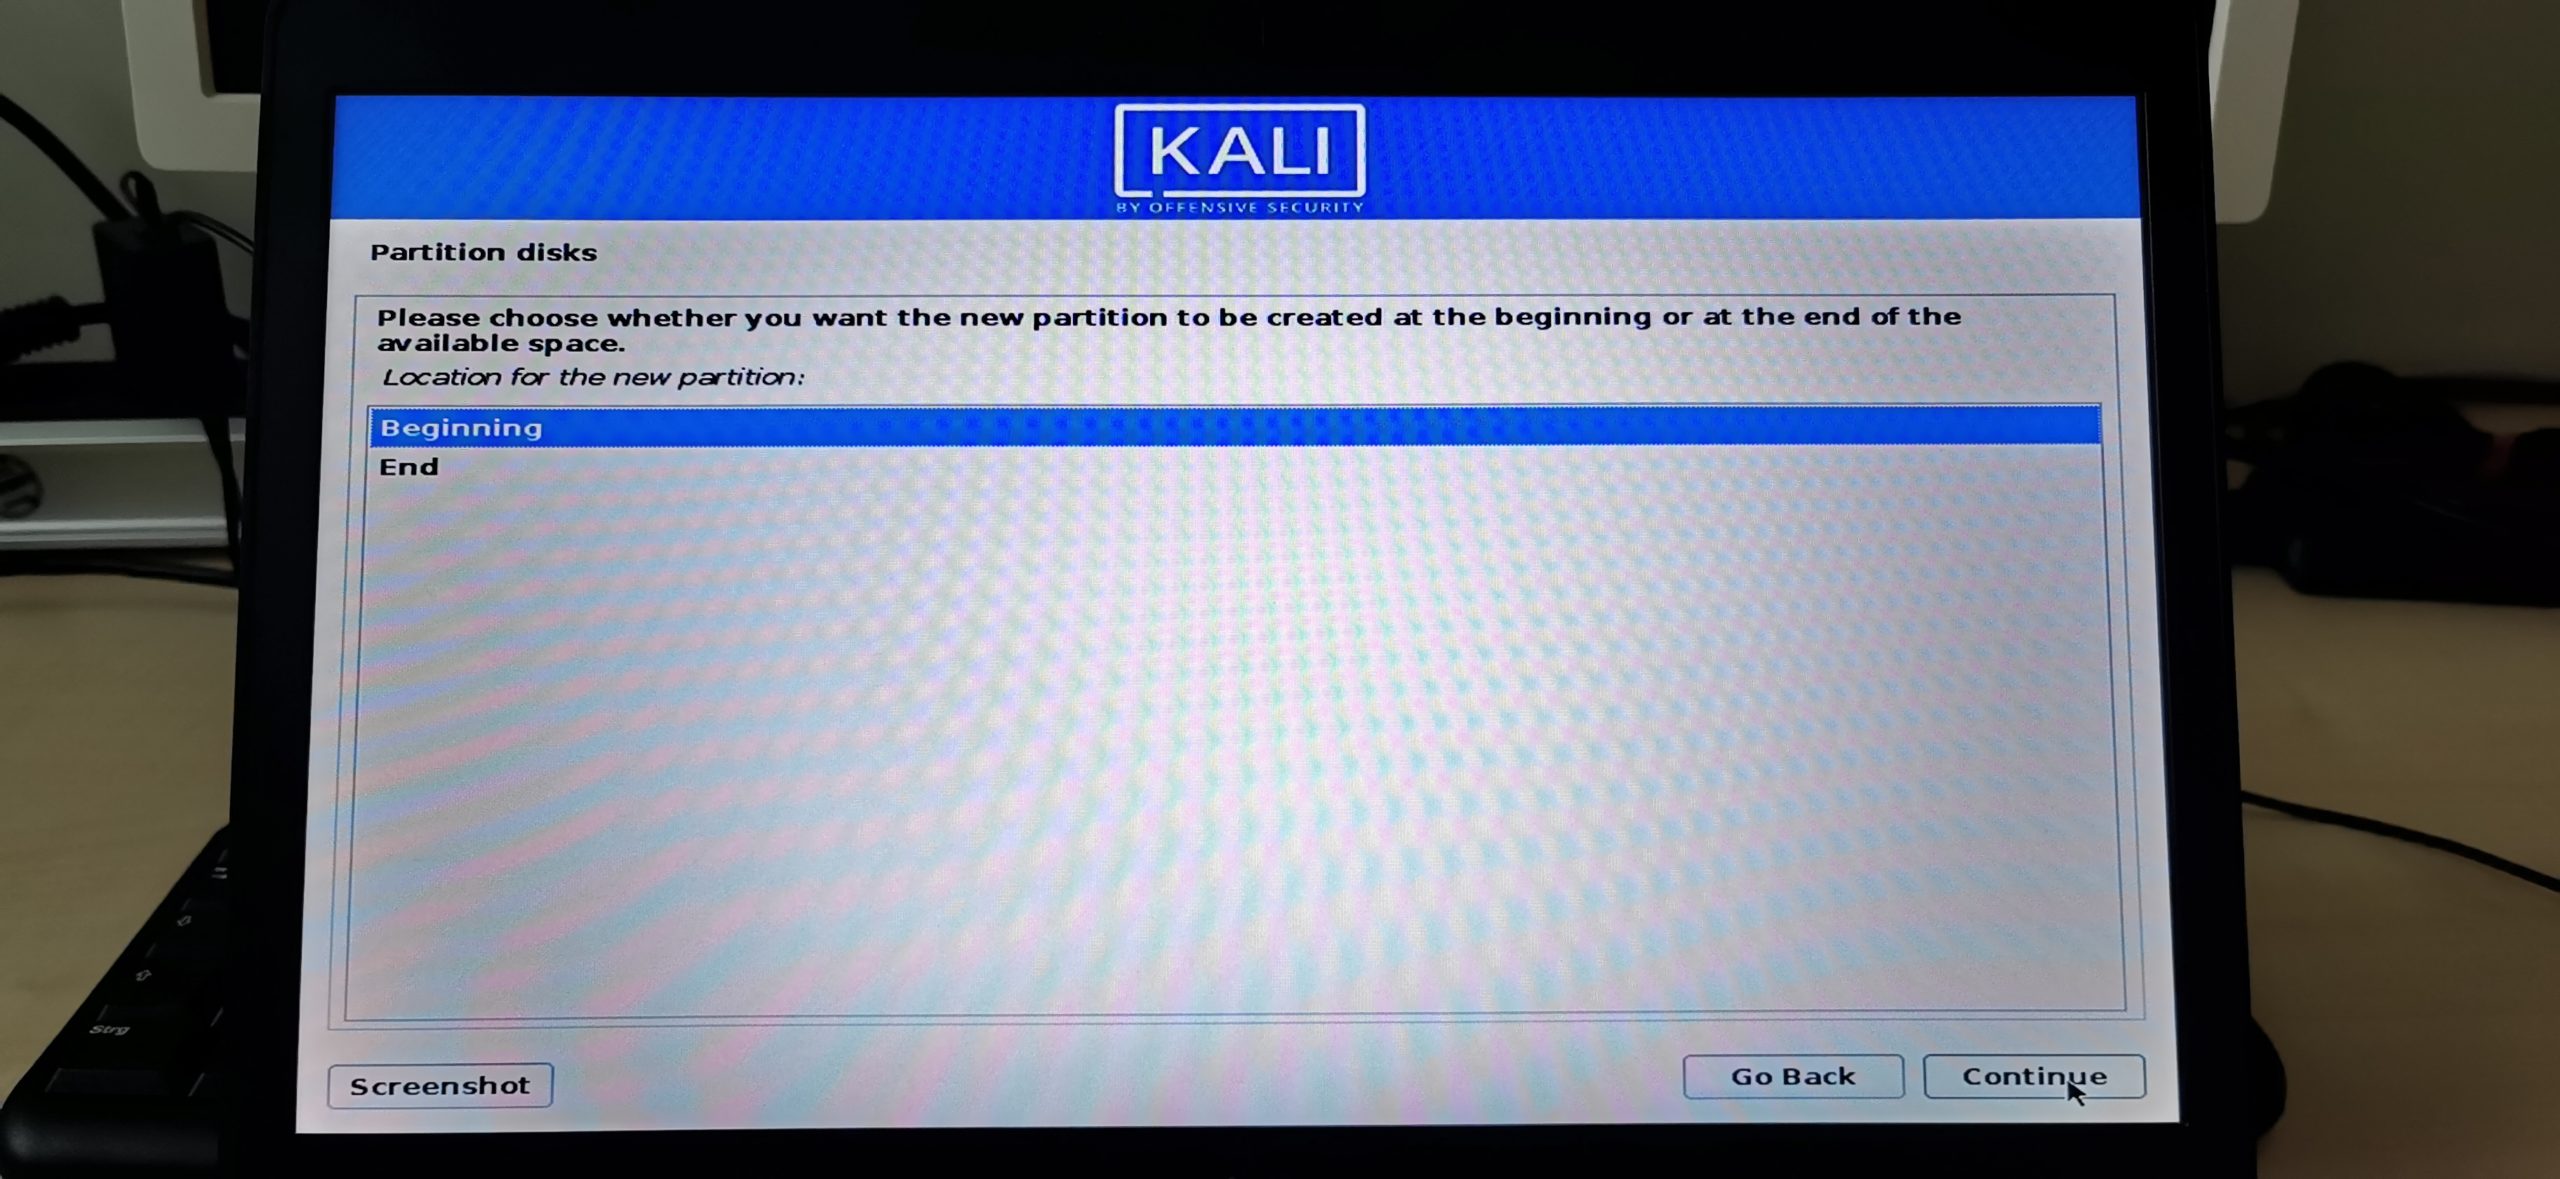
SWAP Step 5 – Location for the new Partition
Choose Beginning and click Continue.
SWAP Step 6 – Naming the Partition
Double-click on Name: and name your partition swap. Click Continue.
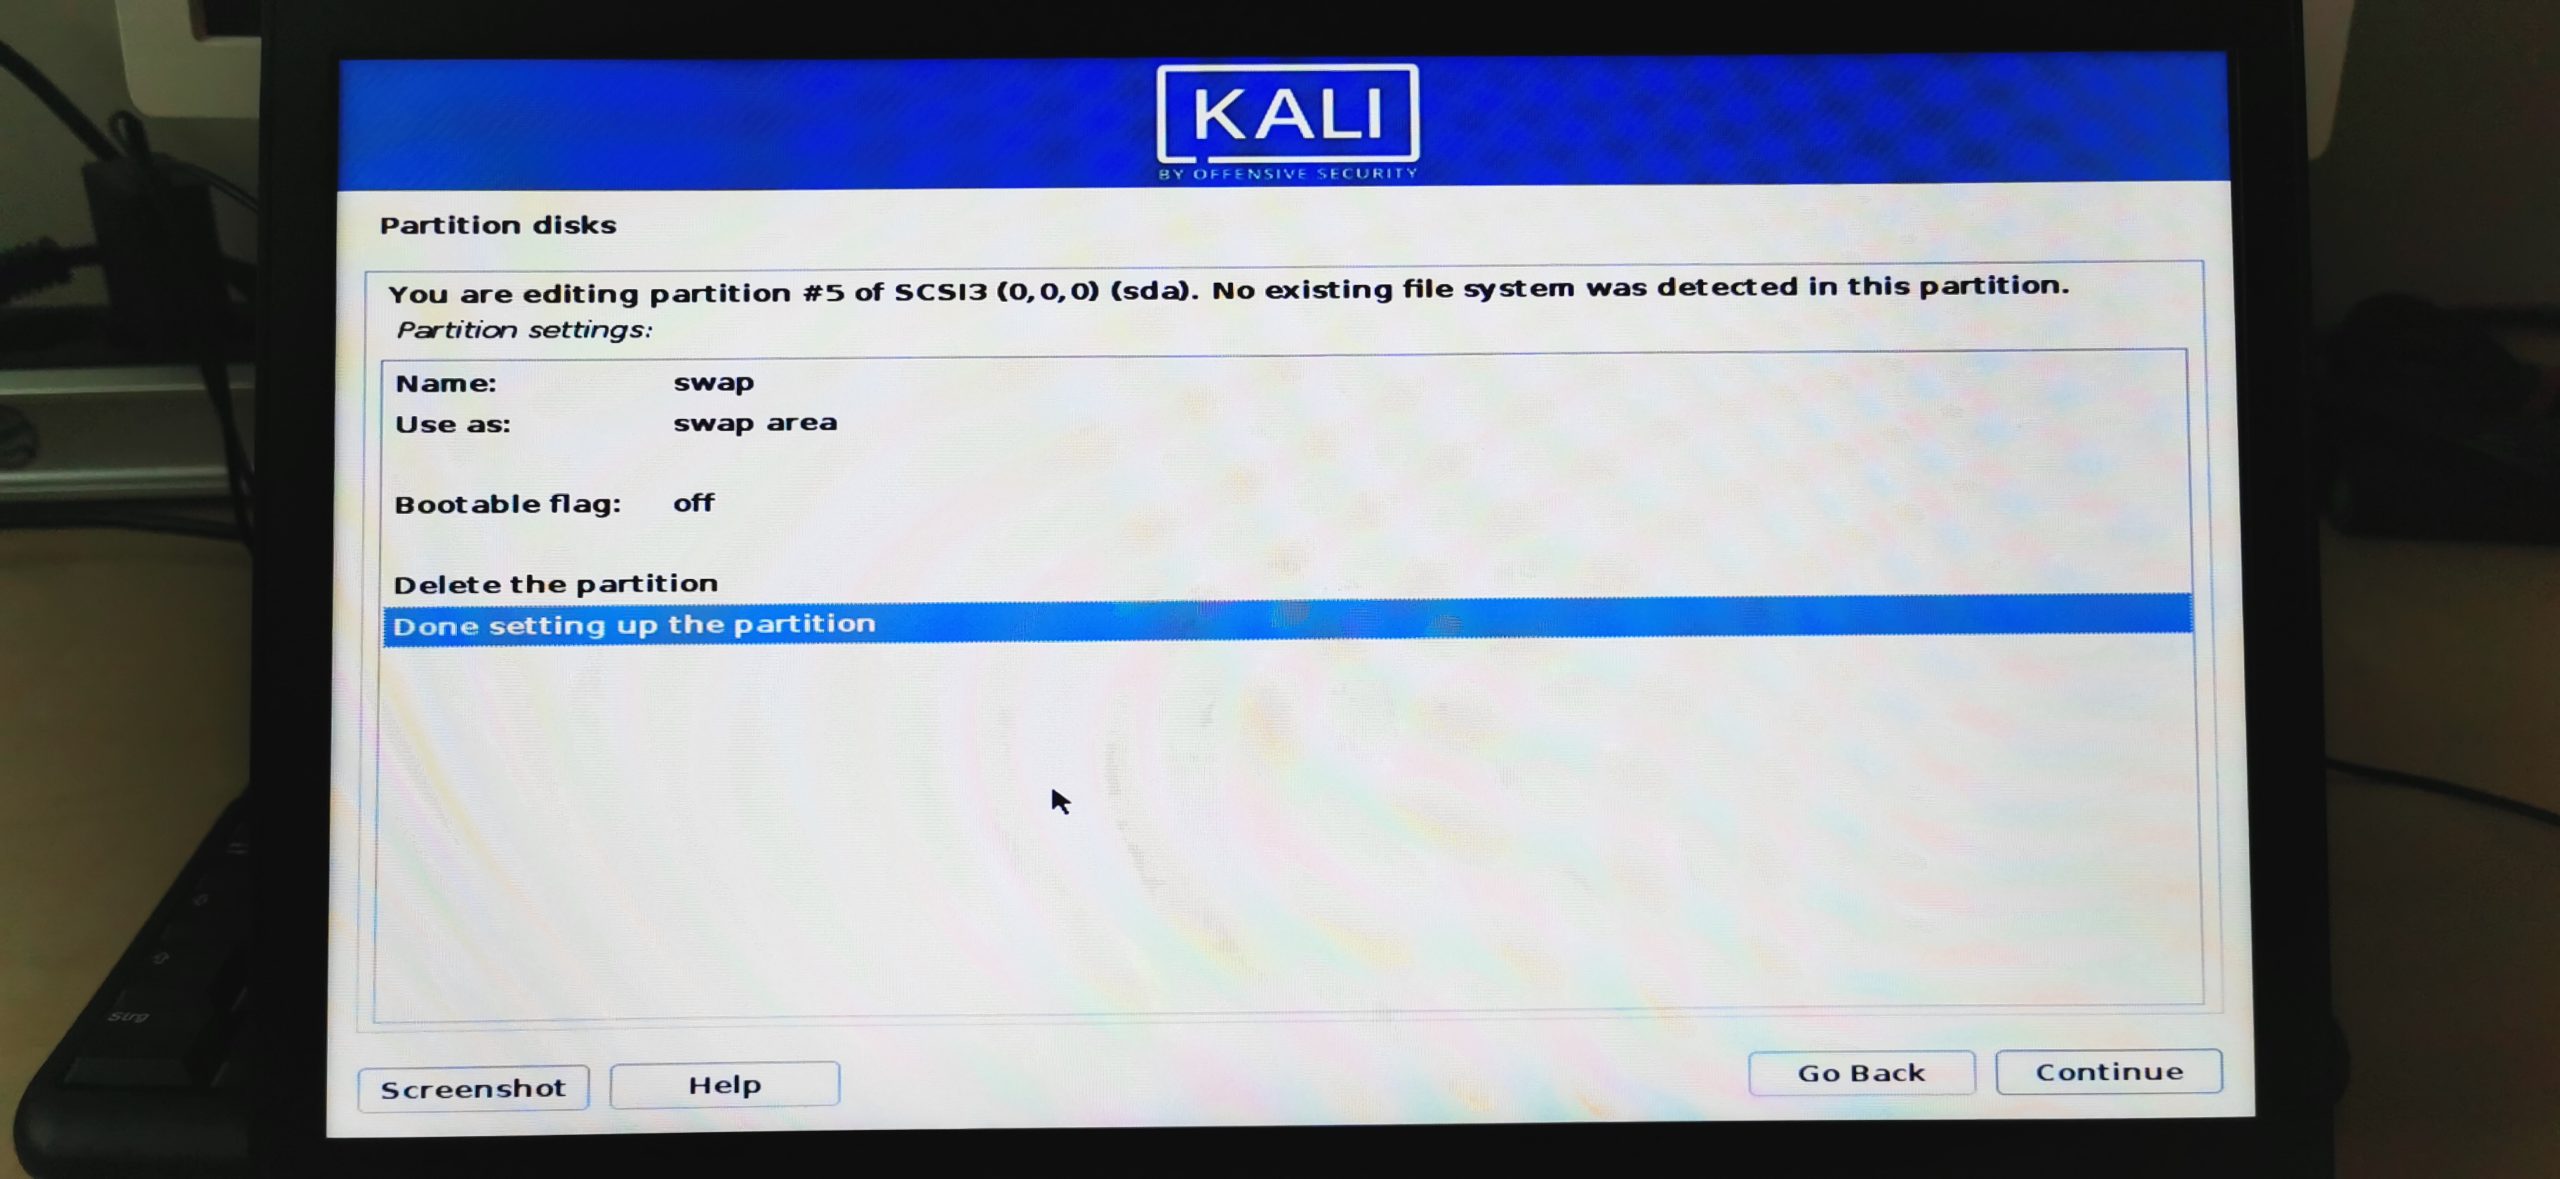
SWAP Step 7 – Setting the partition to use as SWAP
Double-click on Use as: and select swap area.
If that is done, choose “Done setting up the partition” on the bottom and click Continue. Now we need to repeat this process (it’s a little shorter) for our Main partition.
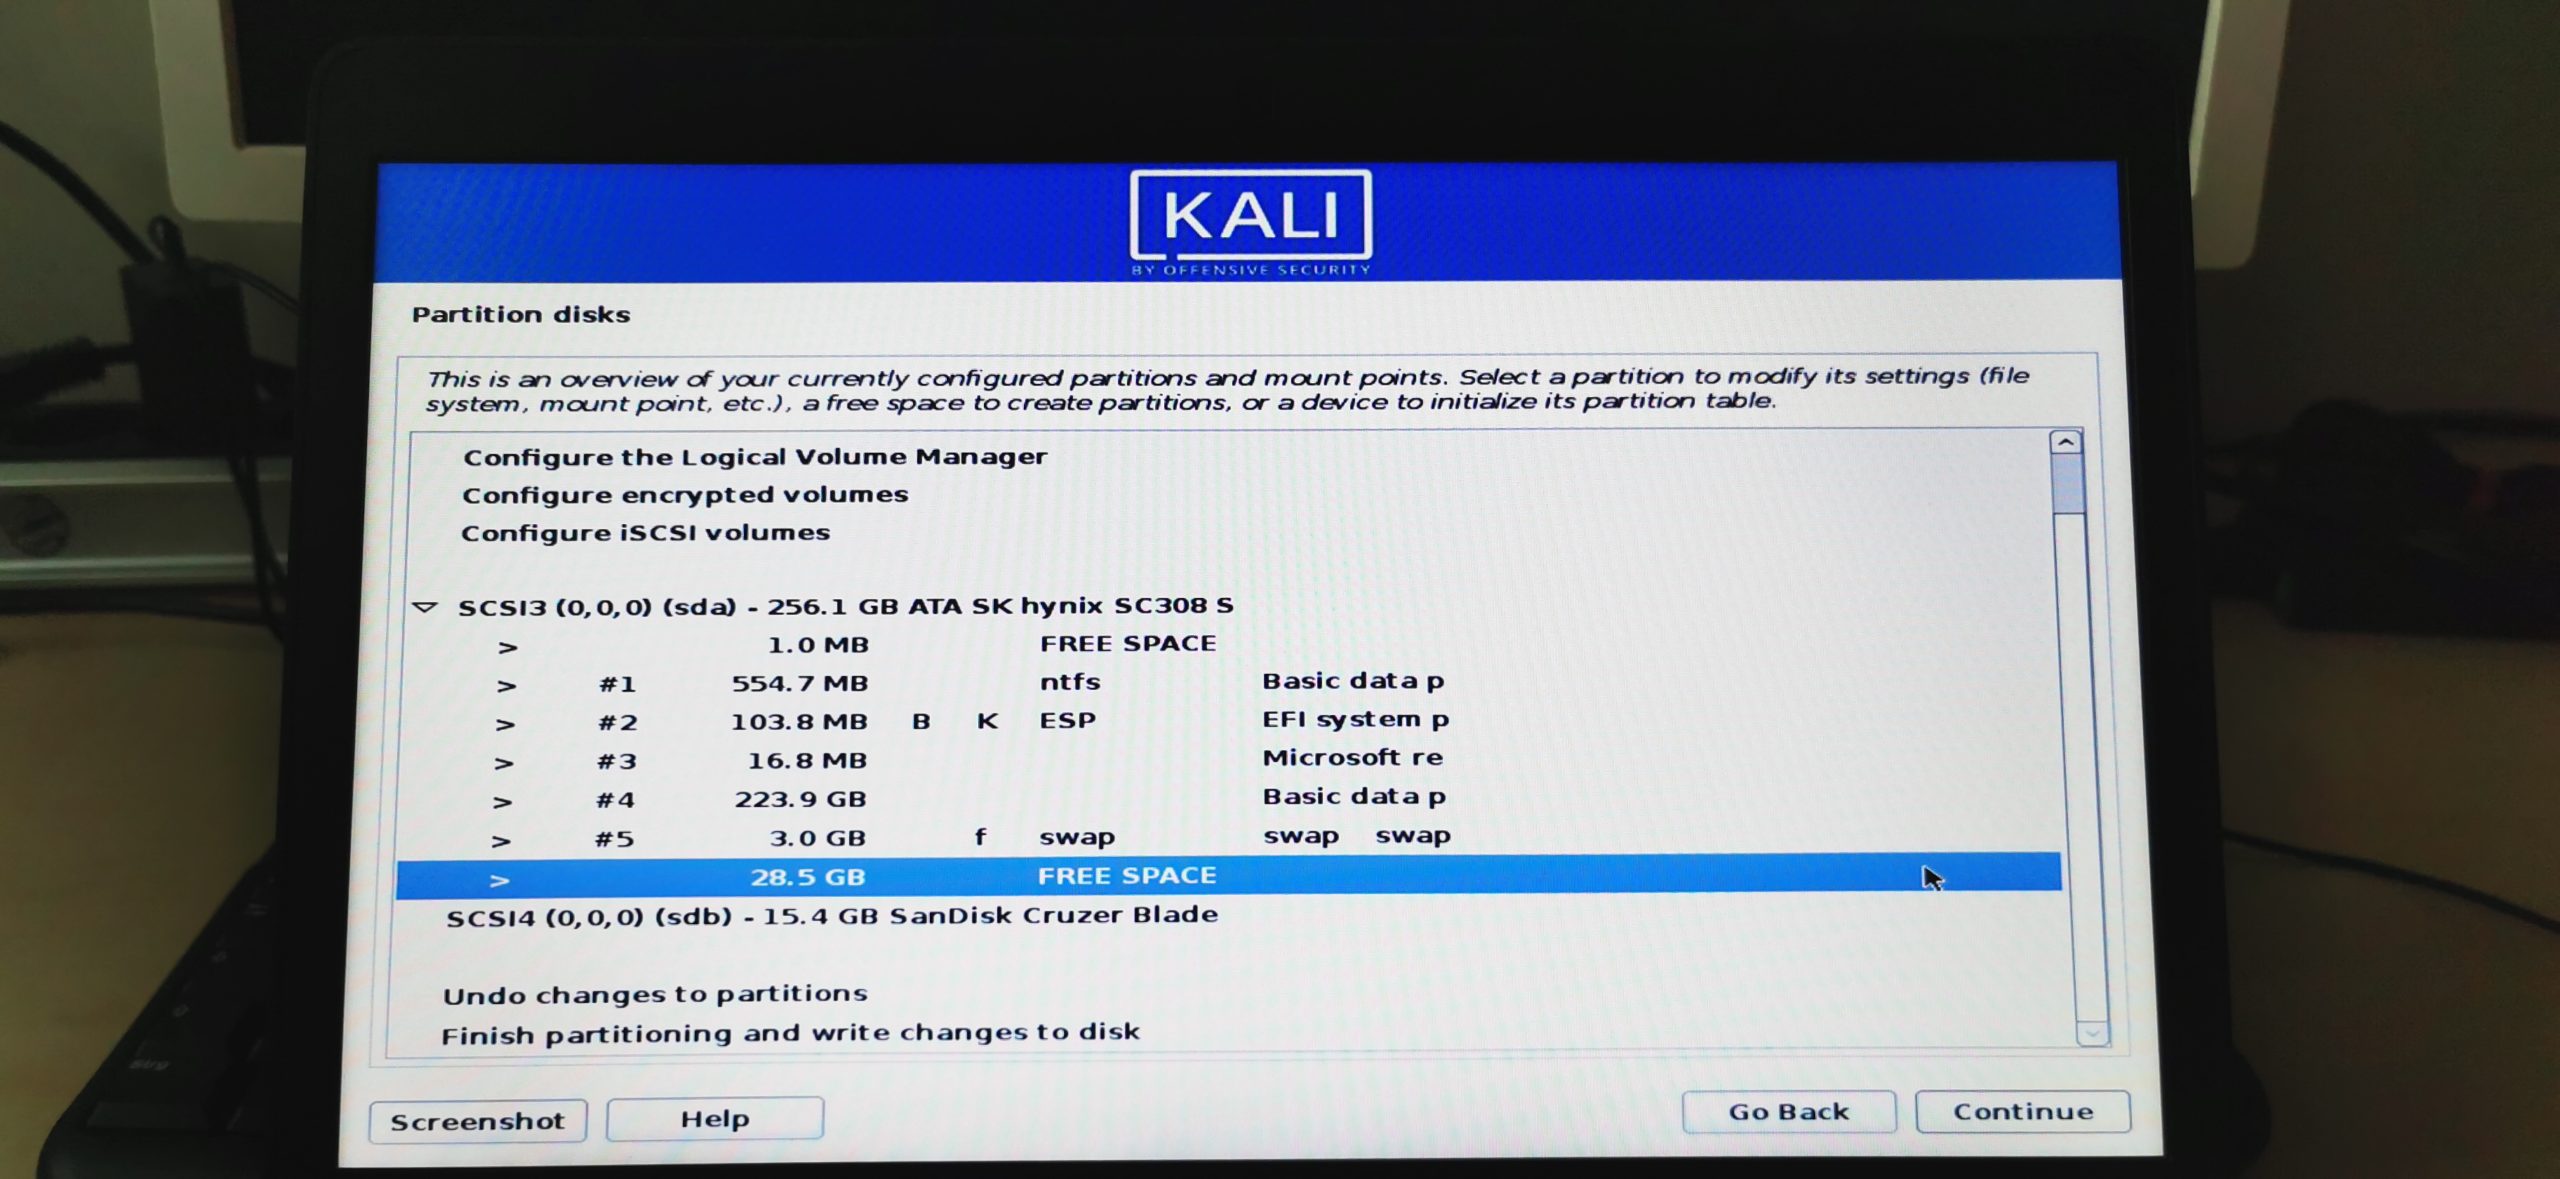
MAIN Step 1 – Selecting the Main Partition
Again, double-click the partition indicated by FREE SPACE.
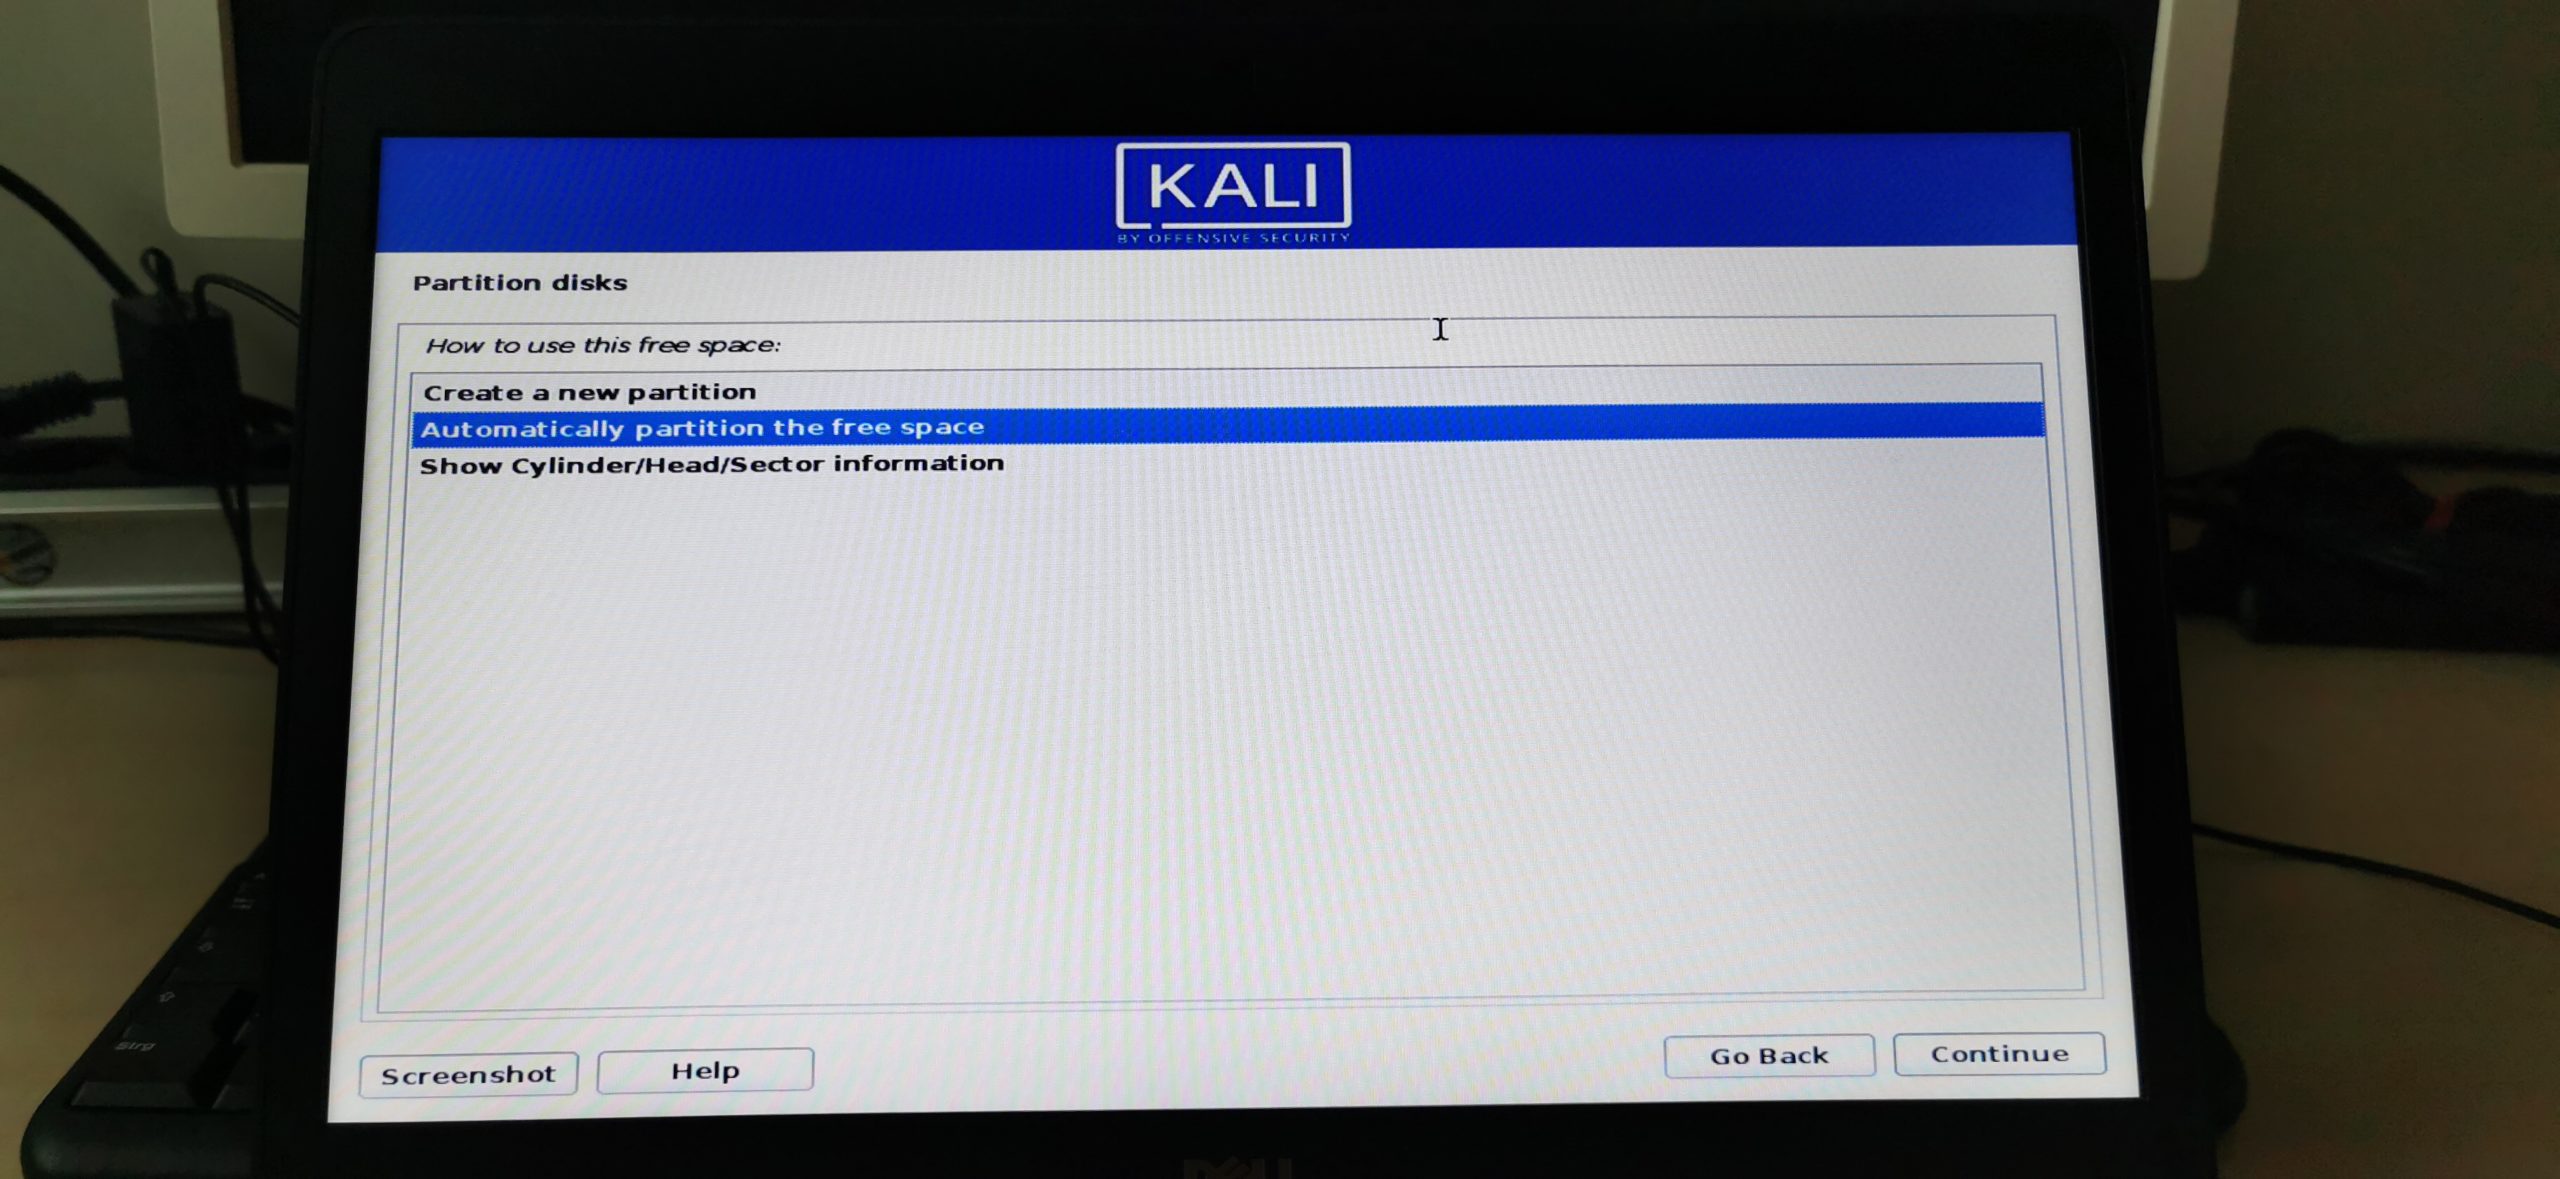
MAIN Step 2 – How to use this free space
Select Automatically partition the free space here.
MAIN Step 3 – Partitioning Scheme
Select All files in one partition (recommended for new users) here. Click Continue.
MAIN Step 4 – Finishing
Select Finish partitioning and write changes to disk and click Continue.
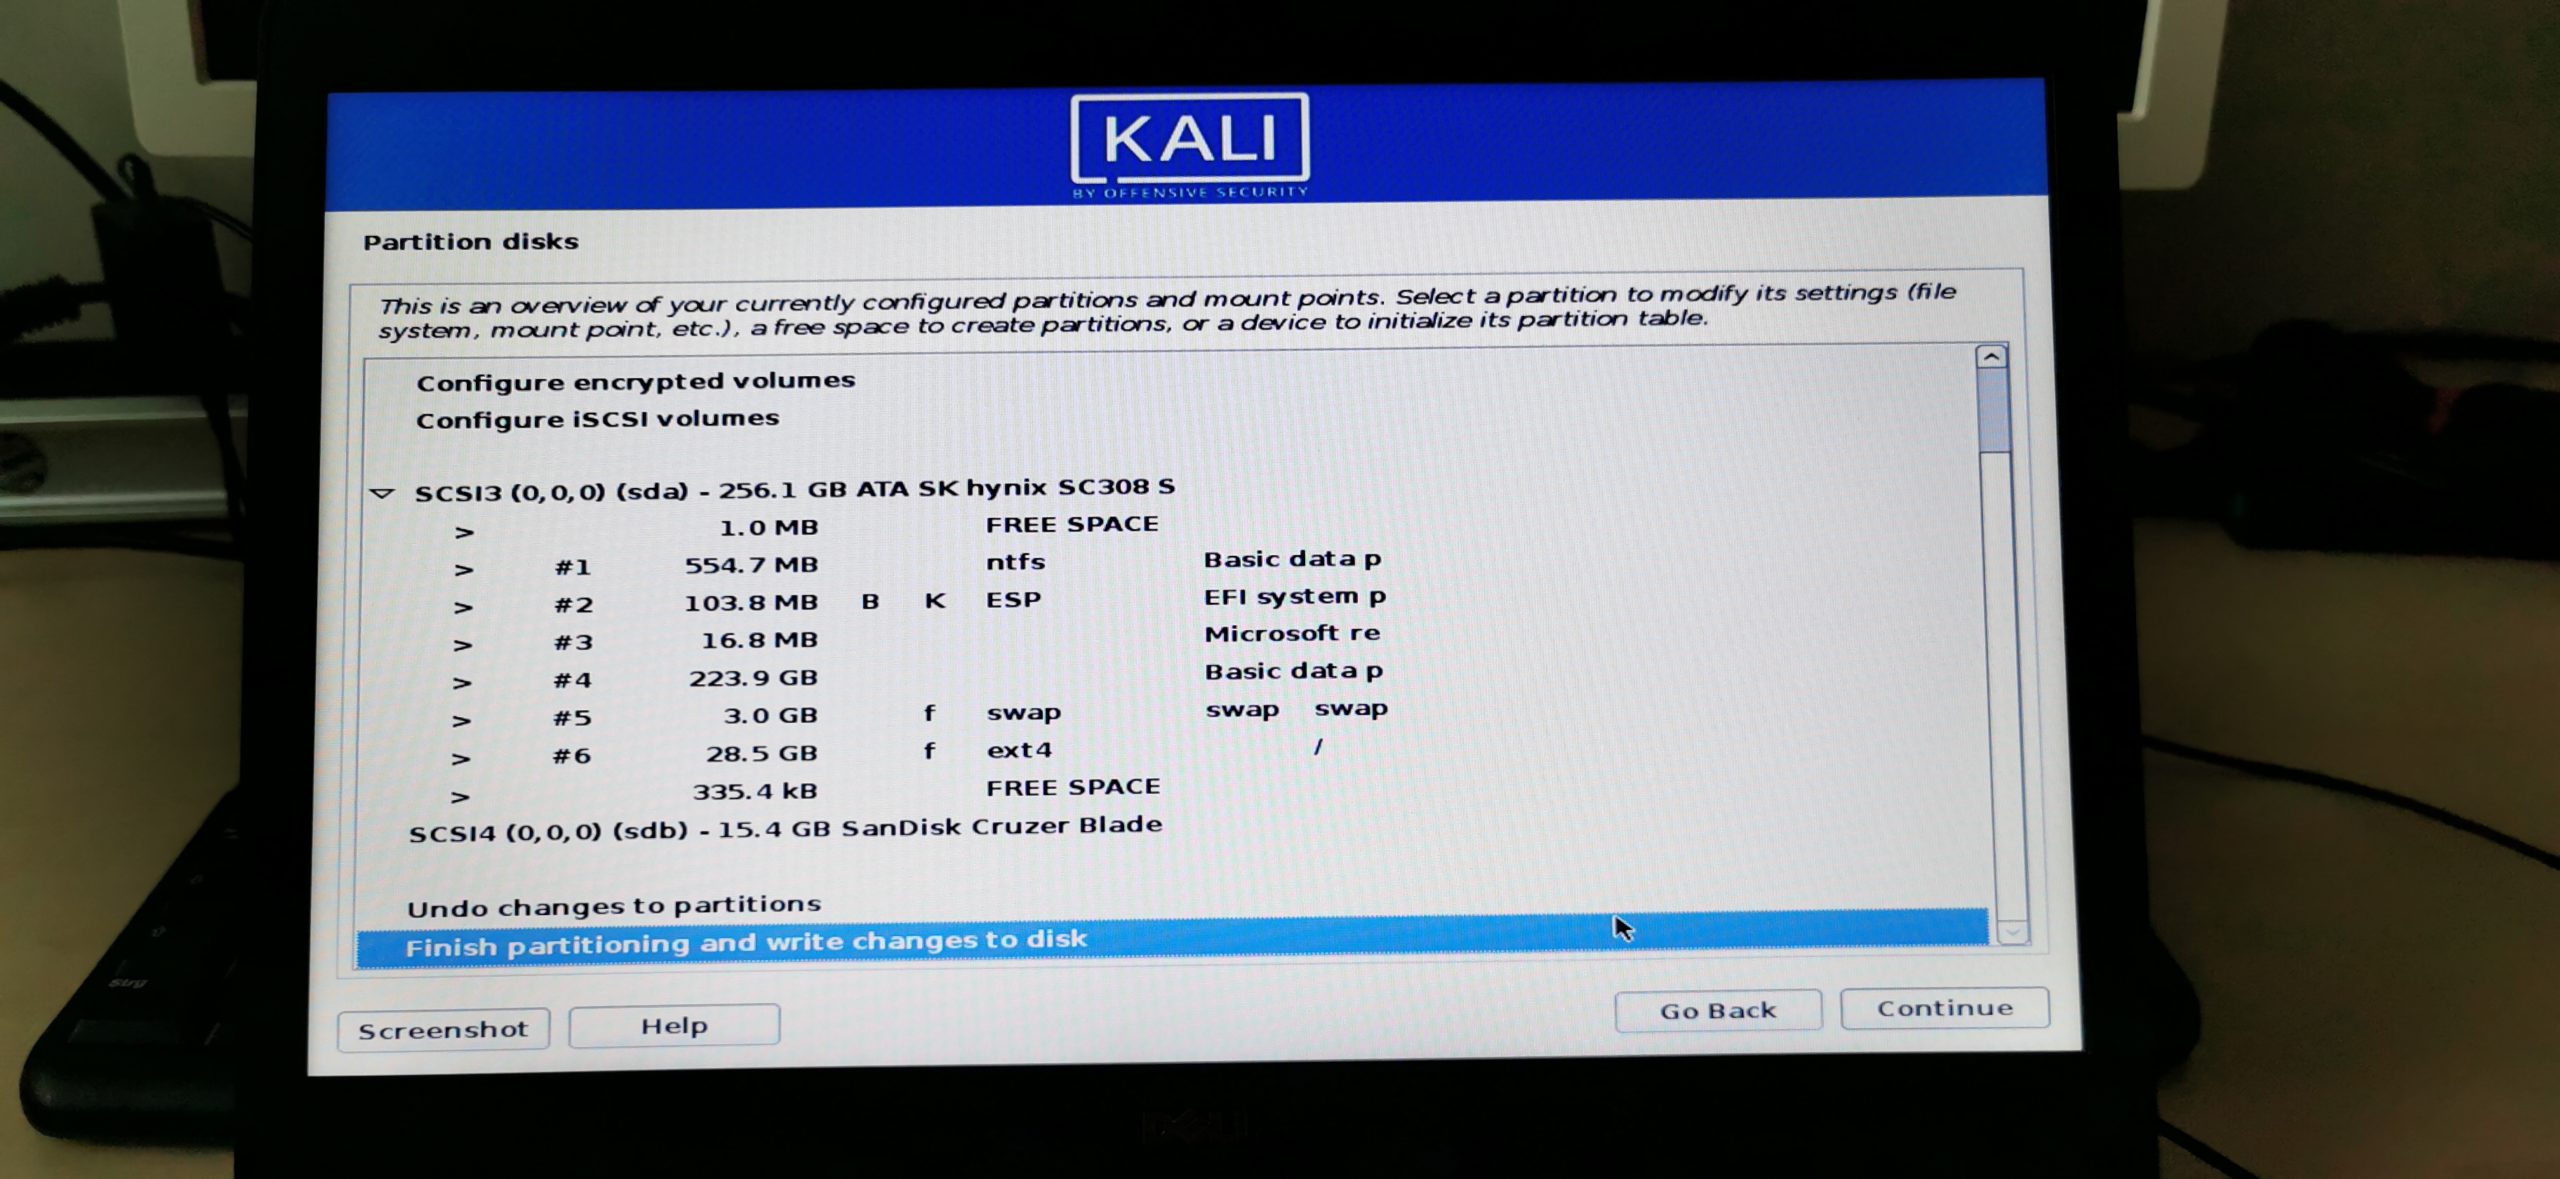
Finally, select Yes to the question if you are sure that you want to write changes to the disk.
You made it! You definitely have passed the hardest part of this tutorial. What a ride so far, huh?
5.8 – Configure the package manager
Click on Continue or enter a Proxy server address if you use one. Now Kali will start downloading some updates and additional drivers and tools.
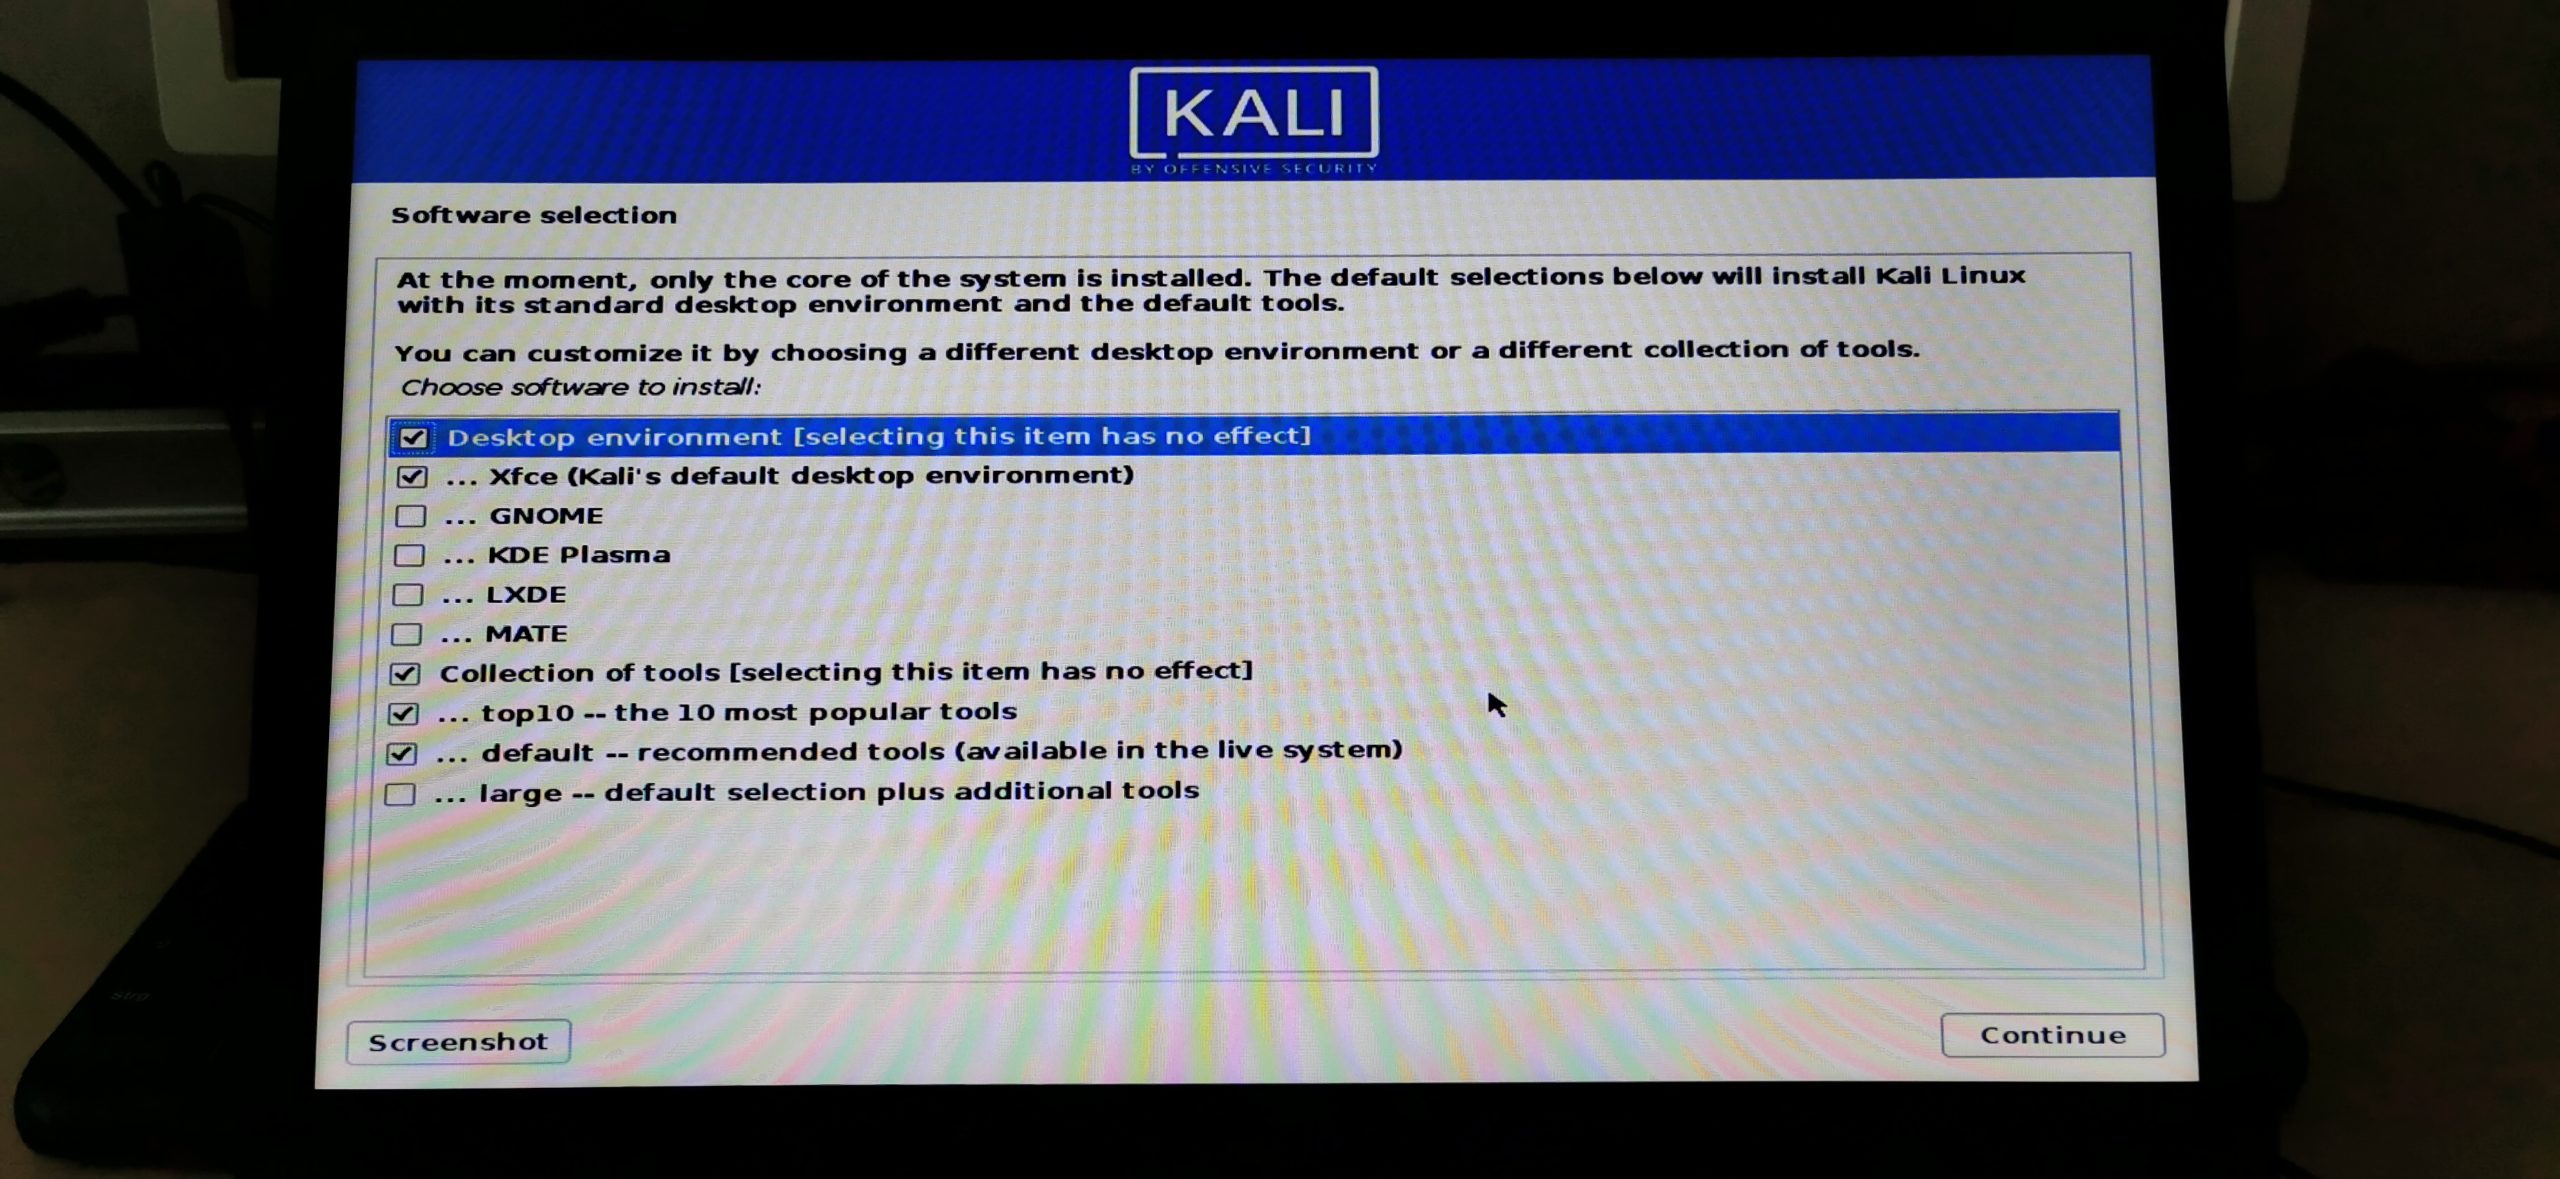
5.9 – Software selection
Now you get the chance to modify how Kali will look like (Desktop Environment) and also what kind of tools you want to install per default. You can do all of this later and it is perfectly fine to leave everything on the default values, which sets you up with the default Kali installation. This is perfectly fine for most cases, especially if you don’t know what that means, just leave it as is and hit Continue.
This process might take a while depending on your internet connection speed. Sit back and relax.
6 – Finish the installation
Finally, you can click on Continue to reboot. Remove the USB Drive from your system now!
You made it! You have successfully installed Kali Linux in Dual Boot with Windows. Only a few steps to go.
Step 6 – Booting up Kali Linux
Once your system reboots, you’ll end up in the GRUB Boot Loader. If you don’t press any button within the first 5 seconds, Kali, or whatever you set as a default system (you can change that to Windows, so Windows will automatically boot instead of Kali on each reboot). Just Google: Change GRUB Boot Order to achieve this. But be careful, messing around with GRUB can still mess up your system!
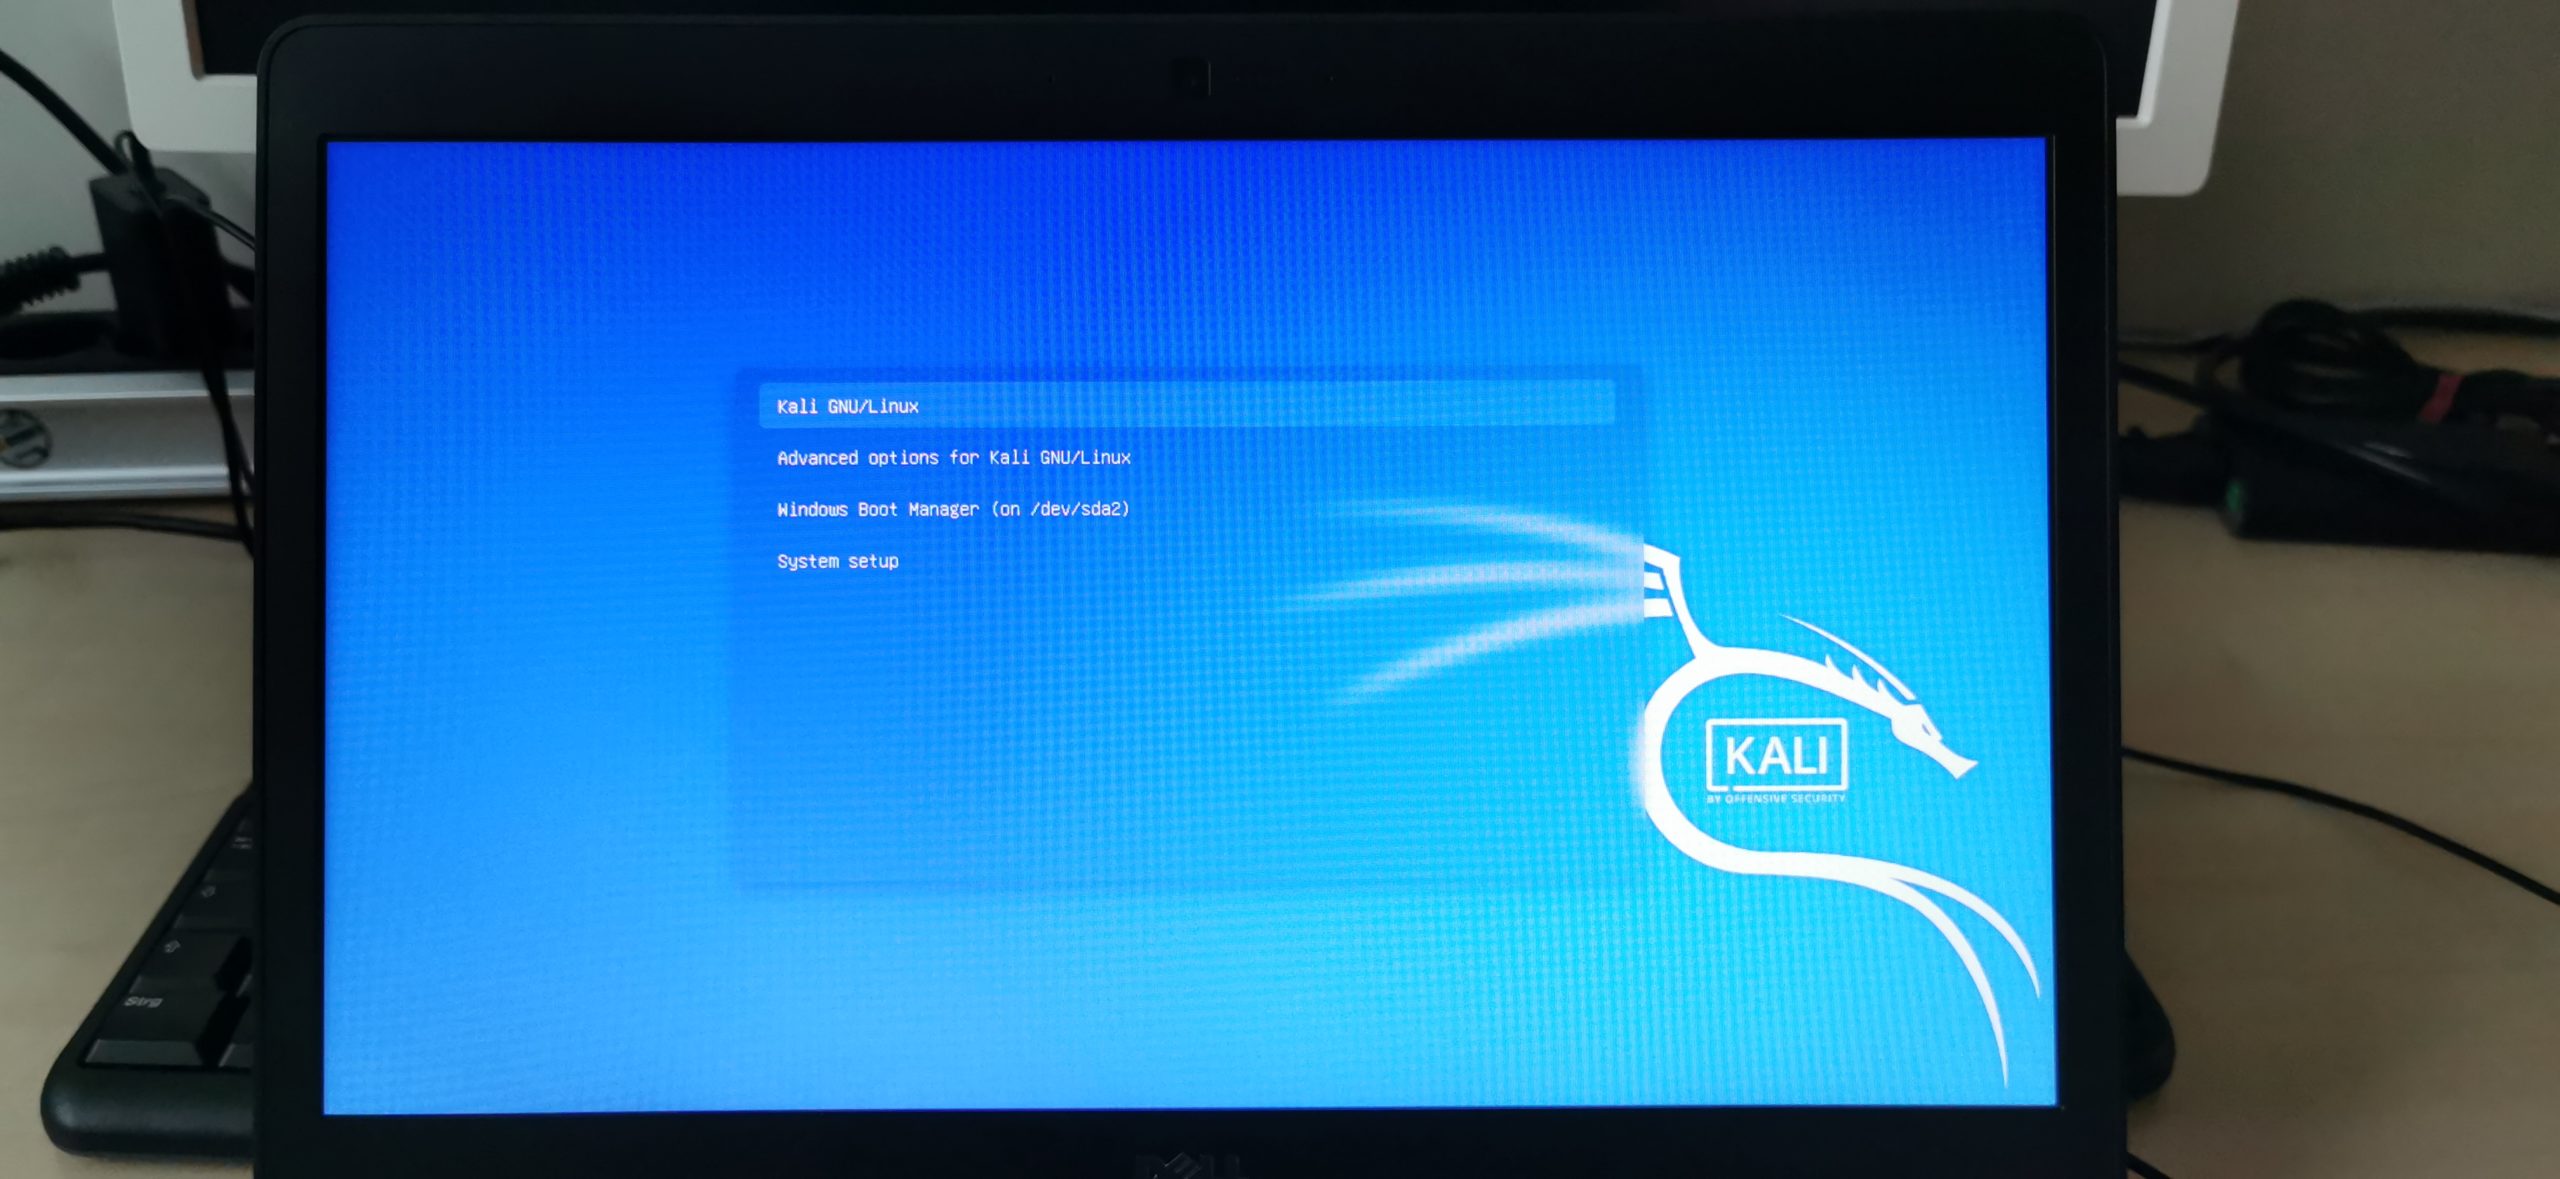
Let’s see if Kali boots up.
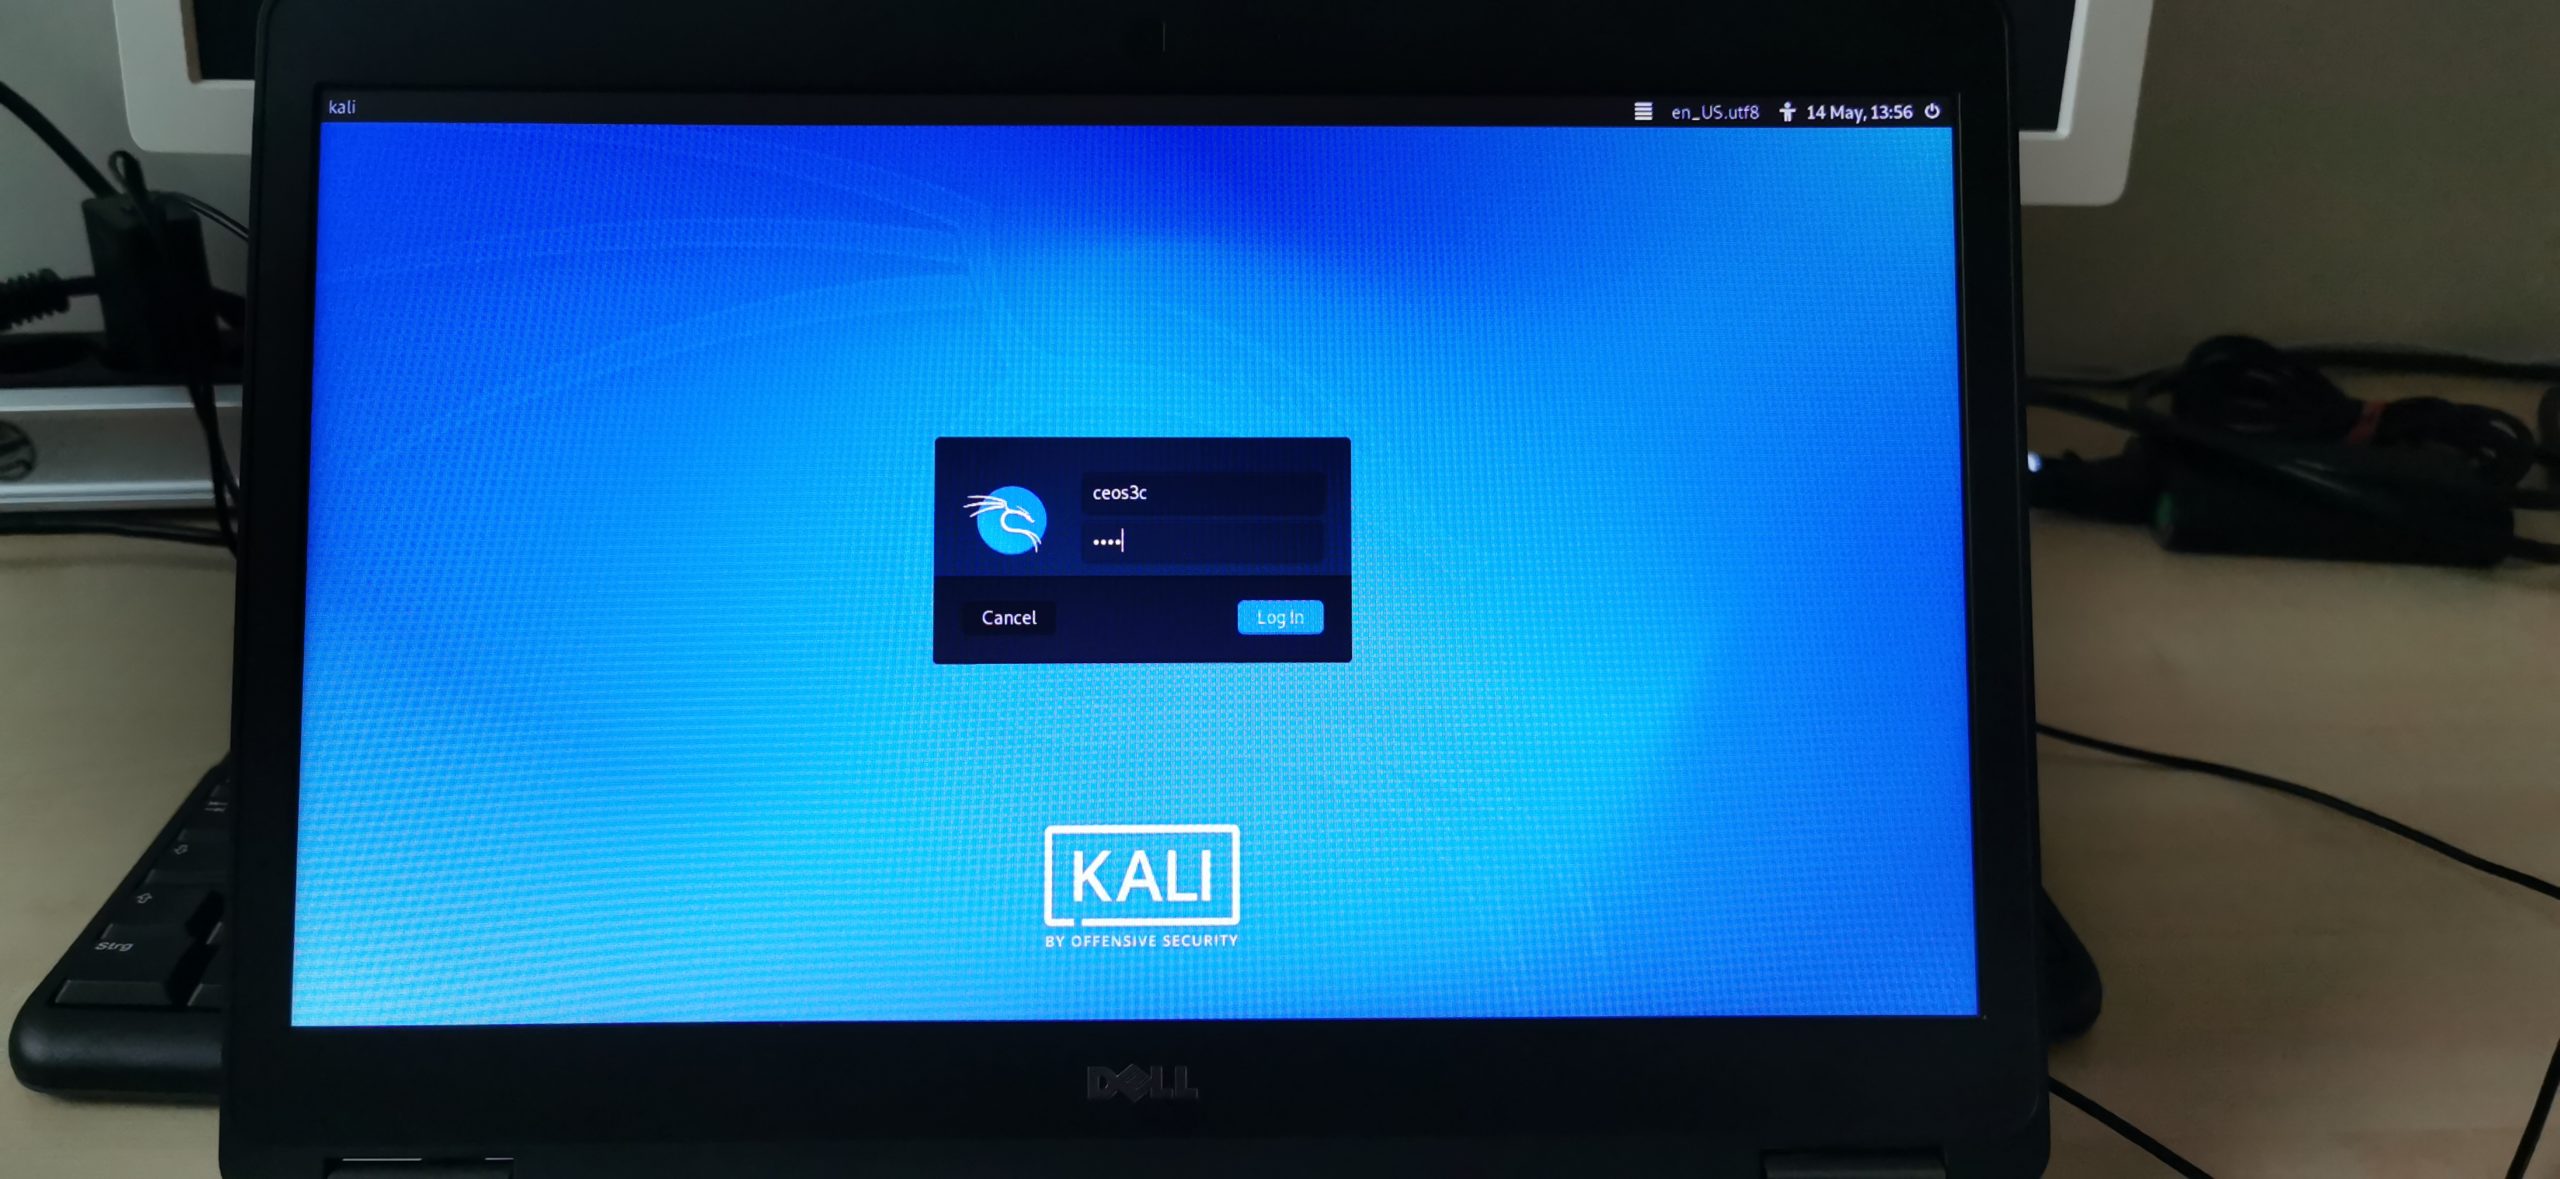
It does! Log in with the username and password you had set during the installation. There is only one thing I will show you to get started, for everything else read on in the Top Things to do after installing Kali Linux article that I constantly update. Including more steps here would just make this unnecessary long.
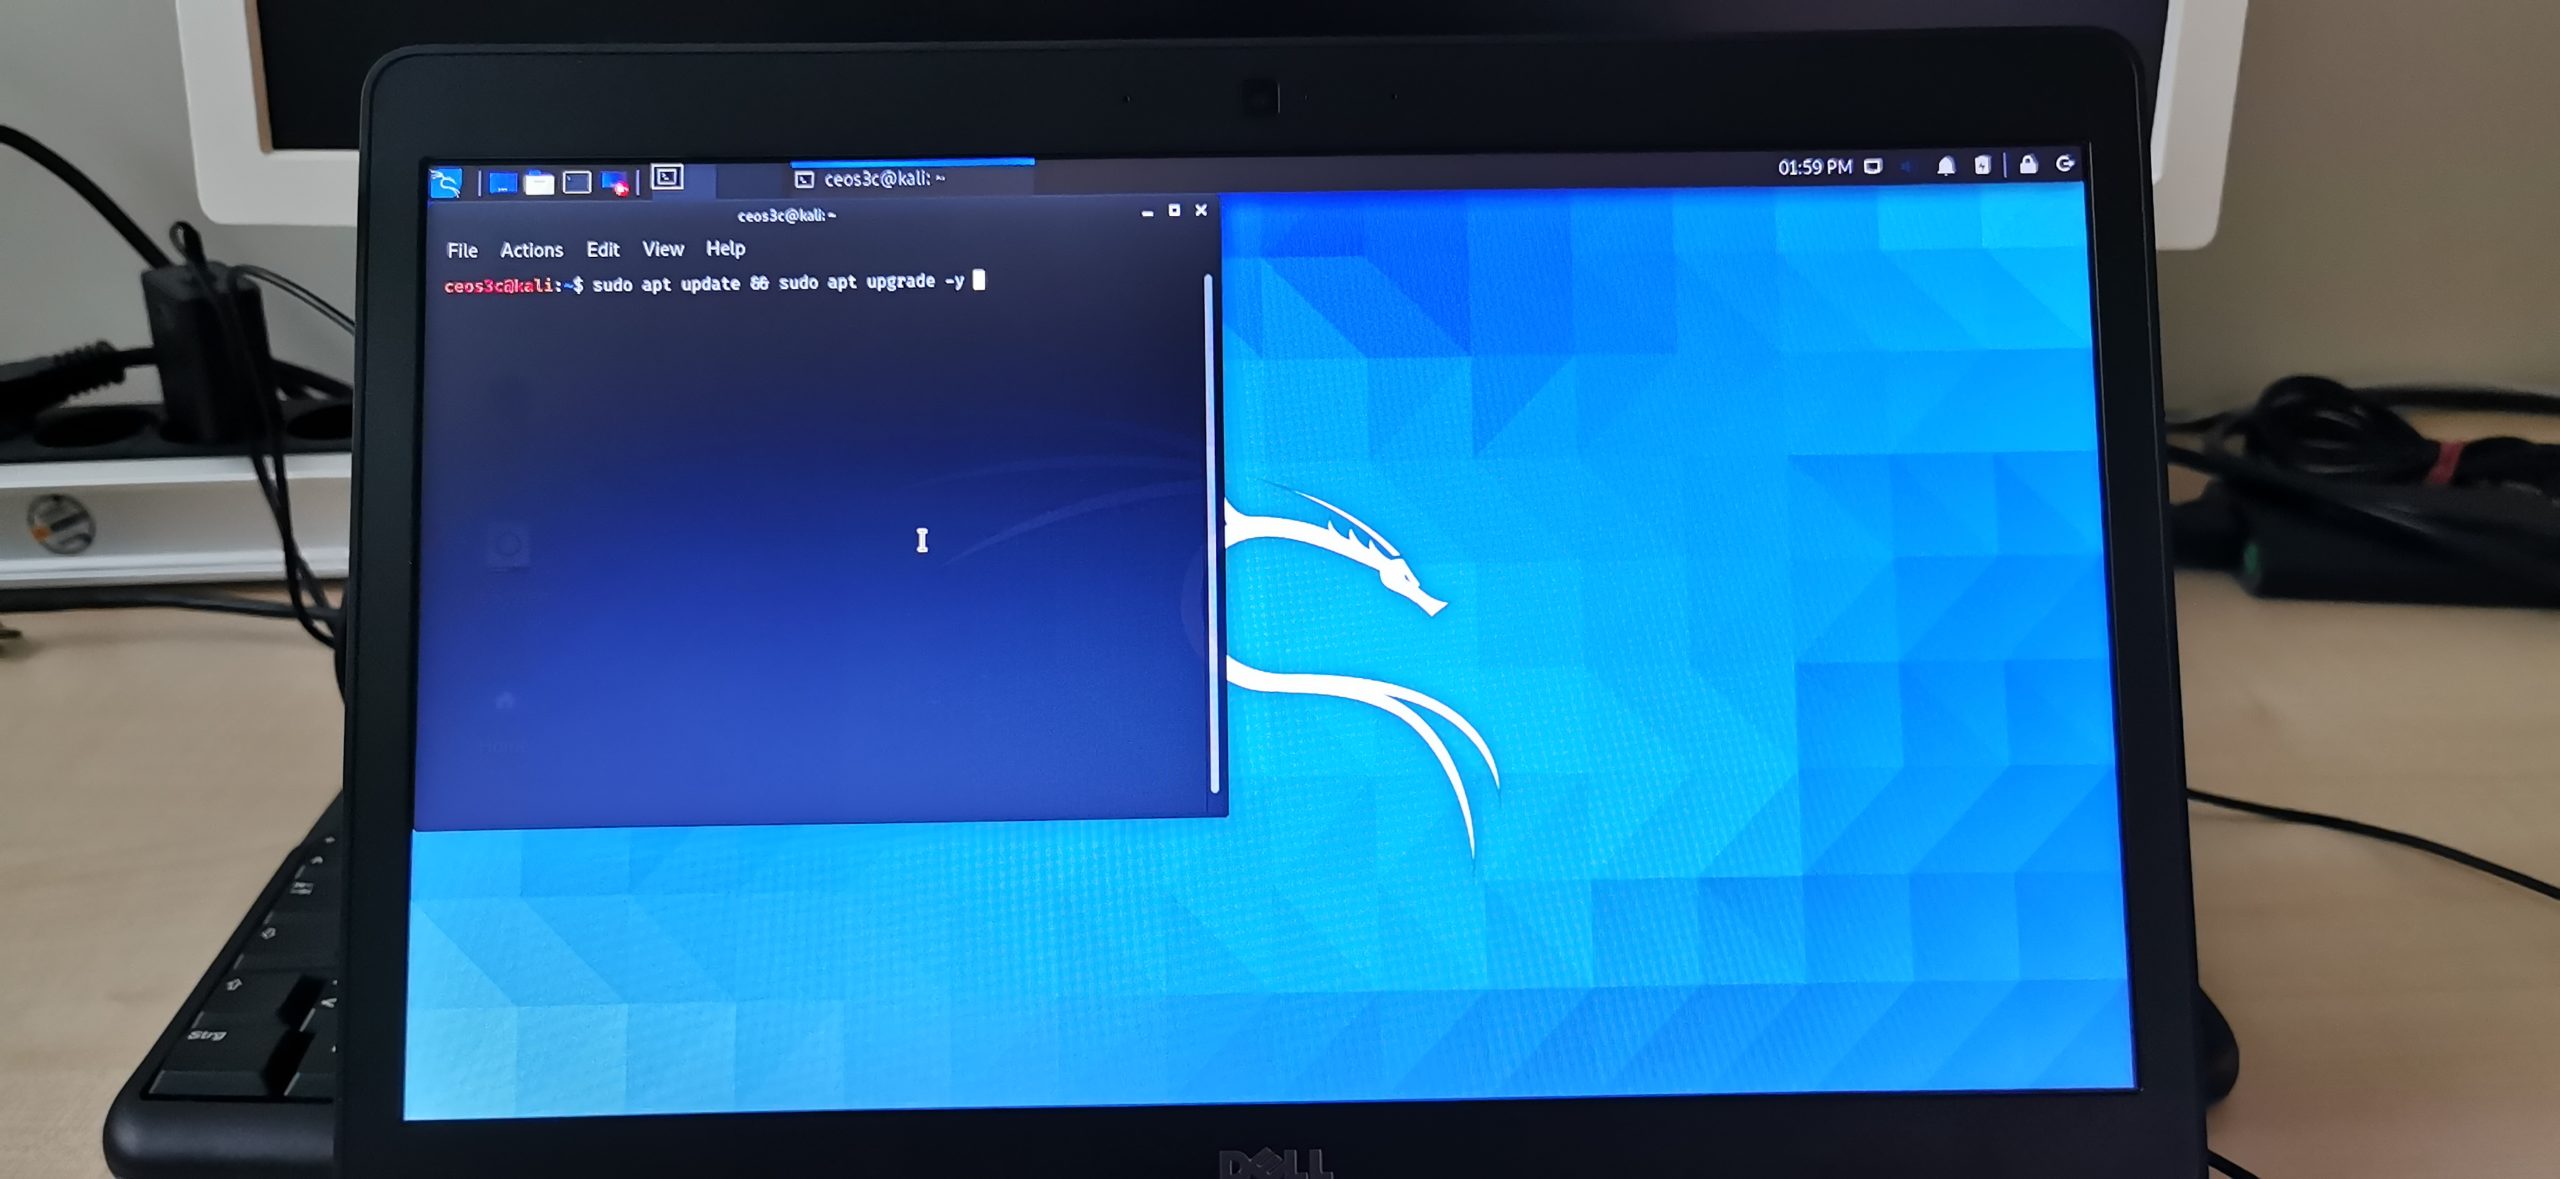
Step 7 – Updating Kali Linux
The first thing I always do on a fresh Kali install is to make sure it’s up to date, your system should have already been updated and upgraded during the installation, we’ll make sure anyway. Open a terminal window and run:
sudo apt update && sudo apt upgrade -yThis ensures your system is up to date. As mentioned before, continue here if you want to set up further tools and secure your system.
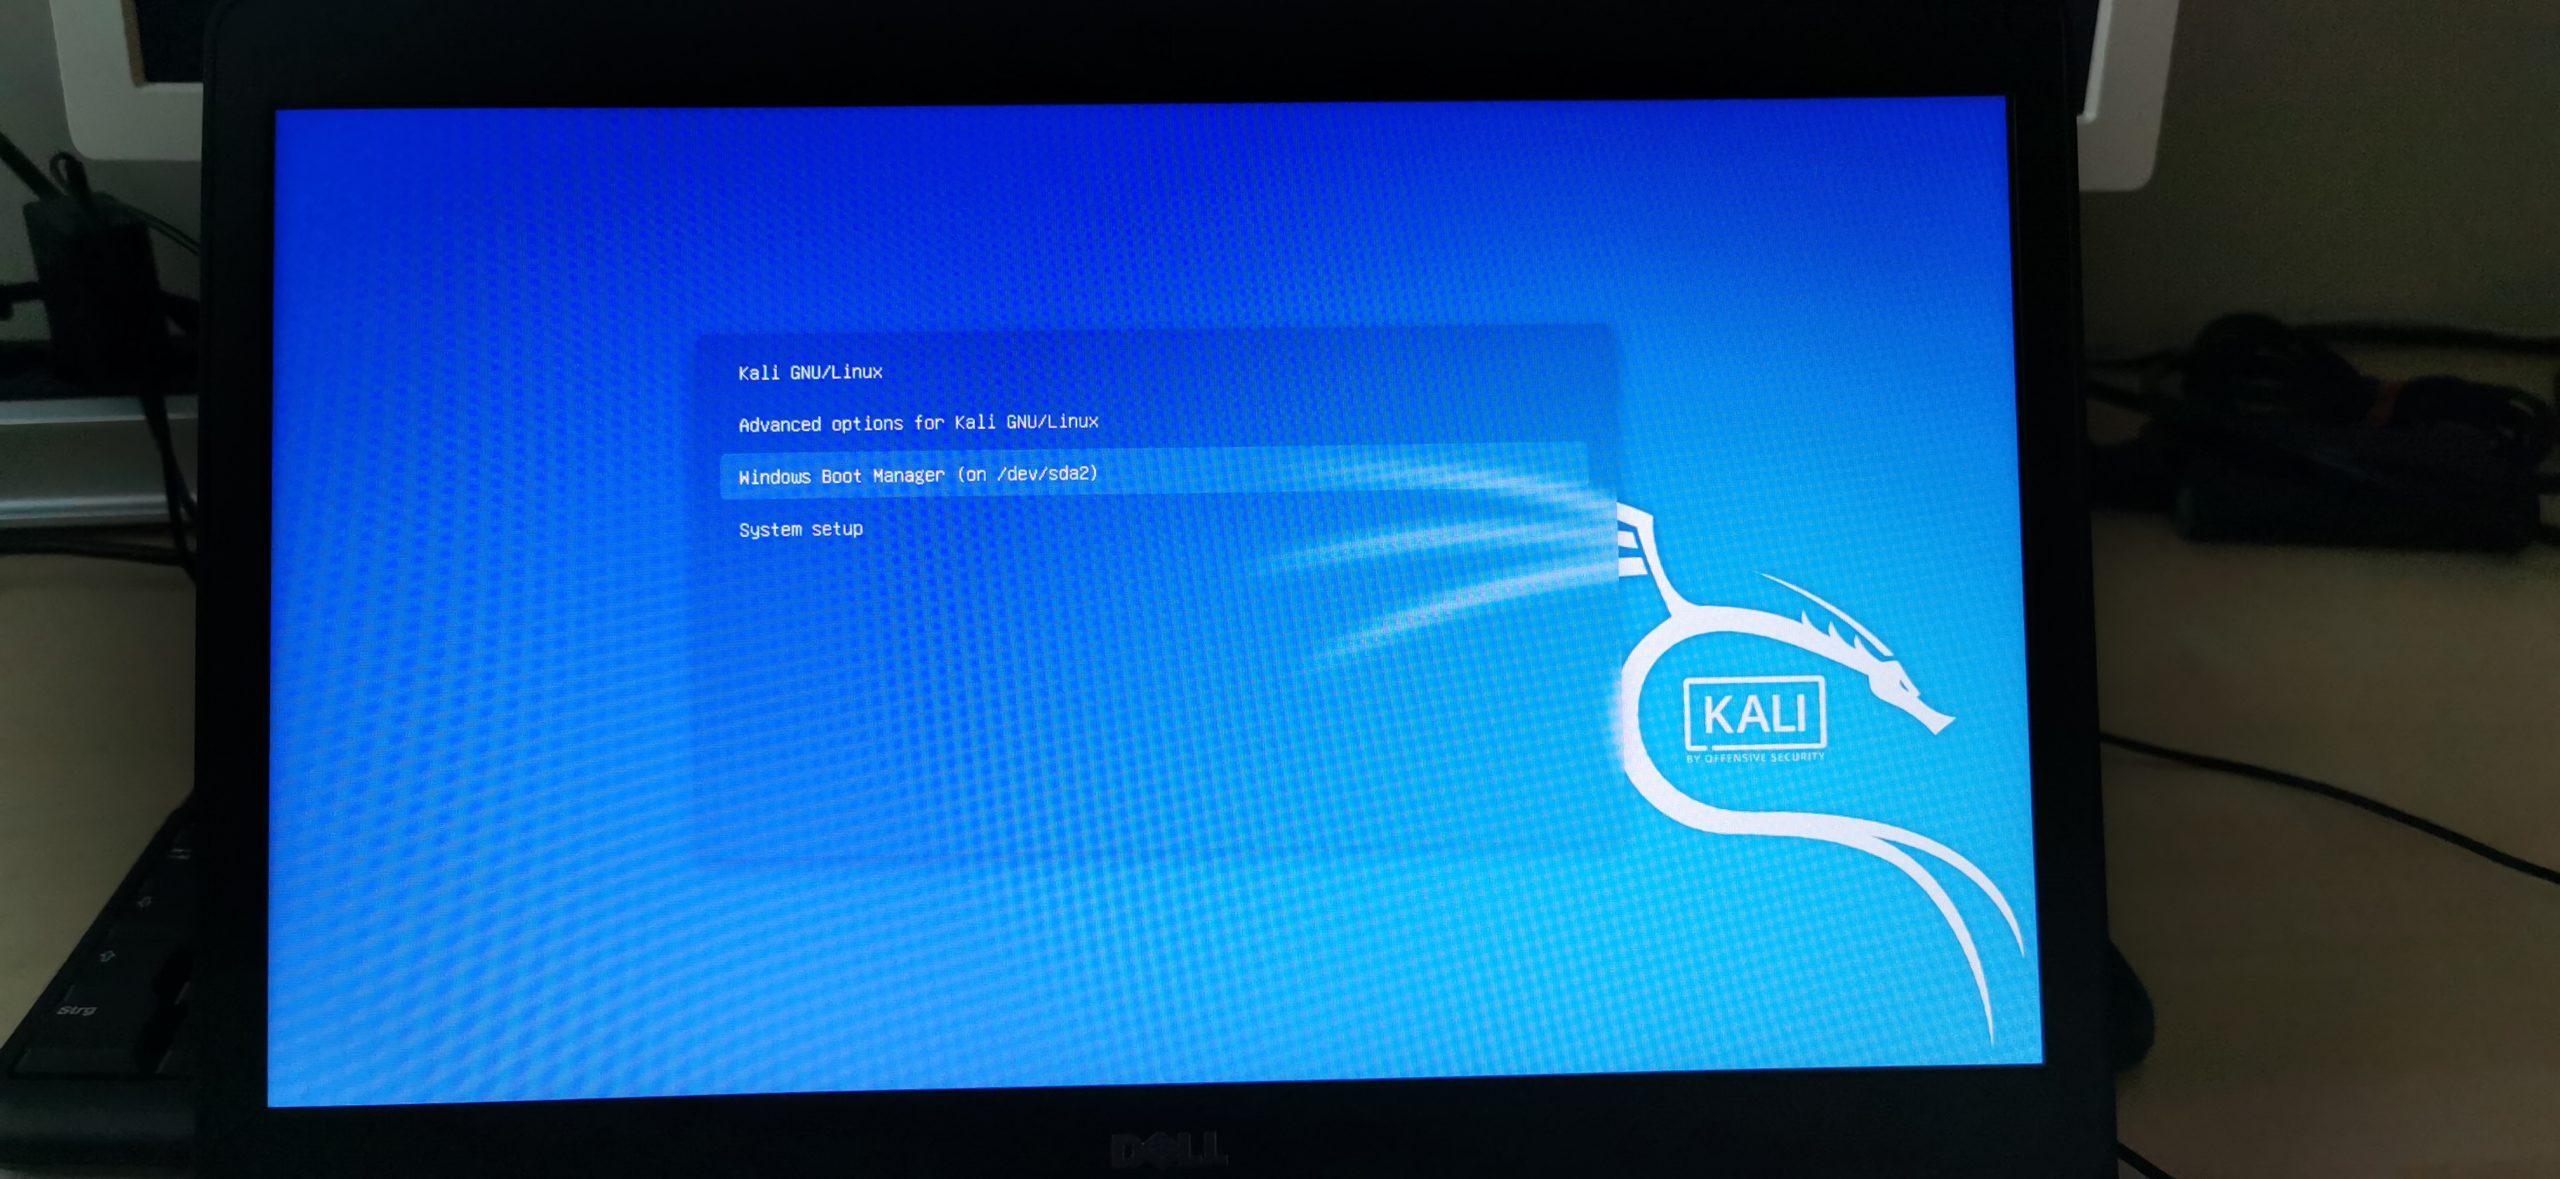
Step 8 – Booting into Windows
Either enter “sudo reboot now” in your terminal or click on the Kali Menu button and choose Logout in the lower right corner on the arrow symbol and choose Restart. Now to boot into Windows, make sure to be quick because otherwise Kali boots up again within 5 seconds of no interaction in the GRUB boot loader.
Select the Windows Boot Manager.
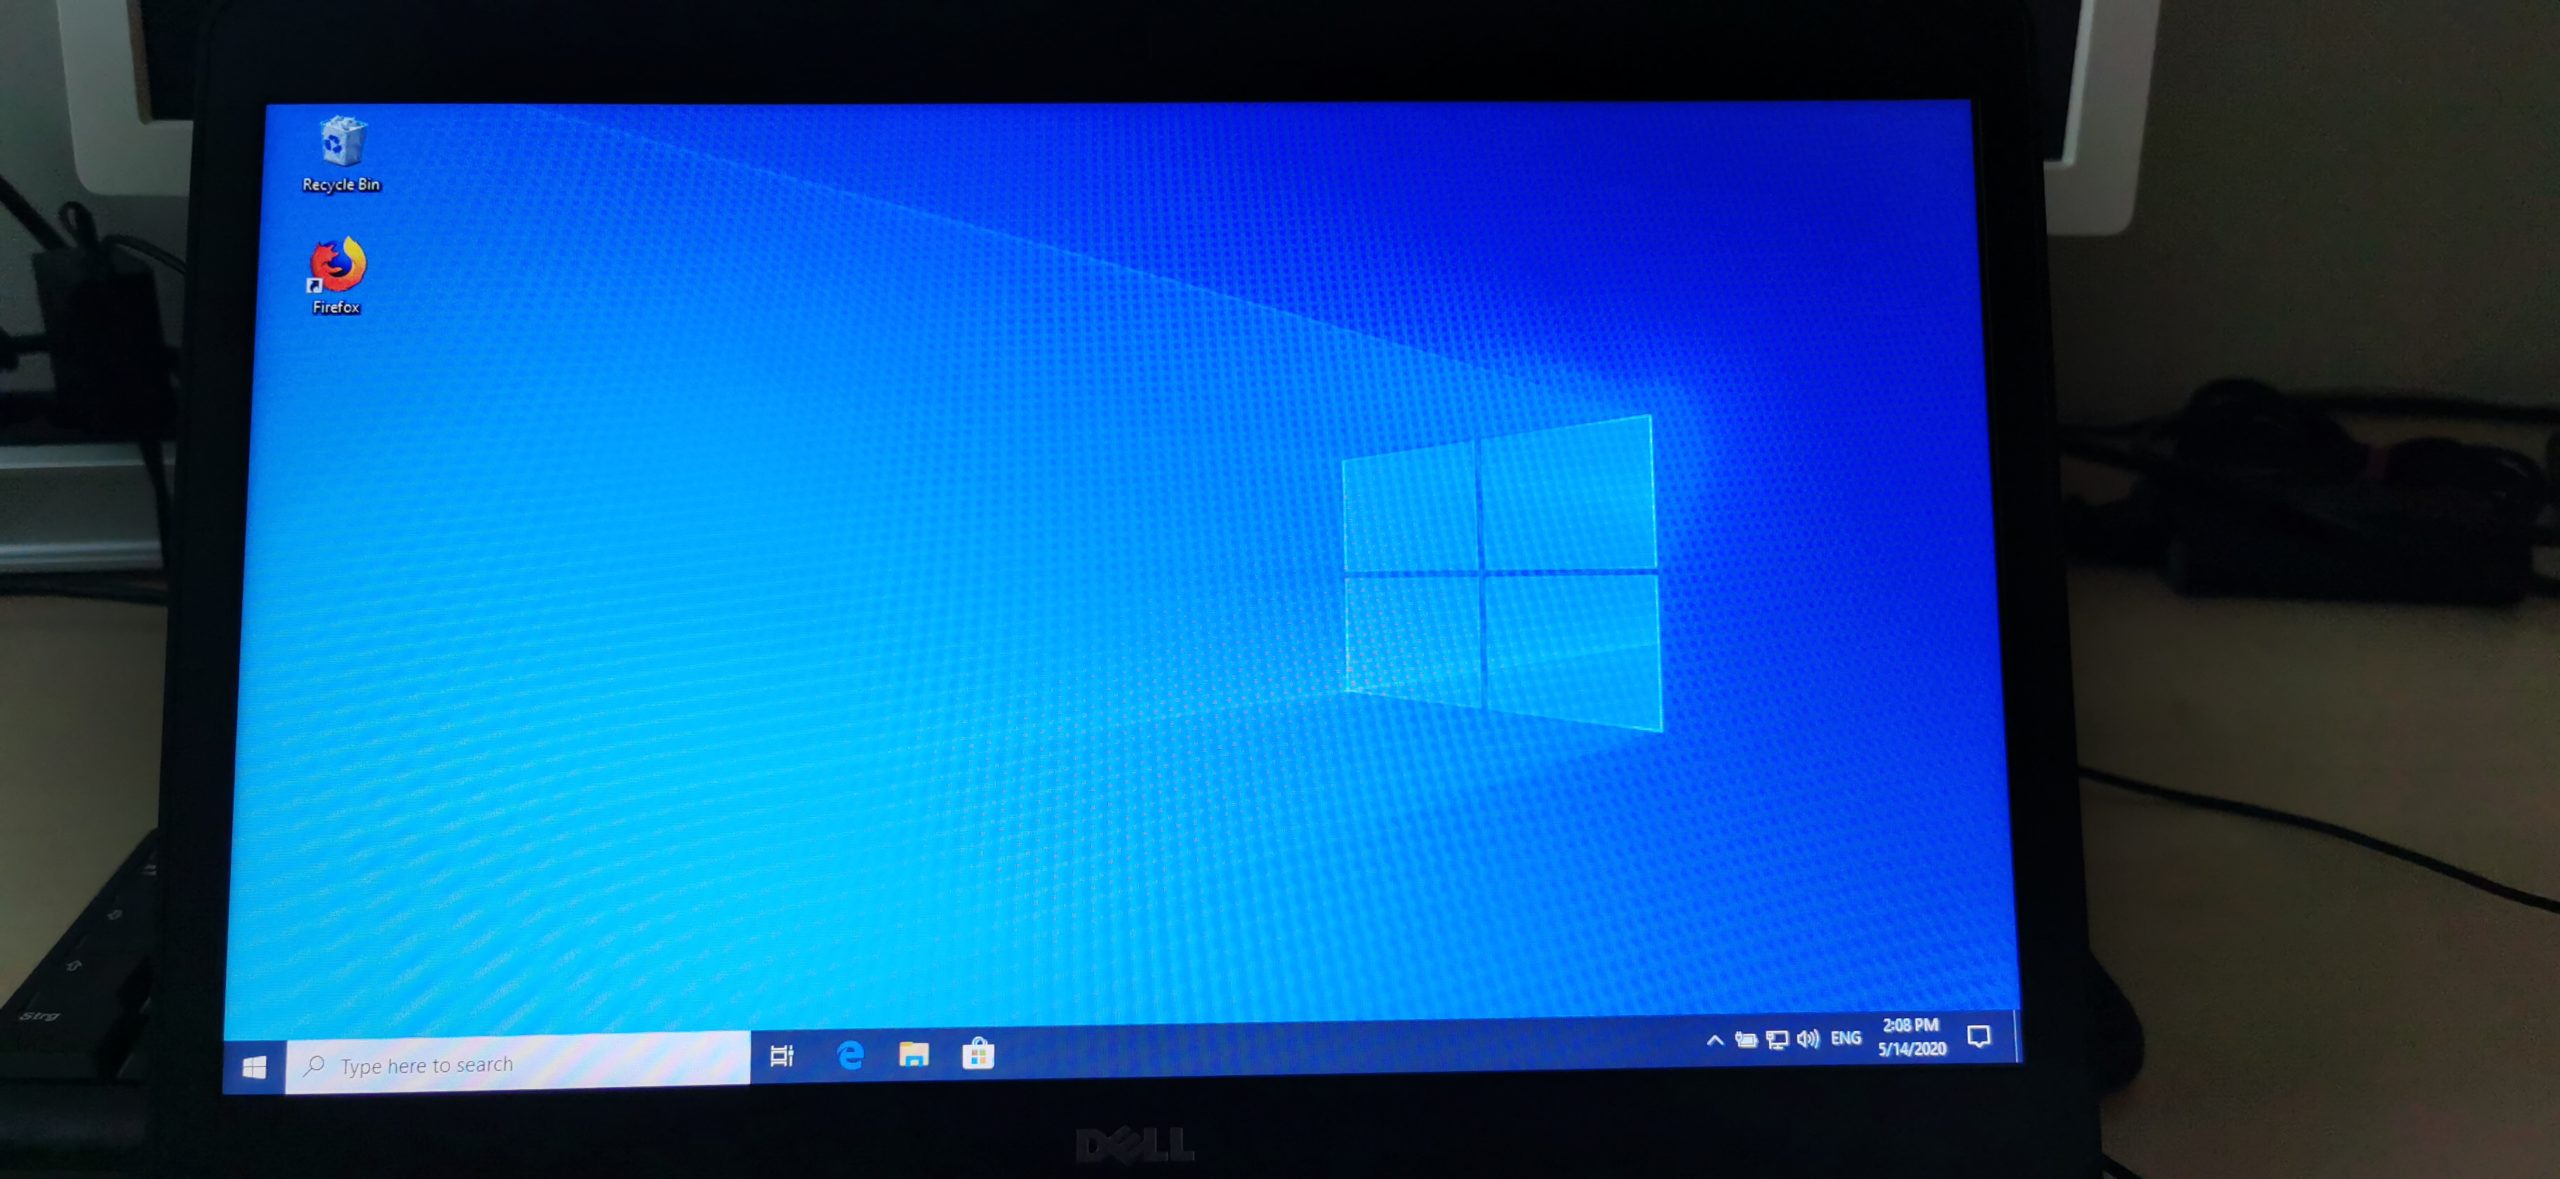
Now if you did everything correctly, you should be back in your Windows installation and you learned how to install Kali Linux in Dual Boot with Windows.
Troubleshooting
Further troubleshooting steps will be added as we go.
- My USB Drive is unusable
- It is possible that imaging your USB Drive with Kali will mess up its partitioning, rendering it unusable on Windows. You can easily fix this by following this guide I have written.
Where to go from here
This is how you install Kali Linux in Dual Boot with Windows. Congratulations! You have set yourself up with a pretty neat system!
I know, it’s a long process and when I first tried that myself I was scared too because there was no thorough guide out there on how to do it, I decided to create this one.
Below, I’ll leave a few additional resources in case you want to learn something new.
👀 This Tutorial has some related Articles!
👉 How to get started in Cyber Security – The Complete Guide
👉 How to get started with Bug Bounties
👉 Terminal Customization Series
👉 Best Ethical Hacking Books
👉 Download Kali Linux Safe & Easy
👉 Best Ethical Hacking Tools
👉 Install VSCode on Kali Linux
👉 Dual Boot Kali Linux with Windows
👉 Install Kali Linux on VirtualBox – Complete Beginner Guide
👉 Top Things to do after installing Kali Linux
👉 WiFi Adapter for Kali Linux – The Ultimate Guide
👉 Nmap Beginner Guide Series
👉 Metasploit Tutorial Series
👉 Burp Suite Beginner Guide
Dual Boot Kali Linux with Windows is a great way to have a dual OS on your computer.
Dual Boot Kali Linux with Windows is a great way to have a dual OS on your computer.
I love how you said you will not help and not responsible lmfao
….the first thing people do is ask for help lmfao
good tutorial man nicely done!!!!!
Naturally, people don’t read instructions 😀
Thank you!
Can you add, how to enable secure boot on Kali so we can let it enabled in uefi please ? Thanks
Hello. Thank you for your inspired instructions.
I have tried at great length to make this work, yet i have so far failed. The installation is complete.
When the computer boots, the BIOS displays message “[checking media] fail”, then it proceeds to boot into Windows 10.
When I enter the BIOS configuration, and try to change the order of the installed OS’s so KALI is on top, the BIOS (ignores) will not respond to the enter key to finish the configuration.
Please help. Thank you.
-Matt
Thank you so much for the useful steps. I installed the system successfully.
Cool! Thanks for letting me know!
Thank you so much for that tutorial ! works perfectly.
Just a little trouble through the Bios part, for those with old style Asus bios menu, you need to switch “boot option priorities” to have the usb as a first boot option.
also, i’m not sure if it’s needed but i enabled the “launch CSM” thing and the “launch PXE oprom policy” that appear after the CSM thing (some tutorials stated it has to be done and it worked for me).
My hard drive is not detected at step SWAP Step 2. Can someone help me please?
GRUB Boot Loader does not appear, it go directly to windows.can anyone help my ?
Is it possible to run Kali Linux with Windows Boot Manager without installing GRUB2?
My question is that I had a problem with running Kali Linux after updating Win10 v2004. Windows has corrupted GRUB bootloader and probably Kali Linux partition table because I couldn’t recover it. Fortunately I had backup. I don’t want the problem to repeat itself after every major Windows update.
Hi, you mentioned that during installation, we should type the swap size according to the memory size (RAM), but what if I changed my RAM and upgraded my memory size? What should I do then? Should I just leave it like that or somethings needed to be changed? Than you!
Hey! got a tough question
After the instalation of grub loader starts, I get an error massege saying “failed to load grub-dummy”
I tried many methods, but nothing seems to work
wireless option isn’t shown while installing, is there any solution? My laptop model is Lenovo G40-80.
this was the most accurate and hands-on guide ever created. currently running both kali linux 2020.2 and windows 10 via dual boot on my asus rog gl553vd. many thanks bro.
Thank you!
My kali linux is freezing randomly after logging in.. The mouse key only moves but im not able to click anybthing