
It’s about time to move on with our pfSense tutorial series. This time we will cover: How to install Squid on pfSense and set up ClamAV on pfSense!
Squid is a powerful proxy server that helps you keep your network traffic low by caching data locally from web pages you were visiting. For example, if you just visited arstechnica.com and 5 minutes later one of your colleagues visits arstechnica too, he will get the previously cached version of it, hence it’s saving you bandwidth. Of course, if there was anything new released on the web page in the meanwhile he will get that new information directly from the web, but you get the idea.
In this guide, we will install a non-transparent proxy. If you want to install a transparent proxy, just tick Transparent HTTP Proxy and Bypass Proxy for Private Address Destination in the process.
So let’s dive right into how to install Squid on pfSense!
Table of Contents
- Step 1 – Install Squid on pfSense and configuration
- Step 2 – Create a Firewall rule for Squid Proxy Server
- Step 3 – Setting the Proxy Server on your System
- Step 4 – Configure ClamAV on pfSense
- Conclusion
👀 This Tutorial has some related Articles!
👉 The Complete pfSense Fundamentals Bootcamp
👉 Install pfSense from USB – The Complete Guide
👉 Install pfSense on VirtualBox
👉 The Complete pfSense OpenVPN Guide
👉 The Complete pfSense DMZ Guide
👉 Generate SSL Certificates for HTTPS with pfSense
👉 The Complete pfSense Squid Proxy Guide (with ClamAV!)
👉 pfSense Site-to-Site VPN Guide
👉 pfSense Domain Overrides Made Easy
👉 pfSense Strict NAT (PS4,PS5,Xbox,PC) Solution
👉 The Best pfSense Hardware
👉 Traffic Shaping VOIP with pfSense
👉 pfSense OpenVPN on Linux – Setup Guide
👉 pfSense Firewall Rule Aliases Explained
👉 Email Notifications with pfSense
👉 pfSense DNS Server Guide
Step 1 – Install Squid on pfSense and configuration
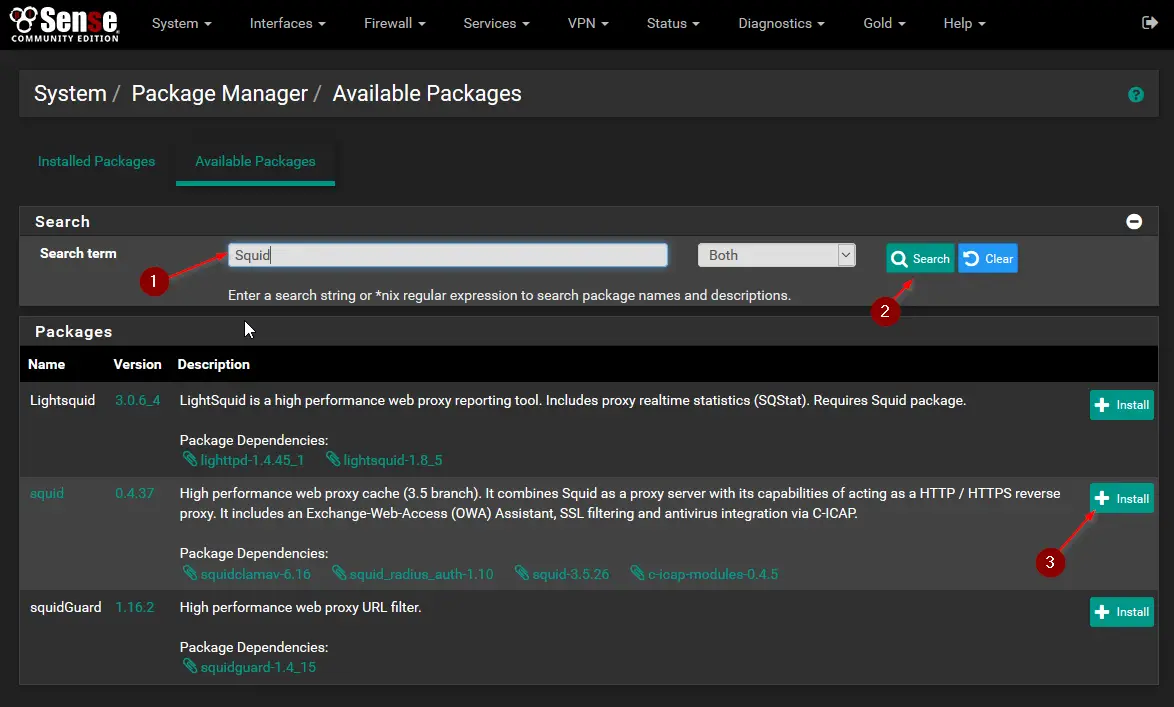
To install Squid on pfSense, log in to your pfSense firewall and navigate to System / Package Manager / Available Packages
- Enter Squid as a search term
- Click on Search
- Click on Install next to Squid Proxy
To be able to fully install Squid on pfSense, we need to set the Local Cache size first.
Navigate to Services / Squid Proxy Server / Local Cache

Configure the Hard Disk Cache Size to your liking and also according to your available hard drive space. You don’t necessarily want to dedicate 90% of your hard drive space to Squid.
I got a 25GB SSD and dedicated 3000 MB for a start. Start low and if you run full, increase or clear the disk cache once in a while.
For Maximum Object Size, I went with 10 MB but you can leave it on the default 4 MB if you want. The lower this value, the higher the speed, the bigger the value, the more bandwidth you safe.
- Increase Hard Disk Cache Size according to your hard drive size (Shoot for around 25%)
- Set the Maximum Object Size to 10 MB or leave it as the default

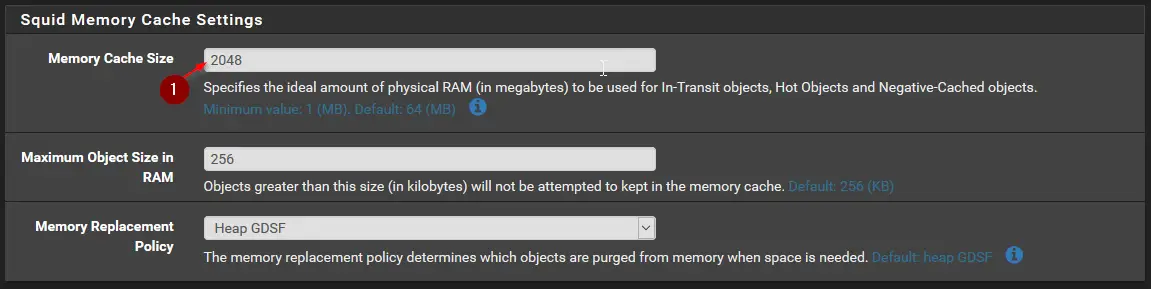
Next, we configure the Memory Cache Settings.
This setting can significantly increase your speed, but it should not surpass 50% of your total memory.
I got 8 GB of RAM on my box so I dedicated 2048MB. You can adjust this value accordingly. Shoot for around 25% of your total memory.
- Adjust Memory Cache Size
- Scroll down to the bottom and click Save
Navigate back to Services / Squid Proxy Server / General
- Tick Enable Squid Proxy, scroll to the bottom and click Save

Step 2 – Create a Firewall rule for Squid Proxy Server
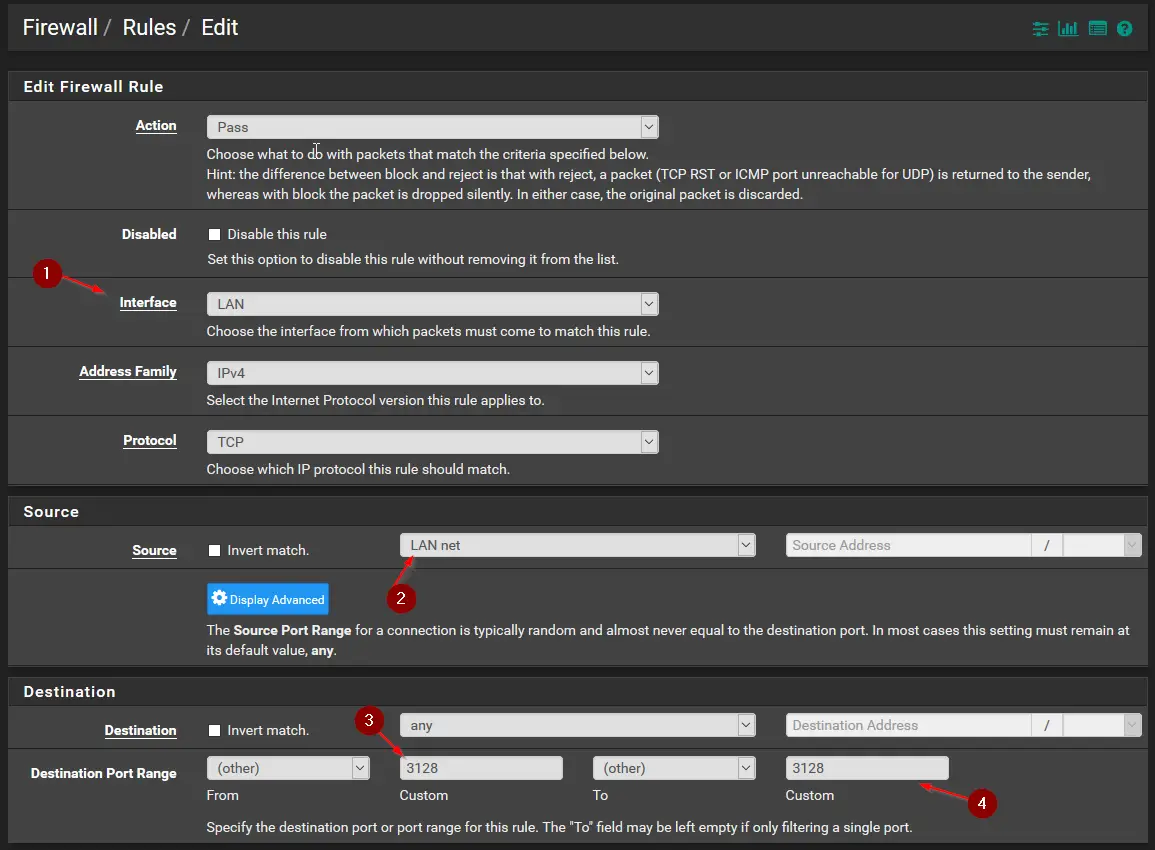
Now we need to add a quick Firewall Rule to your LAN Network.
Navigate to Firewall / Rules / LAN and click on add.
- Interface: LAN
- Source: LAN Net
- From Destination 3128(TCP)
- To Destination 3128(TCP)
Step 3 – Setting the Proxy Server on your System
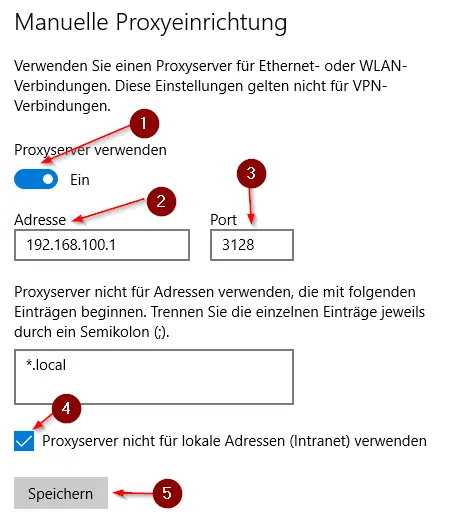
You can set up a system-wide proxy on Windows 10 by hitting the Windows Button and typing: Proxy
My locale is German but you should get the point.
I prefer the second method described below, where we just use the proxy inside of our Web Browser, so feel free to skip this step.
- Switch on Proxy
- Enter IP of your pfSense Firewall
- Enter port 3128
- Check box to not use proxy for local addresses
Alternatively, you can set the proxy in the browser of your choice only. For Firefox, open the preferences and search for Proxy. Click on Settings next to it. This is my preferred method.
- Set setting to Manual proxy configuration
- Enter pfSense IP Address
- Tick “Also use this porxy for FTP and HTTPS”
- Enter pfSense Subnet Address to “No proxy for” field
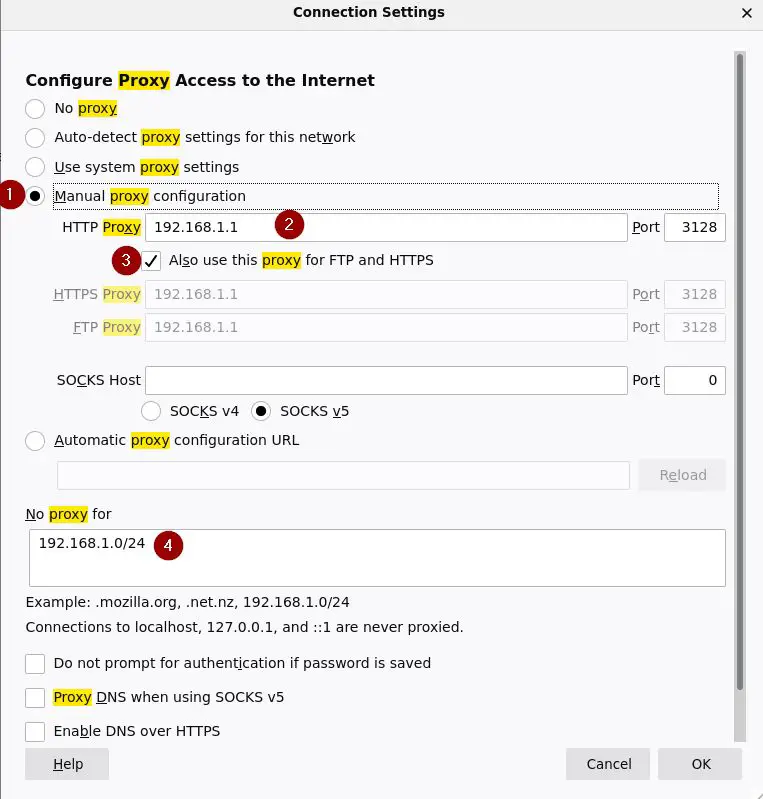
Now you will only use the pfSense Proxy inside of your Web Browser.
⚠️ If you would like to learn more about pfSense, I highly recommend you check out my pfSense Fundamentals Bootcamp over at Udemy. This is the most up-to-date as well as the highest-rated pfSense course on Udemy.
Step 4 – Configure ClamAV on pfSense
Now we are already at the last step: Activating ClamAV.
Disclaimer: I’ve experienced issues with ClamAV in the latest version of pfSense (2.5.2) and do not recommend using ClamAV as of this moment. The ClamAV service kept crashing for me. If you want to try and see if it works for you anyway, follow the steps below.
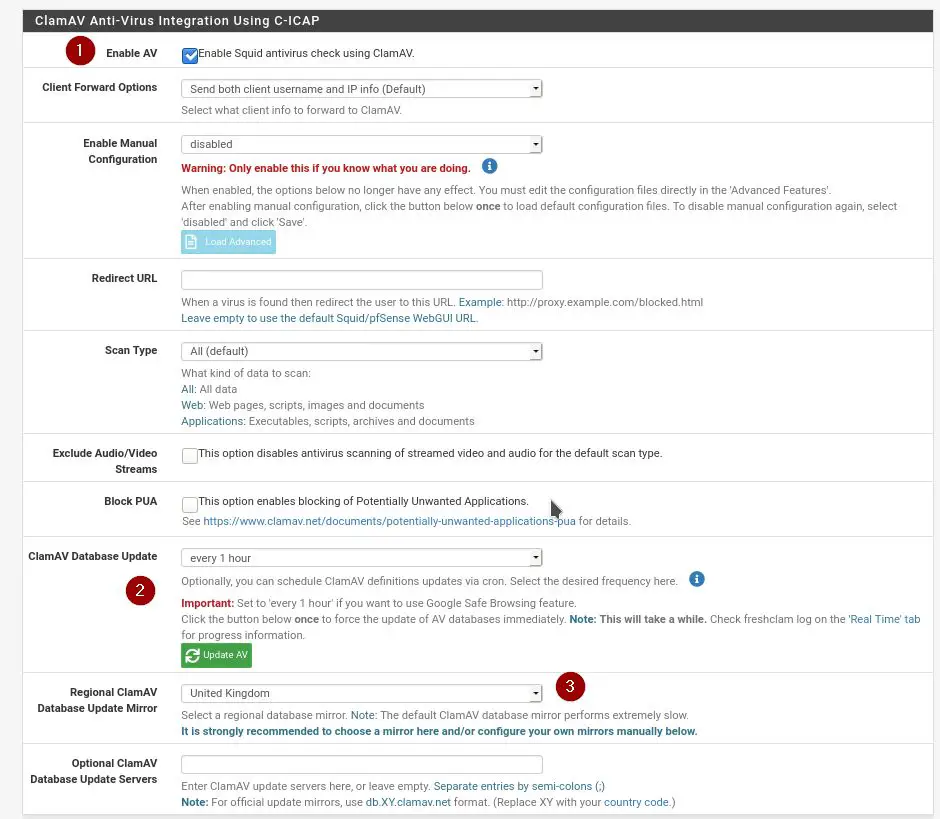
Head back to your pfSense Firewall and Navigate to Services / Squid Proxy Server / Antivirus
- Tick Enable AV
- Set ClamAV Database Update to “every 1 hour” to enable Google Safe Browsing
- Set the ClamAV Update Server to your closest location
- Scroll to the bottom and hit SAVE
Now go ahead and reboot your pfSense Firewall: Diagnostics -> Reboot -> Normal Reboot.
I had to reboot the firewall to make it work, there was a permission issue with ClamAV without a reboot.
Once rebooted, navigate back to Services / Squid Proxy Server / Antivirus and click that Update AV Button next to ClamAV Database Update. This should get the manual update going.
At last, Navigate to Status / Services and make sure that:
- c-icap
- clamd
- squid
Services are running.
Now you should be all set up.
I experienced this behavior several times before. If you have problems accessing HTTPS sites head to Services / Squid Proxy Server / General and tick: Resolve DNS IPv4 First.
If you would also like to learn how to install OpenVPN on pfSense, follow my complete beginner guide here.
Conclusion
After following this guide, you should be able to install squid on pfSense. Squid and ClamAV is a great combination of tools to make your pfSense firewall even better. If you want, check out some of the related articles below!
👀 This Tutorial has some related Articles!
👉 The Complete pfSense Fundamentals Bootcamp
👉 Install pfSense from USB – The Complete Guide
👉 Install pfSense on VirtualBox
👉 The Complete pfSense OpenVPN Guide
👉 The Complete pfSense DMZ Guide
👉 Generate SSL Certificates for HTTPS with pfSense
👉 The Complete pfSense Squid Proxy Guide (with ClamAV!)
👉 pfSense Site-to-Site VPN Guide
👉 pfSense Domain Overrides Made Easy
👉 pfSense Strict NAT (PS4,PS5,Xbox,PC) Solution
👉 The Best pfSense Hardware
👉 Traffic Shaping VOIP with pfSense
👉 pfSense OpenVPN on Linux – Setup Guide
👉 pfSense Firewall Rule Aliases Explained
👉 Email Notifications with pfSense
👉 pfSense DNS Server Guide
Does it work with the newest pfsense version?
It should.
Followed your guide… After hitting “Save” on step 4 I’m getting an icap error!
Please help
You don’t to SSL filtering? I’m not getting that to work very well. Everything works, but it’s painfully slow.
Is CalmAV working now, wasn’t enough stable when I tried it in early builds of 2.3.