
I will show you how to set up your pfSense DMZ step-by-step and explain what is important. A DMZ is usually created if you want a more restrictive outside-facing part of your network that is separated from your internal network. A Web server would be a good example of this. You want the Web server to be reachable from the Internet, but you don’t want anyone from the Internet to be able to also access your internal network.
For this tutorial, we are using our lab pfSense running on VirtualBox. The firewall has 3 interfaces. One will be our WAN, one our LAN, and one our DMZ interface.
Table of Contents
- Requirements
- Step 1 – Creating a DMZ interface
- Step 2 – Enabling DHCP on the DMZ interface
- Step 3 – Configuring Firewall Rules
- Conclusion pfSense DMZ
👀 This Tutorial has some related Articles!
👉 The Complete pfSense Fundamentals Bootcamp
👉 Install pfSense from USB – The Complete Guide
👉 Install pfSense on VirtualBox
👉 The Complete pfSense OpenVPN Guide
👉 The Complete pfSense DMZ Guide
👉 Generate SSL Certificates for HTTPS with pfSense
👉 The Complete pfSense Squid Proxy Guide (with ClamAV!)
👉 pfSense Site-to-Site VPN Guide
👉 pfSense Domain Overrides Made Easy
👉 pfSense Strict NAT (PS4,PS5,Xbox,PC) Solution
👉 The Best pfSense Hardware
👉 Traffic Shaping VOIP with pfSense
👉 pfSense OpenVPN on Linux – Setup Guide
👉 pfSense Firewall Rule Aliases Explained
👉 Email Notifications with pfSense
👉 pfSense DNS Server Guide
Requirements
If you are using VirtualBox to follow this tutorial, your settings should look like this:
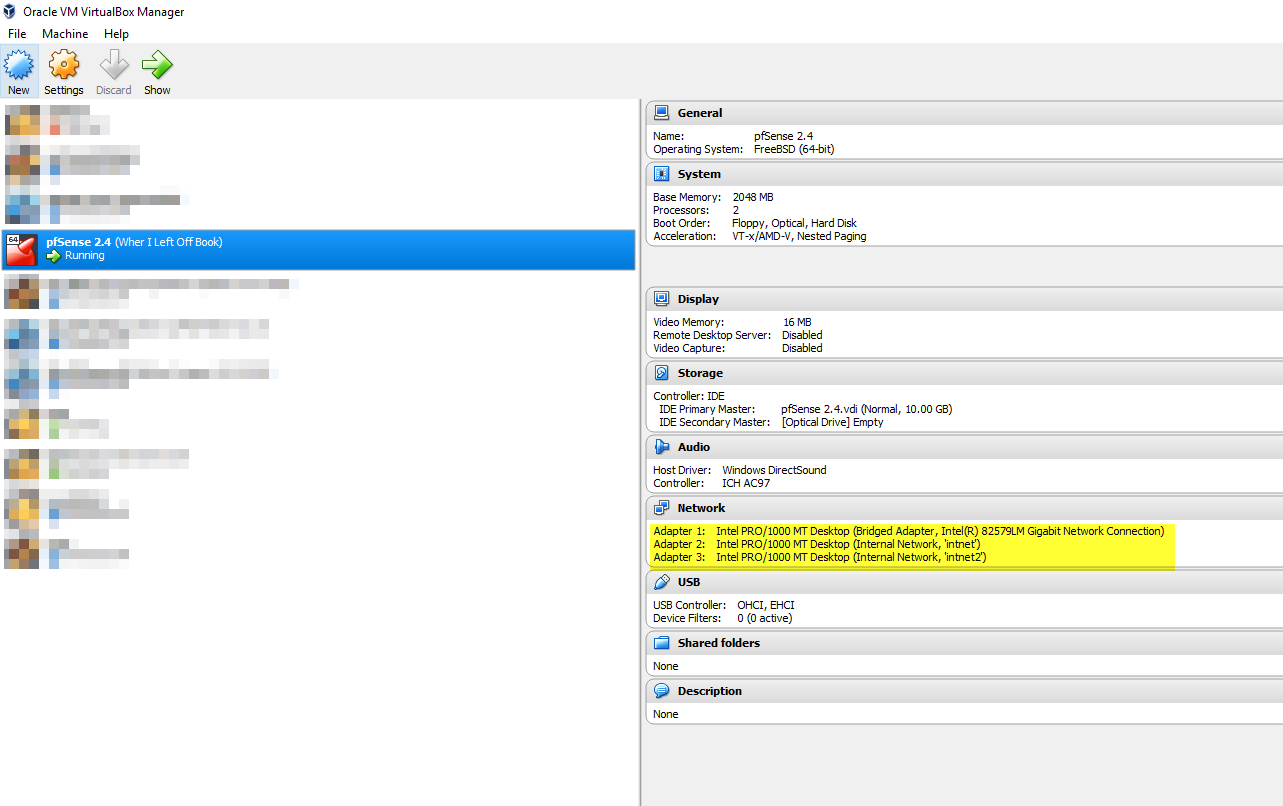
You should have one Interface set as Bridged to simulate your WAN, one in intnet1 and one in intnet2. To create a new intnet, just type in the name field after choosing Internal Network and it will be created. So let’s put it together:
- Bridged Interface – Our WAN
- Internal Network ‘intnet’ – Our LAN
- Internal Network ‘intnet2’ – Our DMZ
Naturally, you need 2 additional VMs to test everything, one connected to intnet and one to intnet2. You could use Ubuntu for that purpose. If you are running a physical pfSense appliance, you naturally also need at least 3 network interfaces to create a DMZ.
Step 1 – Creating a DMZ interface
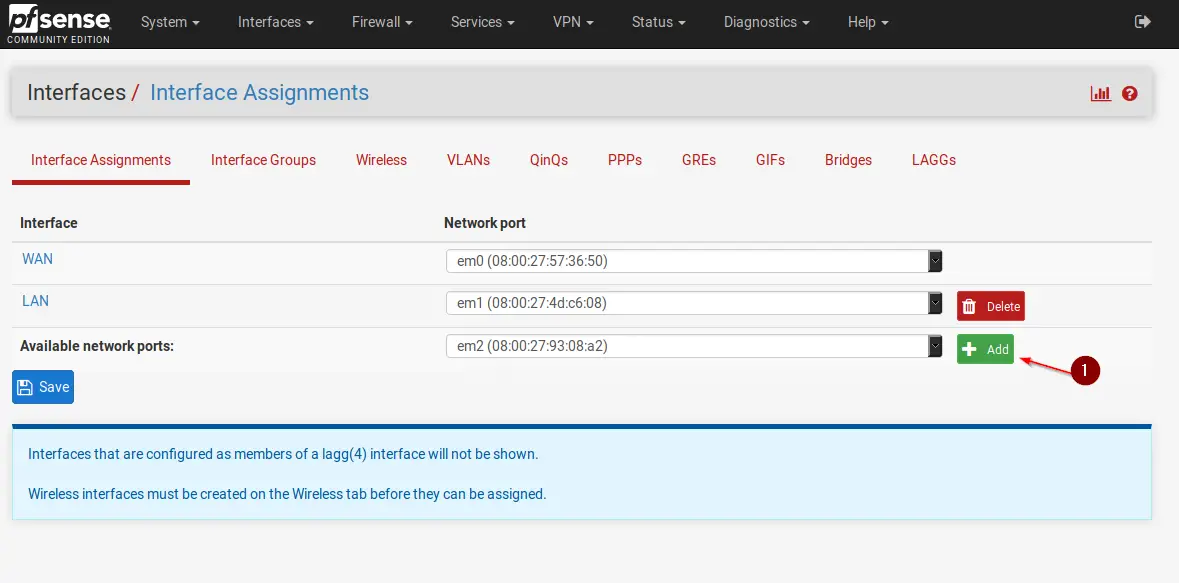
Login to your pfSense dashboard and navigate to Interfaces -> Assignments. If you followed my recommendation of creating 3 interfaces in VirtualBox, you should see something along those lines. Click on +Add to add our DMZ interface.
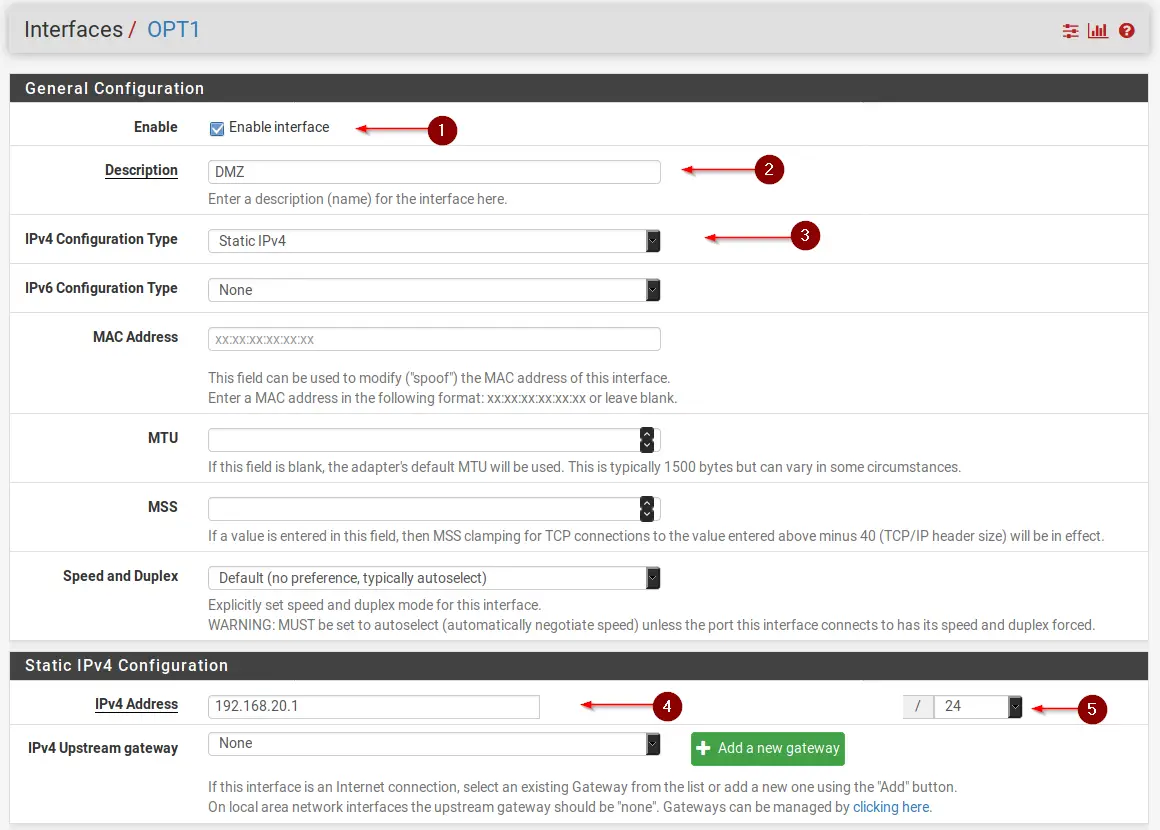
Click on Save after the OPT1 interface was created and click on OPT1 to configure it.
- Check Enable interface
- Change the interface name to DMZ
- Select Static IPv4
- Set whatever IP Address you want
- Assign a Subnet Mask
- Click on Save
- Click on Apply Changes
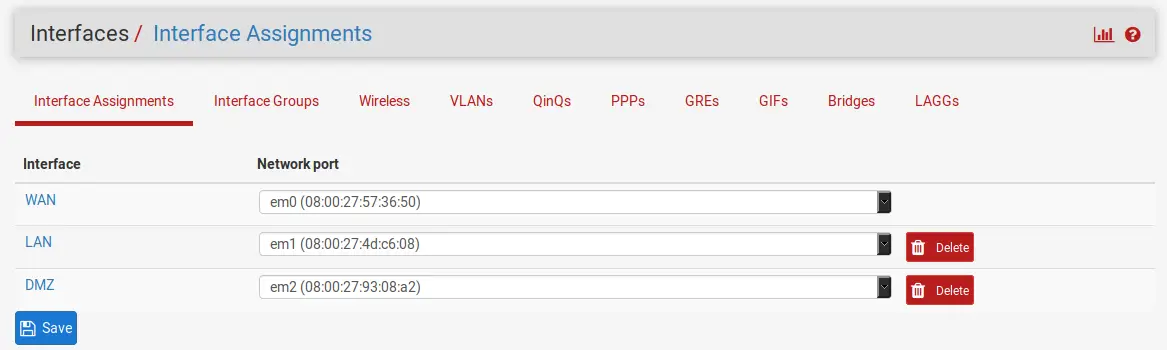
Back on Interfaces -> Assignments, we can now see that the DMZ interface was created.
⚠️ If you would like to learn more about pfSense, I highly recommend you check out my pfSense Fundamentals Bootcamp over at Udemy. This is the most up-to-date as well as the highest-rated pfSense course on Udemy.
Step 2 – Enabling DHCP on the DMZ interface
Now, this is somewhat optional, as it depends on if you need DHCP on your DMZ or if all your devices have a static IP. For our example, we are going to use DHCP.
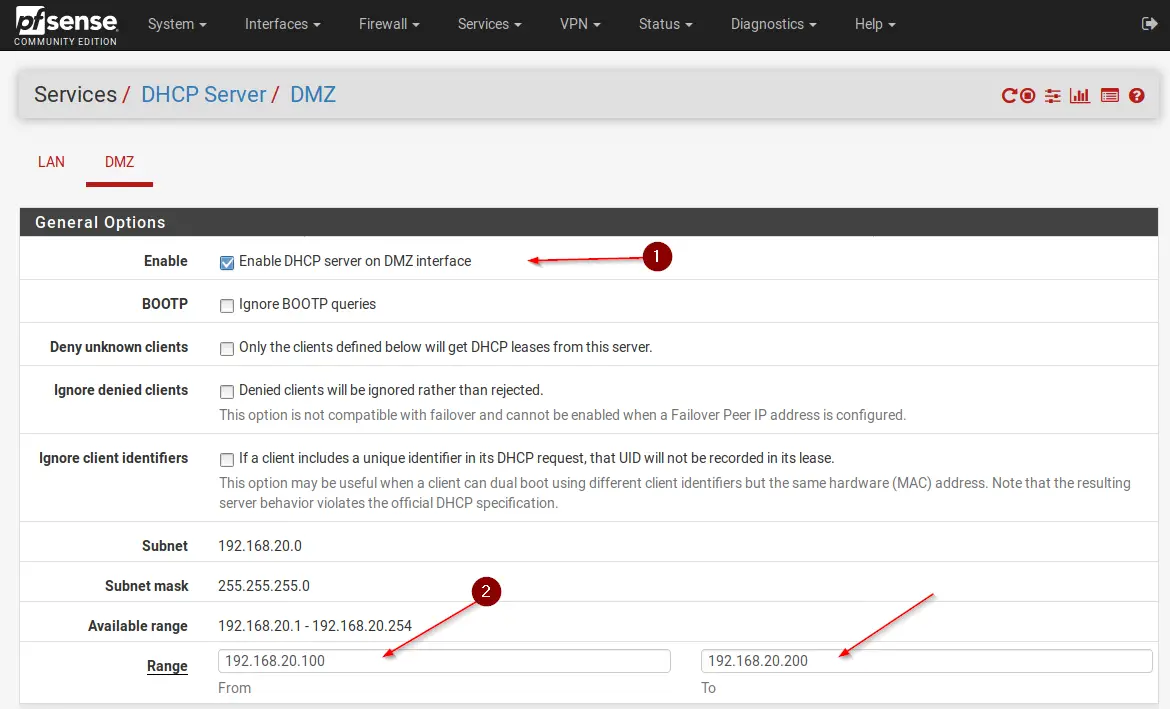
Navigate to Services -> DHCP Server and select the DMZ Interface.
- Check Enable DHCP server on DMZ interface
- Set a DHCP Range
- Click Save on the bottom
Alright, now that we have that setup, we can go ahead and adjust the firewall rules.
Step 3 – Configuring Firewall Rules
When you create a new interface, it always comes without any rules, meaning all traffic is blocked by default.
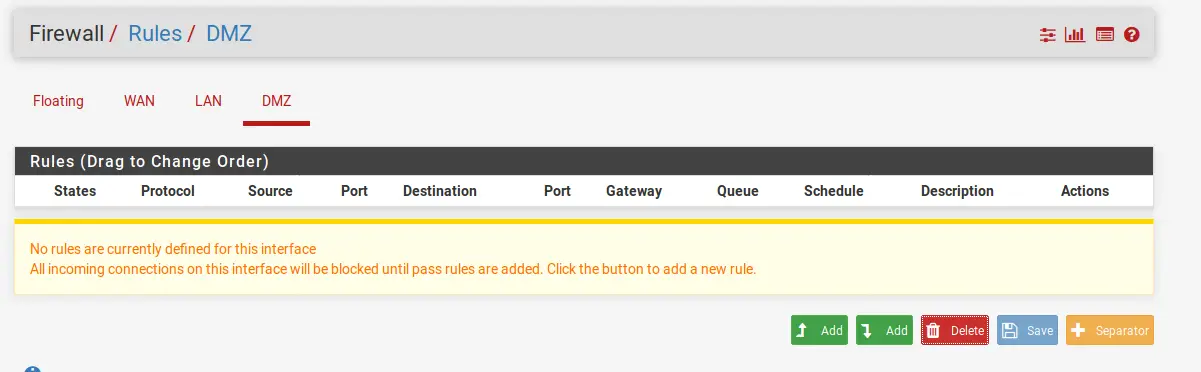
We can verify this by trying to ping google from the VM on intnet2(DMZ). Naturally, the ping will fail because both, DNS and ICMP are blocked.
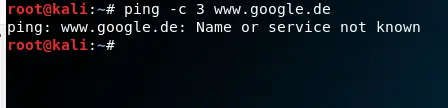
This means, that nothing will get In or Out of your DMZ.
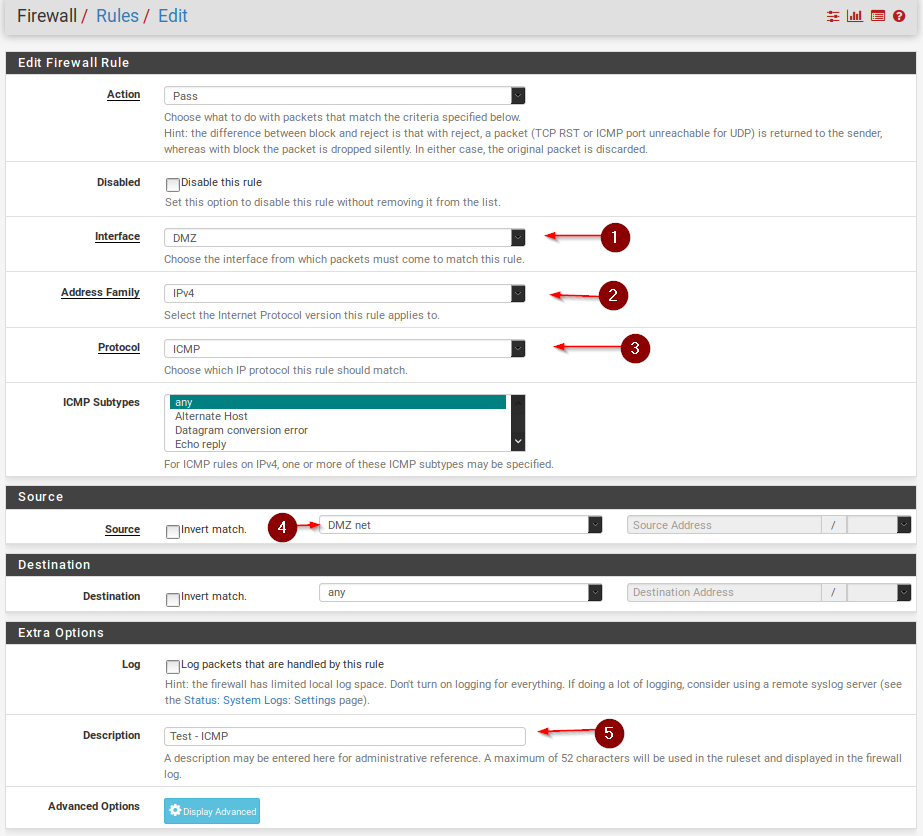
To verify this, we can go ahead and create 2 Firewall Rules – One for DNS and one for ICMP(Ping).
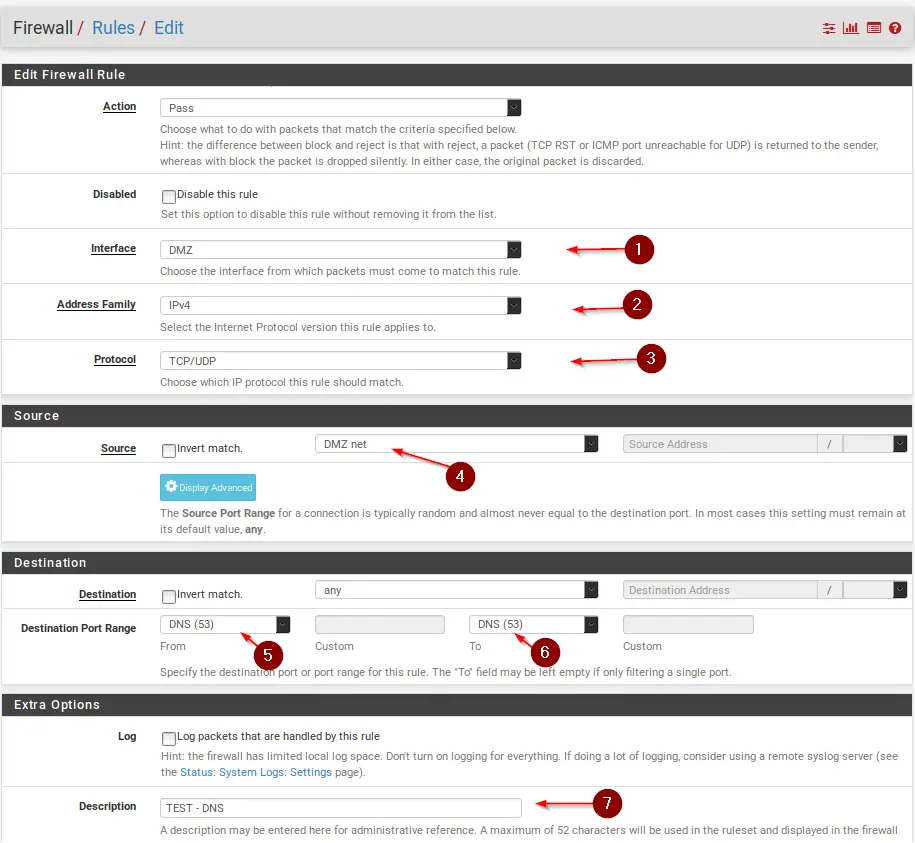
Under Firewall -> Rules -> DMZ click on Add (Arrow Up) to create a new rule.
Click on Add again to create the DNS rule.
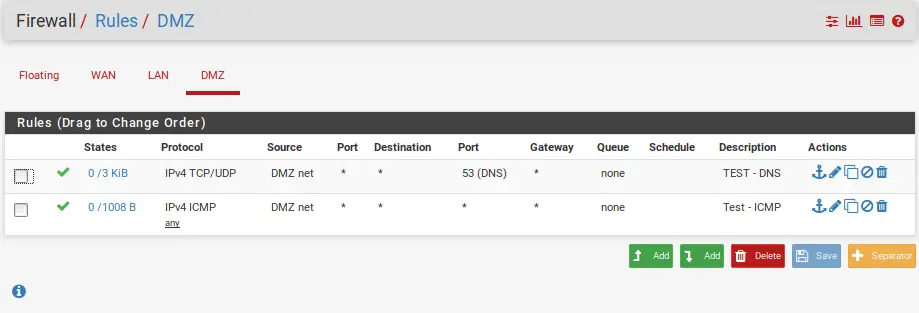
And finally, let’s verify our rules.
Let’s go ahead and try to ping Google once more from our DMZ VM.
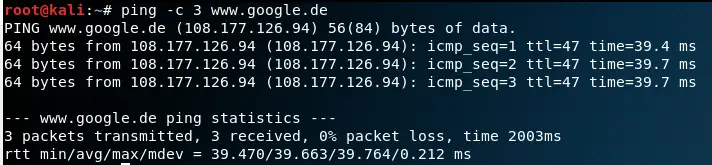
And sure enough, we get a reply from Google.
Conclusion pfSense DMZ
This should give you a good idea of how you can create a DMZ and how to work with Firewall Rules to block and allow traffic. There will be a separate tutorial on how to work with Aliases and Firewall rules to make it easier to keep a better overview of everything. A DMZ is essential if you want to make something on your network accessible from the Internet, for security’s sake.
👀 This Tutorial has some related Articles!
👉 The Complete pfSense Fundamentals Bootcamp
👉 Install pfSense from USB – The Complete Guide
👉 Install pfSense on VirtualBox
👉 The Complete pfSense OpenVPN Guide
👉 The Complete pfSense DMZ Guide
👉 Generate SSL Certificates for HTTPS with pfSense
👉 The Complete pfSense Squid Proxy Guide (with ClamAV!)
👉 pfSense Site-to-Site VPN Guide
👉 pfSense Domain Overrides Made Easy
👉 pfSense Strict NAT (PS4,PS5,Xbox,PC) Solution
👉 The Best pfSense Hardware
👉 Traffic Shaping VOIP with pfSense
👉 pfSense OpenVPN on Linux – Setup Guide
👉 pfSense Firewall Rule Aliases Explained
👉 Email Notifications with pfSense
👉 pfSense DNS Server Guide
You just created a lan interface with a DMZ name, and the procedure for this is only the same, what is the difference of it?
I think a complete guide would include how to setup computers in the DMZ
You are not wrong 😀
I will maybe update it to that. Thanks for the tip!
why do we have to enable dhcp on our dmz?
That’s not mandatory actually in many case you want servers in DMZ to get there IP automatically
Thank uuuu
Dont use bridged on vbox,use internal network instead
After I create a new DMZ the devices I plug into it somehow get a DHCP lease from my existing LAN DHCP server and have full LAN/WAN access even before I create any firewall rules. Any thoughts on why that might be?