Welcome to the third part of our introductory Astro JS Tutorial Series. In this part of the series, we are going to work with Astro Layouts and Tailwind CSS. We also include a global.css file to apply some global styling to our app, and we introduce Astro Layouts, which allow us to create a layout to use throughout our app.
Astro JS Tutorial Series Part 3 Topics
After finishing this part of the series, you will be able to:
- Apply global styling to your app using a
global.cssfile. - Use Astro Layouts to apply layouts to your pages.
- Install and use Tailwind CSS in Astro.
You can clone the finished code of this series here. Make sure to checkout the 3-Astro-And-TailwindCSS branch.
Astro Global Styling
To start things off, we are going to create a new file at src/styles/global.css. This file serves as a global stylesheet for our app. Add the following contents to it:
* {
    box-sizing: border-box;
    margin: 0;
    padding: 0;
}
Code language: CSS (css)
Now instead of importing this file to each of our pages, we are going to create a layout to handle this.
Astro Layouts
Layouts in Astro are used to create reusable UI elements across our pages. Layouts are nothing else than Astro components, and we treat them as such. You can think of layouts as a template.
Layouts in Astro include things like navigation bars, headers, footers, and so on. We keep it very simple at first. Layouts in Astro are placed in the src/layouts folder.
Create the src/layouts folder, then create the file src/layouts/MainLayout.astro. Add the following code to it:
---
const { title } = Astro.props
---
Code language: JavaScript (javascript)
We utilize Astro props to set our respective page titles. If you remember, we did the same by setting the pageTitle variable in each of our pages in the last part of the series. Astro props help us to make things even more dynamic and helps us to write DRY code.
Modifying index.astro
Copy everything from the Astro Component Template of your index.astro file:
<html lang='en'>
  <head>
    <meta charset='utf-8' />
    <link rel='icon' type='image/svg+xml' href='/favicon.svg' />
    <meta name='viewport' content='width=device-width' />
    <meta name='generator' content={Astro.generator} />
    <title>{pageTitle}</title>
  </head>
  <body>
    <a href='/'>Home</a>
    <a href='/about'>About</a>
    <a href='/hobbies'>Hobbies</a>
    <h1>{pageTitle}</h1>
  </body>
</html>
Code language: HTML, XML (xml)
And paste it inside the Astro Component Template of your MainLayout.astro file:
---
const { title } = Astro.props
---
<html lang='en'>
  <head>
    <meta charset='utf-8' />
    <link rel='icon' type='image/svg+xml' href='/favicon.svg' />
    <meta name='viewport' content='width=device-width' />
    <meta name='generator' content={Astro.generator} />
    <title>{pageTitle}</title>
  </head>
  <body>
    <a href='/'>Home</a>
    <a href='/about'>About</a>
    <a href='/hobbies'>Hobbies</a>
    <h1>{pageTitle}</h1>
  </body>
</html>
Code language: HTML, XML (xml)
Now modify your MainLayout.astro file to look like this:
---
const { title } = Astro.props
import "../styles/global.css"
---

<html lang='en'>
  <head>
    <meta charset='utf-8' />
    <link rel='icon' type='image/svg+xml' href='/favicon.svg' />
    <meta name='viewport' content='width=device-width' />
    <meta name='generator' content={Astro.generator} />
    <title>{title}</title>
  </head>
  <body>
    <nav>
      <a href='/'>Home</a>
      <a href='/about'>About</a>
      <a href='/hobbies'>Hobbies</a>
    </nav>
    <h1>{title}</h1>
    <slot />
  </body>
</html>
Code language: HTML, XML (xml)
A couple of things that we have changed here:
- We replaced
pageTitlewithtitleto match our Astro.props for our<title>and our<h1>. - We wrapped our Navbar inside of <nav> tags.
- We added a
<slot />below our<h1>. - We imported our
global.cssfile in the frontmatter.
This <slot /> is a placeholder for where our content goes once we import the layout to another page. This <slot> allows us to inject child elements from other pages into our Astro layout. You can read more about slots here.
Next, modify your index.astro file to look like this:
---
import MainLayout from "../layouts/MainLayout.astro"
---
<MainLayout title='Landing Page'>
<p>Our Landing Page wrapped in a Astro Layout!</p>
</MainLayout>
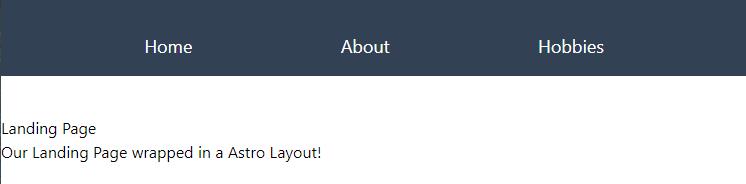
Code language: HTML, XML (xml)Now refresh your Landing Page and look at the result:
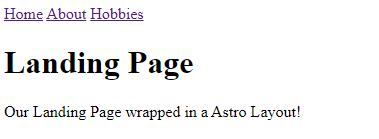
Our Landing Page looks exactly like before (with the addition of a new paragraph). This time, everything is dynamic, and the Navbar was automatically added using our Astro layout!
Challenge
Now that you know how to apply layouts to pages, I invite you to apply the MainLayout to the about.astro and the hobbies.astro pages on your own!
You can also remove the custom <style> from the about.astro file as we no longer need this.
Tasks
- Apply the
MainLayoutto theabout.astropage. - Remove the
<style>tags and everything between from theabout.astropage. - Apply the
MainLayoutto thehobbies.astropage.
Solution
Find the solution to the challenge below.
about.astro
---
import MainLayout from "../layouts/MainLayout.astro"
---

<MainLayout title='Who Am I?'>
  <p>
    My name is Stefan and I build my first Astro project using <a
      href='https://wwww.ceos3c.com'>ceos3c.com</a
    > !
  </p>
</MainLayout>
Code language: HTML, XML (xml)
hobbies.astro
---
import MainLayout from "../layouts/MainLayout.astro"

const hobbies = [
  "Playing Video Games",
  "Watching Movies",
  "Playing Sports",
  "Reading",
  "Listening to Music",
]
---

<MainLayout title='My Hobbies'>
  <ul>
    {hobbies.map((hobby) => <li>{hobby}</li>)}
  </ul>
</MainLayout>
Code language: HTML, XML (xml)Note: When looking at the hobbies page, you notice that the list dots have disappeared. We are going to fix this once we install Tailwind CSS.
Astro Layouts Summary
Now we have made our app much cleaner, and we saved ourselves from writing repetitive code on each page for our Navbar and HTML tags.
We can now use our MainLayout.astro file to apply site-wide styling and templates.
Astro and Tailwind CSS
Now that we have our app cleaned up, it’s time to install Tailwind CSS in our Astro project. Tailwind CSS is officially supported by Astro and can be easily installed by typing:
npx astro add tailwind
Code language: Bash (bash)
Accept all of the following prompts by pressing Enter to automatically create a tailwind.config.cjs file for us:
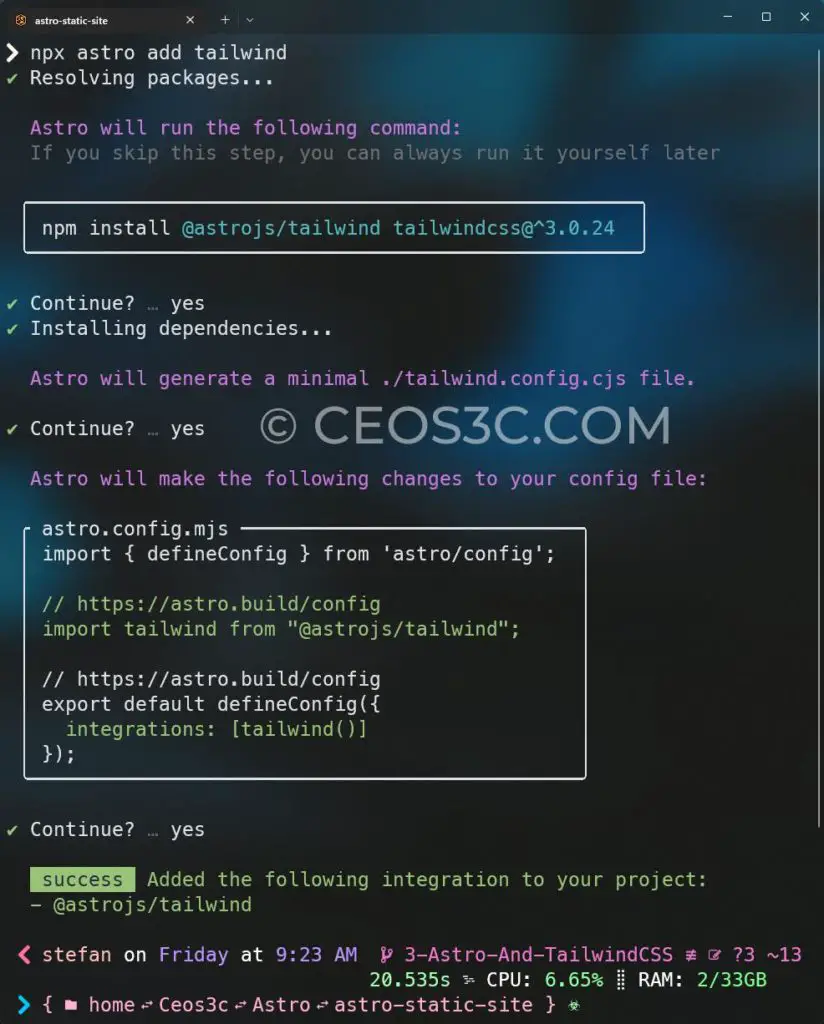
That’s all there is to it. The installer has everything set up for us, and we can start using Tailwind CSS.
Why Tailwind CSS?
We like to use Tailwind CSS because it allows us to quickly add styling to our components without writing bare CSS. With Tailwind CSS, we also get access to a multitude of pre-written Tailwind CSS components, ready to use, like Flowbite or DaisyUI.
Styling our App with Tailwind CSS
If you run your dev server now with npm run dev and look at your Front Page; you will see that we now have a pretty underwhelming-looking Front Page without any styling. This is intended and the default behavior of Tailwind CSS.
We get into things like typography later when we build our Astro blog. Let’s add some styling to our app!
Navbar
First, open the src/layouts/MainLayout.astro file and replace everything between the <nav> tags with the following code:
...
<nav class='bg-slate-700 mb-10'>
      <div
        class='container flex flex-wrap items-center justify-between mx-auto'
      >
        <div class='w-full'>
          <ul class='flex p-4 mt-4 justify-around text-lg'>
            <li>
              <a href='/' class='text-white hover:text-orange-400'>Home</a>
            </li>
            <li>
              <a href='/about' class='text-white hover:text-orange-400'>About</a
              >
            </li>
            <li>
              <a href='/hobbies' class='text-white hover:text-orange-400'
                >Hobbies</a
              >
            </li>
          </ul>
        </div>
      </div>
    </nav>
...
Code language: HTML, XML (xml)
Now we have a basic navbar across all of our pages:
Title
Next, modify the <h1> that holds our title inside of src/layouts/MainLayout.astro:
...
<h1 class='text-4xl mb-10'>{title}</h1>
...
Code language: HTML, XML (xml)
Now we have set the text size of our <h1> across all of our pages.
Content
Let’s give our content some room to breathe. For this, we wrap both, our <h1> and our <slot /> inside of a <div> with some Tailwind magic:
...
<div class='container flex flex-col mx-auto h-screen'>
<h1 class='text-4xl mb-10'>{title}</h1>
<slot />
</div>
...
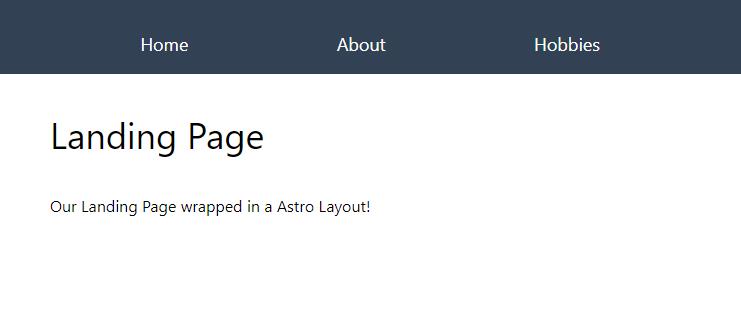
Code language: HTML, XML (xml)This should make things look a bit better:
Footer
Let’s add a footer to our layout. Add the following code right above the closing </body> tag inside of src/layouts/MainLayout.astro:
...
<footer
      class='p-4 bg-slate-700 flex justify-between '
    >
      <span class='text-white '
        >© 2022 <a href='https://www.ceos3c.com' class='hover:underline'
          >Ceos3c</a
        >. All Rights Reserved.
      </span>
      <ul
        class='flex flex-wrap items-center gap-x-5 text-white h-20'
      >
        <li>
          <a href='#' class='hover:underline '>About</a>
        </li>
        <li>
          <a href='#' class='hover:underline '>Privacy Policy</a>
        </li>
        <li>
          <a href='#' class='hover:underline'>Contact</a>
        </li>
      </ul>
    </footer>
</body>
...
Code language: HTML, XML (xml)
This adds a simple footer to our layout:

Hobbies
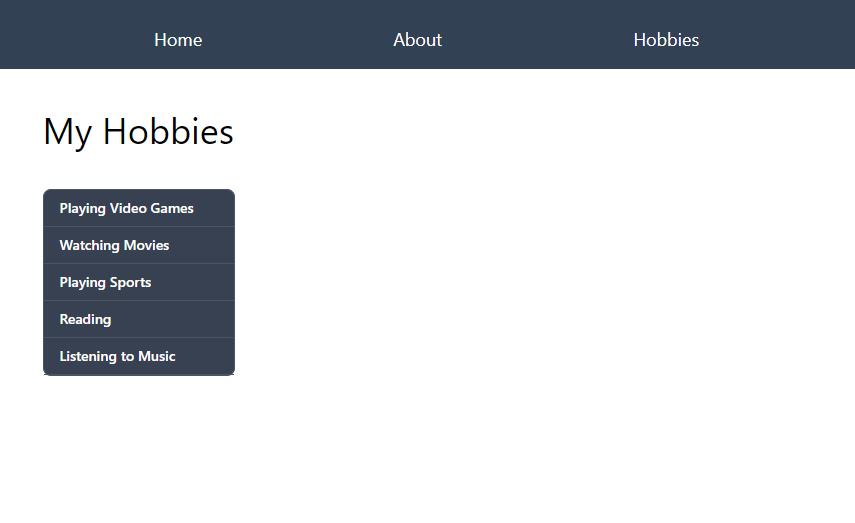
Finally, let’s make the list of our hobbies look a little nicer. Open the src/pages/hobbies.astro file and modify it as follows:
<MainLayout title='My Hobbies'>
  <ul
    class='w-48 text-sm font-medium rounded-lg border bg-gray-700 border-gray-600 text-white'
  >
    {
      hobbies.map((hobby) => (
        <li class='py-2 px-4 w-full rounded-t-lg border-b border-gray-600'>
          {hobby}
        </li>
      ))
    }
  </ul>
</MainLayout>
Code language: HTML, XML (xml)
The result looks like this:
Deploying to Netlify
Once you are done with your project, make sure to deploy it to Netlify and show it to your friends. Also, share your final project on Twitter and tag @ceos3c with the hashtag #ceos3c-astro
Summary
Following this third part of the series, you should now be comfortable with adding global styles and layouts and working with Tailwind CSS in your Astro projects.
- You learned how to create and import a
global.cssfile. - You learned how to create an Astro layout and use it across your application.
- You learned how to install and use Tailwind CSS to style your application.
Next Steps
This concludes this introductory Astro JS Tutorial Series. You should now be comfortable with the basics of Astro JS. We invite you to play around with this basic application and modify it further on your own. This is the best way to practice!
In the next part of the Astro JS Tutorial series, we will build your own LinkTree clone using all of the skills you have acquired by following this tutorial series. Make sure to subscribe to our newsletter to get informed when a new part has been published.
Hi Stefan,
I have just finished the Astro basic tutorial, the first 3 parts. Very good and easy to understand for me as a beginner in the Astro topic.
Can you please tell me if there will come more, as you have promised?
Thanks you for any reply!
Best regards; keep up the good work!
Ad Rienks
Rijswijk, South-Holland
Hello Ad!
I am glad that you have liked it! I have just published the first part of the next series: https://www.ceos3c.com/astro/astro-linktree-clone-part1/
The video isn’t finished yet, but will likely be tomorrow!