Claude Code Desktop for Beginners: Your First App on GitHub
 14 min read
A lot of people want to build small apps just for themselves, but GitHub scares them off. Git commands, branches, pull requests: it sounds like a lot before you have written a single line.
In this post, I show you Claude Code Desktop for beginners, step by step. We build a weekly meal planner, save it in a private GitHub repo, break it on purpose and get it back, and Claude does every git step for us.
I recorded the video on a Mac. The Windows steps and the .env check are written-only parts of this guide, and I mark them as such.
Table of Contents
- Claude Code Desktop Quick Start
- Install and Setup on a Mac
- Create a free GitHub account and keep your email private
- Install Claude Code Desktop and open the Code tab
- Install Homebrew
- Install the GitHub CLI and log in
- Setup on Windows (Not Shown in the Video)
- Install Claude Code Desktop on Windows
- Install Git for Windows
- Install the GitHub CLI on Windows
- What about WSL?
- Pick a Project Folder
- Permission Mode and Model
- Let Claude Create a Private GitHub Repo
- The ground rules prompt
- The private repo prompt
- Check the repo on GitHub
- Build the Meal Planner
- The build prompt
- Why Claude made a branch
- Try the App
- Save It on GitHub
- Make It Yours
- Break It, Then Roll Back
- The risky change prompt
- The rollback prompt
- Keep Your .env File off GitHub (Not Shown in the Video)
- Test it with a dummy value
- If .env was committed already
- Troubleshooting
- Further Reading
- Your Turn
Claude Code Desktop Quick Start
- Create a free GitHub account at github.com/signup and turn on Keep my email addresses private (Settings, Emails).
- Install Claude Code Desktop from code.claude.com and open the Code tab. It needs a paid Claude plan: Pro, Max, Ultra, Team or Enterprise.
- On a Mac, install Homebrew with the command from brew.sh, then install and log in to the GitHub CLI:
brew install gh
gh auth login
gh auth status- On Windows, install Git and the GitHub CLI with WinGet instead (see Setup on Windows), then run the same
gh auth login. - In the Code tab, open an empty project folder, keep This computer selected and paste the prompts from this guide: ground rules, private repo, build the app.
- Save whenever something works, try risky changes on a branch, and switch back to
mainwhen they go wrong.
Install and Setup on a Mac
You need four things: a GitHub account, the Claude desktop app, Homebrew and the GitHub CLI. All of it is a one-time setup.
Create a free GitHub account and keep your email private
GitHub is a place that stores your project, and it can stay private. The free account at github.com/signup is all you need.
Before anything else, turn on one setting. Click your avatar in the upper right corner, then Settings, then Emails on the left side.
Tick Keep my email addresses private. Now your commits show a GitHub noreply address and not your real email.
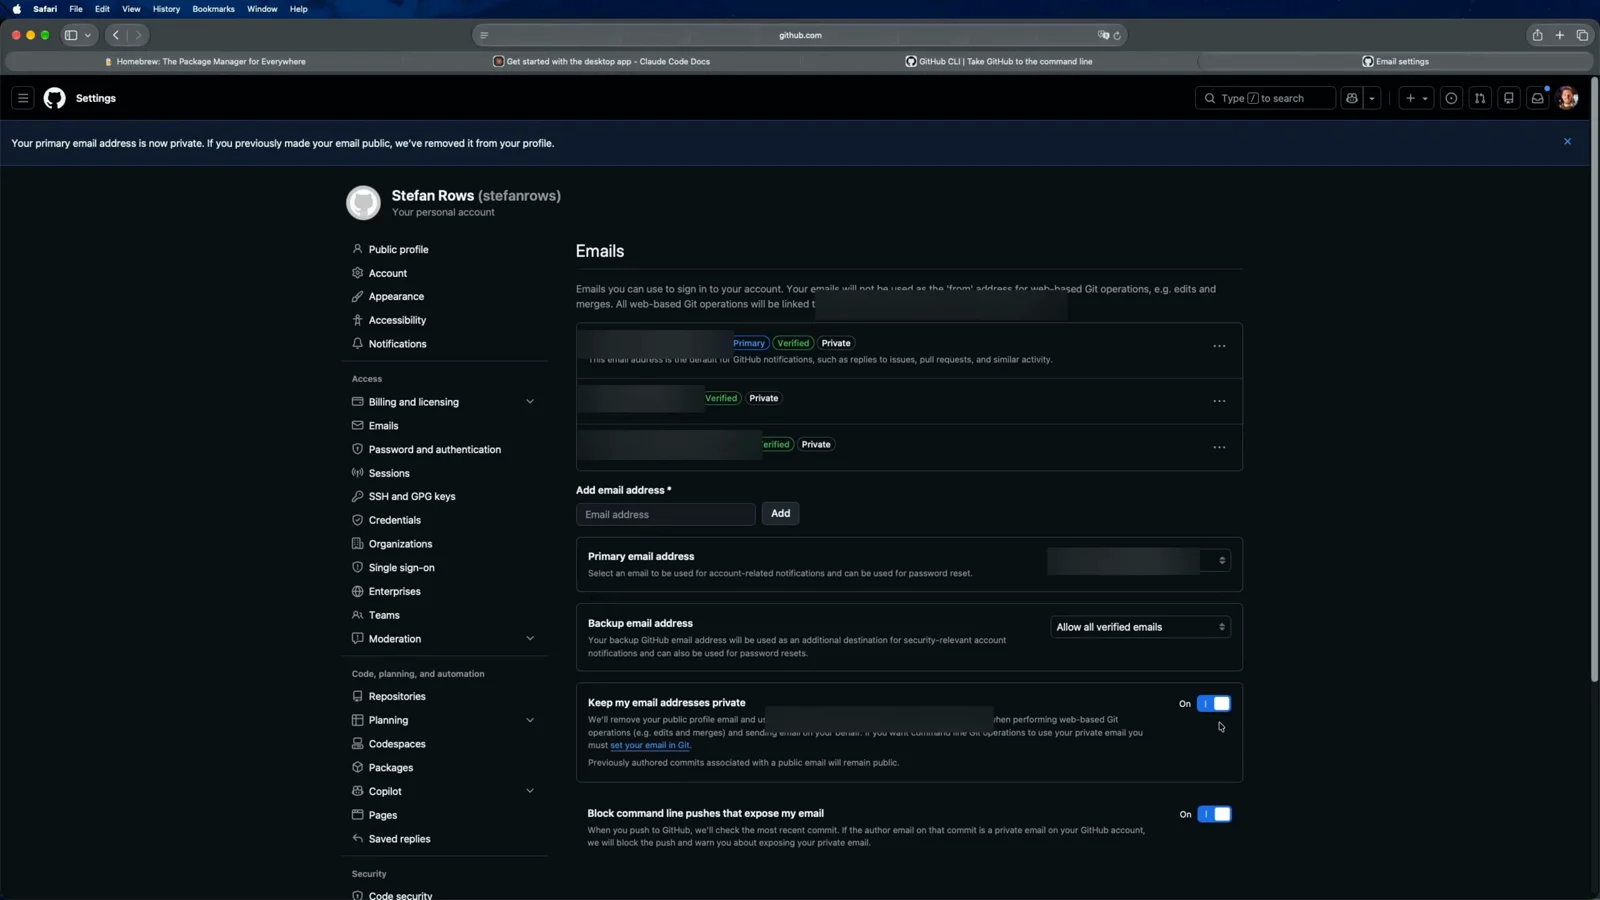
As you can see, my account also has Block command line pushes that expose my email switched on. That one matters later, because Claude noticed it and used the noreply address for the commits.
Install Claude Code Desktop and open the Code tab
Only download the app from the official page. The desktop quickstart on code.claude.com has the download for macOS (one build for Intel and Apple Silicon) and Windows.
Make sure you have a paid plan. The Code tab needs Pro, Max, Ultra, Team or Enterprise.
Once installed, log in with your Claude account. You land in chat mode, which looks like the Claude chat you might know already.
Hover over the tabs at the top of the sidebar and switch to Code. Chat is for asking questions, Code is where Claude works on files in a folder. The app changes fast, so the buttons might move, but this split between chat and code should stay.
Install Homebrew
Before Claude can talk to GitHub, we need two small tools. Homebrew installs tools on a Mac with one command.
Copy that command from brew.sh with the copy button, never from a comment or some random site. Make sure you are actually on brew.sh.
Open the Terminal app (search your Mac for “terminal”), paste the command and hit Enter. It asks for your Mac password, then Enter again.
During the install it might ask to install the Apple developer tools as well. Go ahead and allow it: that’s where Git comes from.
I had Homebrew installed already, so for me it only updated itself.
Install the GitHub CLI and log in
The GitHub CLI (gh) is the tool Claude uses to create the repo on GitHub. The install command is on cli.github.com:
brew install ghIf the terminal says brew is not found, close it and open a new one, then run the command again.
Now we log in once:
gh auth loginIt asks a few questions. I picked GitHub.com, Login with a web browser and HTTPS.
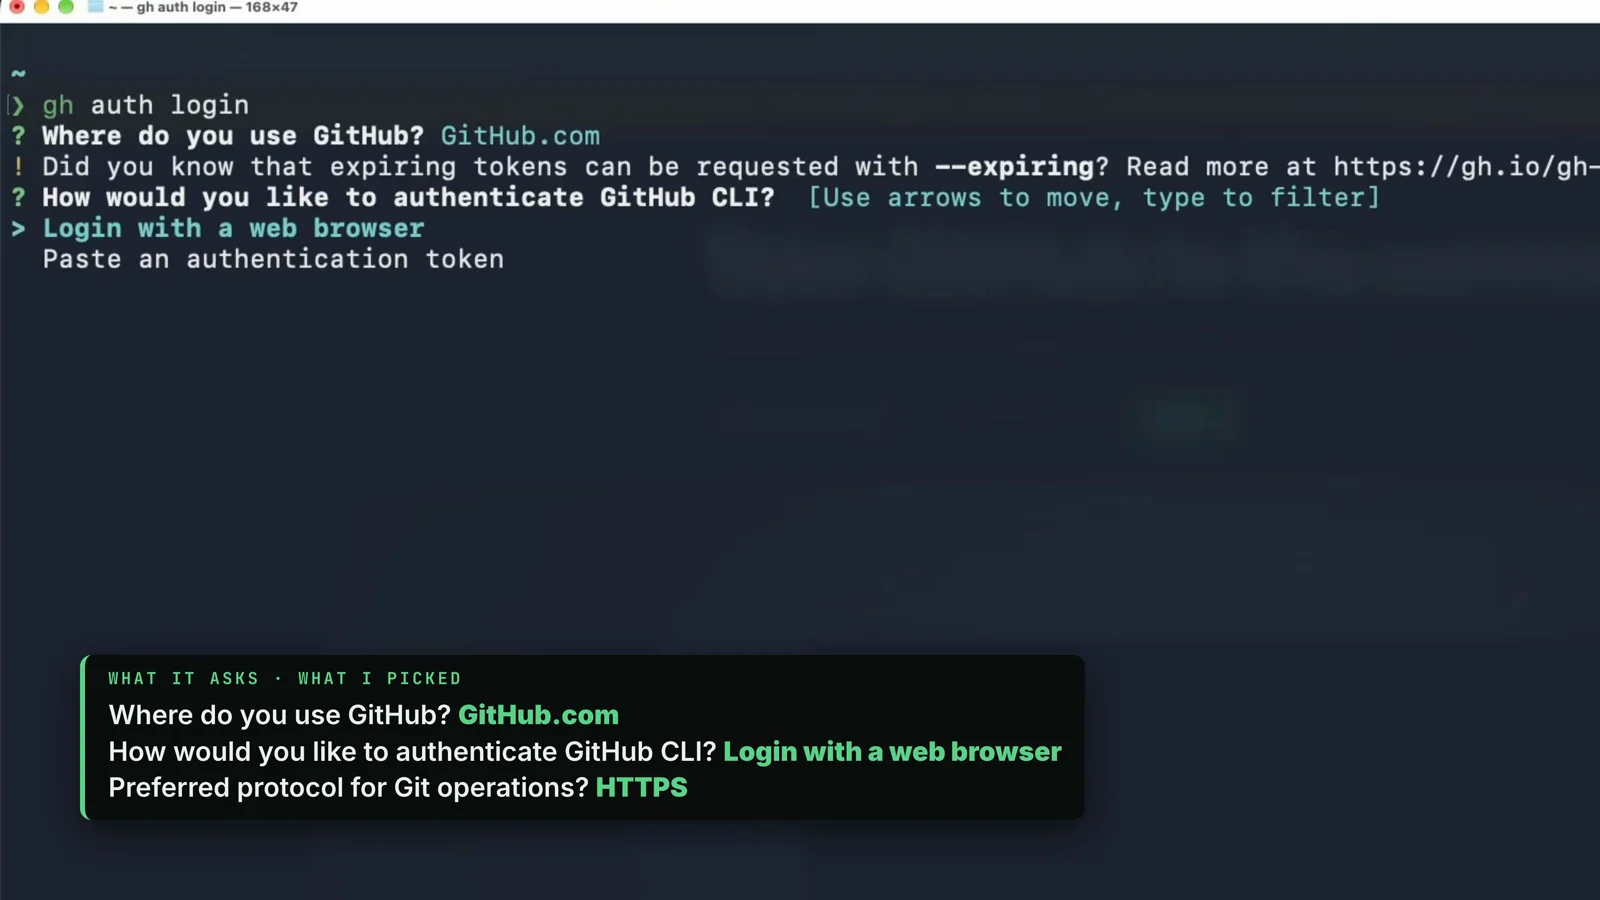
Then it shows a one-time code and opens GitHub in your browser when you hit Enter. Paste the code there (Command+V on a Mac, Ctrl+V on Windows), click Continue and then Authorize GitHub.
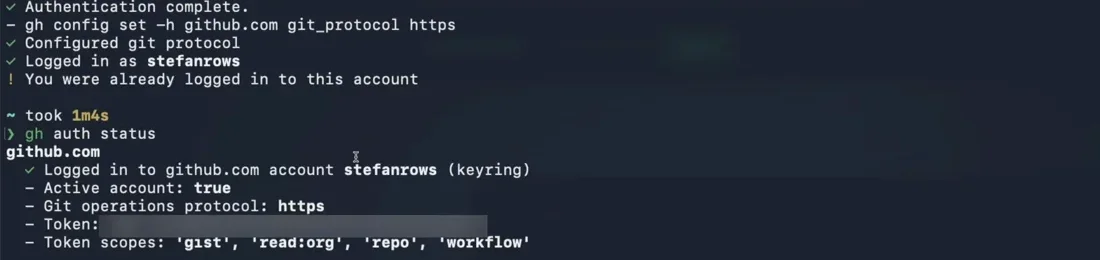
To check that you are logged in, run:
gh auth statusYou should see your account and “Logged in to github.com”.
Setup on Windows (Not Shown in the Video)
I recorded on a Mac and did not run these Windows steps on camera. Everything in this section comes from the official docs of each tool, linked in each step.
On Windows you don’t need Homebrew. WinGet does the same job, and it is available on Windows 11 and modern versions of Windows 10 as part of the App Installer (Microsoft docs).
Install Claude Code Desktop on Windows
Download the Windows installer from the desktop quickstart. The main download is for x64 processors, and the page links a separate ARM64 installer.
Run it, launch Claude from the Start menu and sign in. The same paid plans apply to the Code tab.
Install Git for Windows
A Mac gets Git with the Apple developer tools. On Windows, install Git for Windows.
The Claude Code docs recommend it on native Windows so Claude can use its Bash tool. Without it, Claude Code uses PowerShell for shell commands instead.
You can use the installer from git-scm.com, or WinGet in PowerShell:
winget install --id Git.Git -e --source wingetThe git-scm.com page notes that this WinGet package is not maintained by the Git for Windows project, so it can lag behind the latest version.
Install the GitHub CLI on Windows
The GitHub CLI Windows install guide uses this command:
winget install --id GitHub.cli --source wingetMake sure to open a new terminal window afterwards. In Windows Terminal, a new tab is not enough.
Then log in and check it exactly like on the Mac:
gh auth login
gh auth status
If Claude later says it can’t find git or gh, quit and reopen the Claude app. The desktop app does not read PowerShell profiles, it picks up PATH from your Windows environment variables (desktop docs).
What about WSL?
In the Code tab on Windows, the environment picker also offers WSL. Then the session runs inside a WSL 2 distribution, and Claude Code, your tools and git run on the Linux side.
For a first app, I’d stay on plain Windows. If you already work in WSL, my Claude Code on WSL2 guide covers that setup.
Pick a Project Folder
Now we give Claude a folder to work in. In the Code tab, click New to start a new session and choose a folder, either at the top or with the folder button below the prompt box.
Go ahead and click Open folder. You can create a new folder right in that dialog with New folder, or make one beforehand.
Where it lives is up to you. Mine is called week-meals and sits in my development folder.
Click Trust workspace when it asks. You do that once for every new folder.
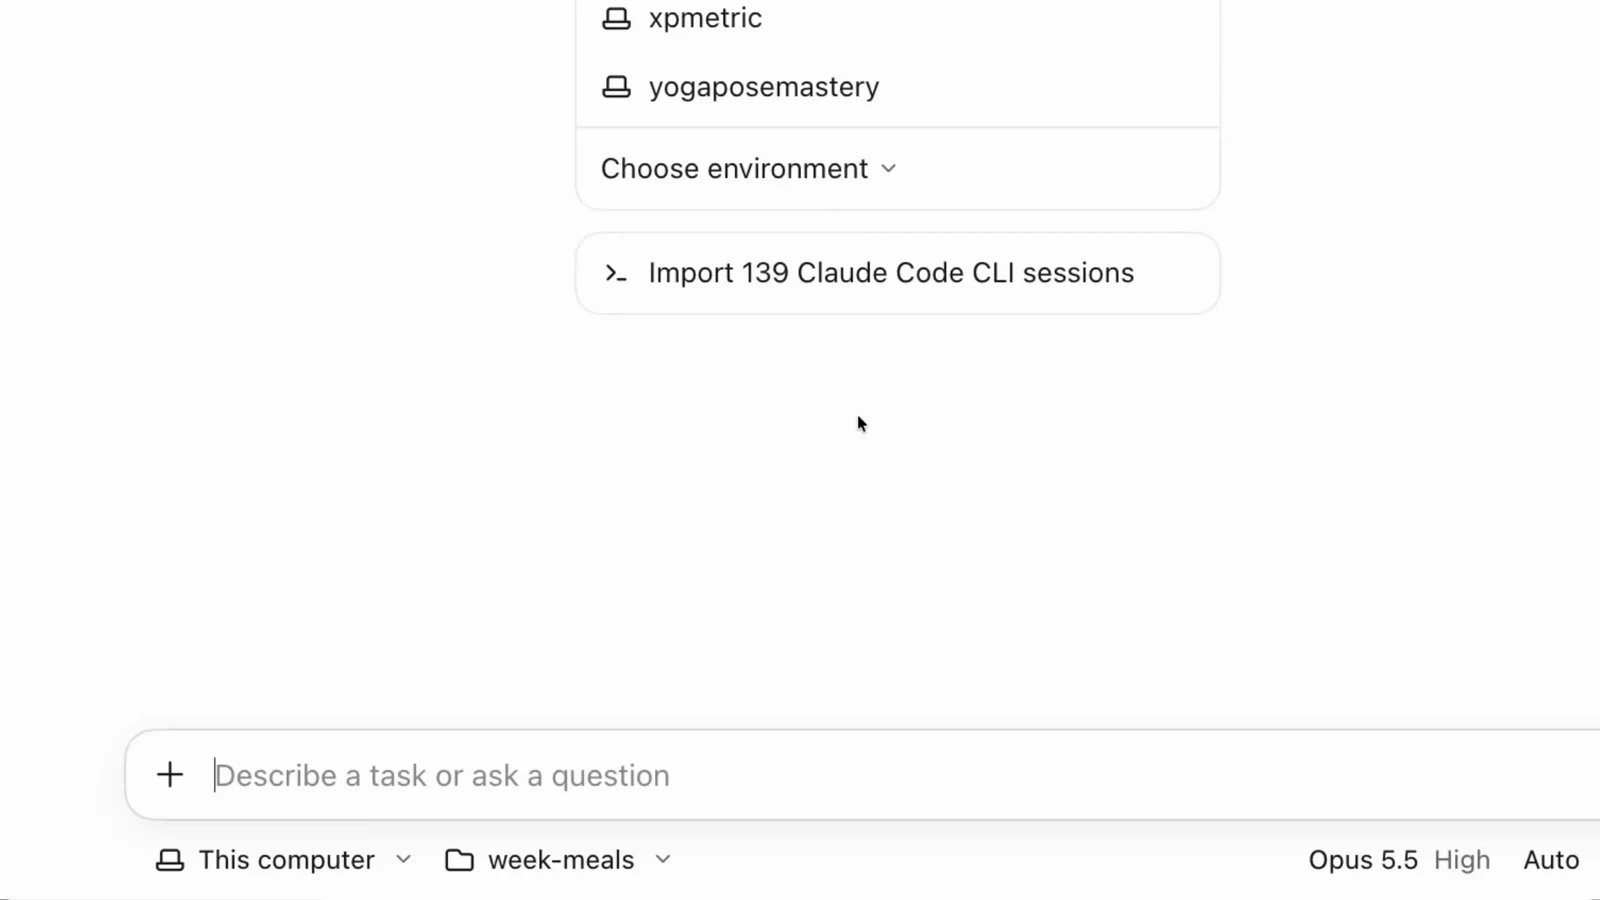
Make sure This computer is selected below the prompt box. That way Claude works on your machine and not in a cloud environment.
Permission Mode and Model
Next to the folder you find the permission mode. I use Auto in the video because I want to move faster.
Manual asks you before Claude edits files or runs commands. If you feel unsure, start with Manual and switch to Auto later.
I would not use Bypass permissions. You might not even see it, because it has to be turned on in the app’s settings first (on Team and Enterprise plans, your organization decides) (permission modes).
On the right you pick the model and the effort level. I used Opus 5.5 on High because that’s what I use most of the time. You can pick whichever model you like.
Let Claude Create a Private GitHub Repo
From here on, Claude does the git part. The first message sets the ground rules.
The ground rules prompt
Paste this as your first message (video 09:14):
I'm a complete beginner. Explain what you do in plain language as you go. Before any git or GitHub step, tell me in one sentence what it does. If something is unclear, ask me before you build.Your answer will look different from mine. Claude knows me from working with it every day.
The private repo prompt
Now we let Claude create the GitHub repository (video 09:48):
Turn this folder into a git project and create a new private GitHub repository for it with the GitHub CLI. Start with a README and a .gitignore that ignores .env files but not .env.example. Then make the first commit and push it.Don’t worry about the .env part yet. A .env file holds things like API keys and passwords, and it should never land on GitHub. I explain it in the .env section below.
Claude checked that the GitHub login works, created the README.md and the .gitignore, started git and made the first commit. It also told me the commits use my GitHub noreply email, because GitHub blocked my private one. That’s the email setting from the start doing its job.
When it asked whether to build the app now, I said not now, because the next prompt does that.
Check the repo on GitHub
Open GitHub and you should see the new repository under your repositories. In mine, the first commit shows “stefanrows and claude”, with the empty README and the .gitignore.
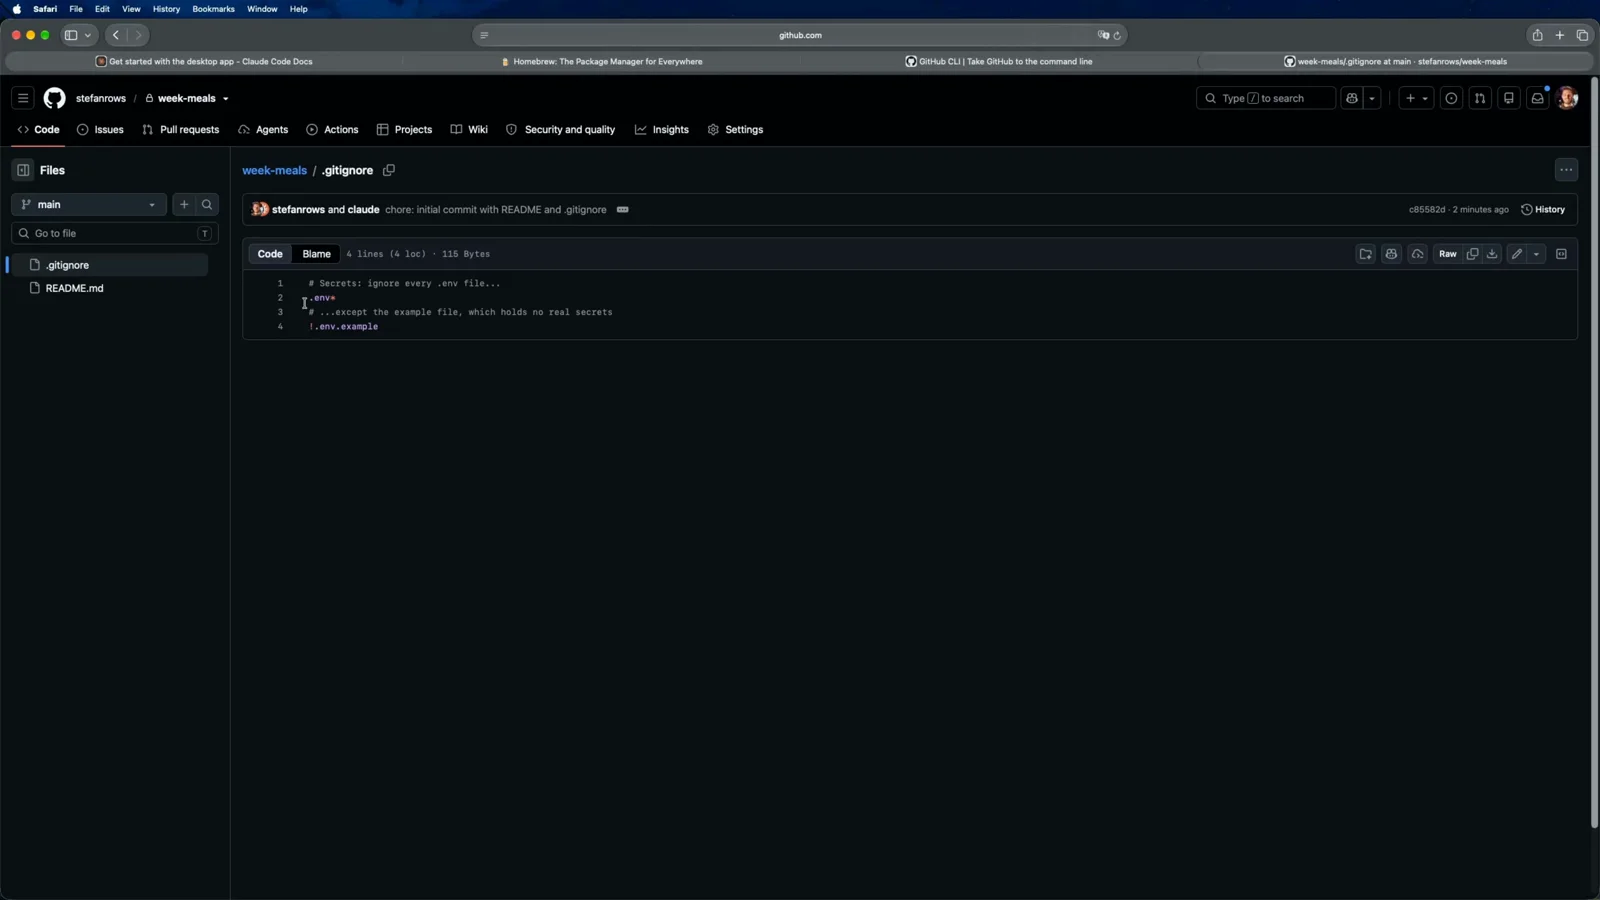
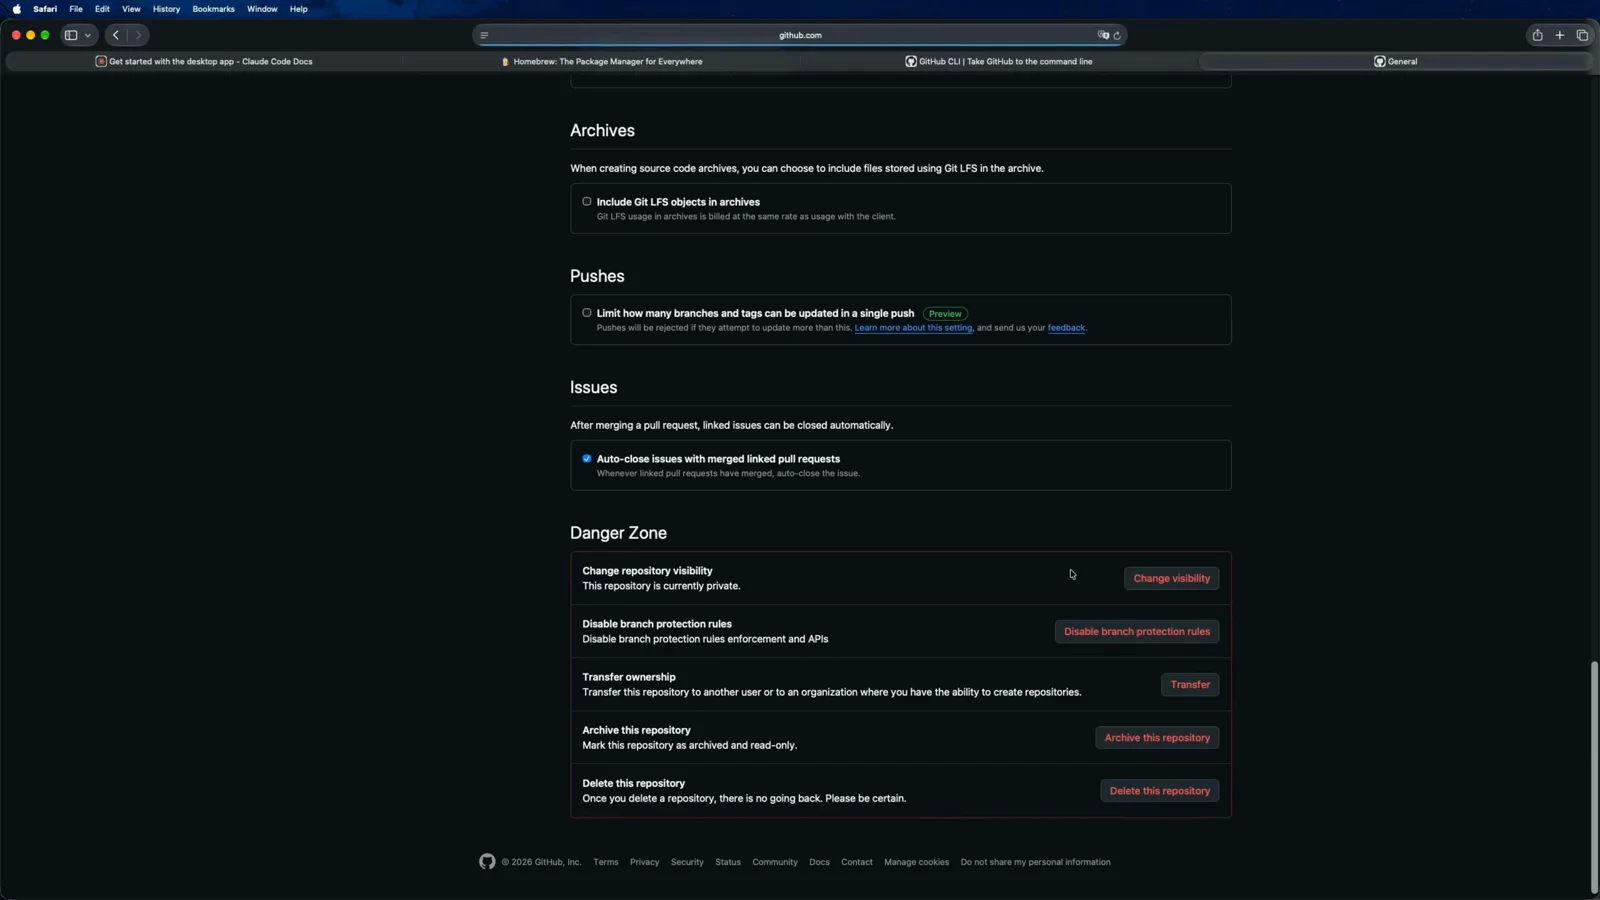
To confirm the repo is private, open Settings in the repo’s top bar and scroll down to the Danger Zone. It should say “This repository is currently private.”
Build the Meal Planner
Now the fun part, the actual app. It’s a weekly meal planner in one HTML file, with no accounts and no API keys, because it only runs on your computer.
I start a new session for it, since the repo is set up already, and a fresh session saves some tokens. Make sure you are in the right folder again.
The build prompt
This is the prompt I pasted (video 12:45):
Build a simple weekly meal planner as a single HTML file called index.html that I can open in the browser. I can add dinners for each day and their ingredients. It makes a shopping list I can check off. Save everything in the browser. No accounts, no API keys, no build step. Before you write any code, ask me up to three questions about how I plan my meals so it fits me.Claude came back with three questions. I mostly take the recommended answer, but I still read the others.
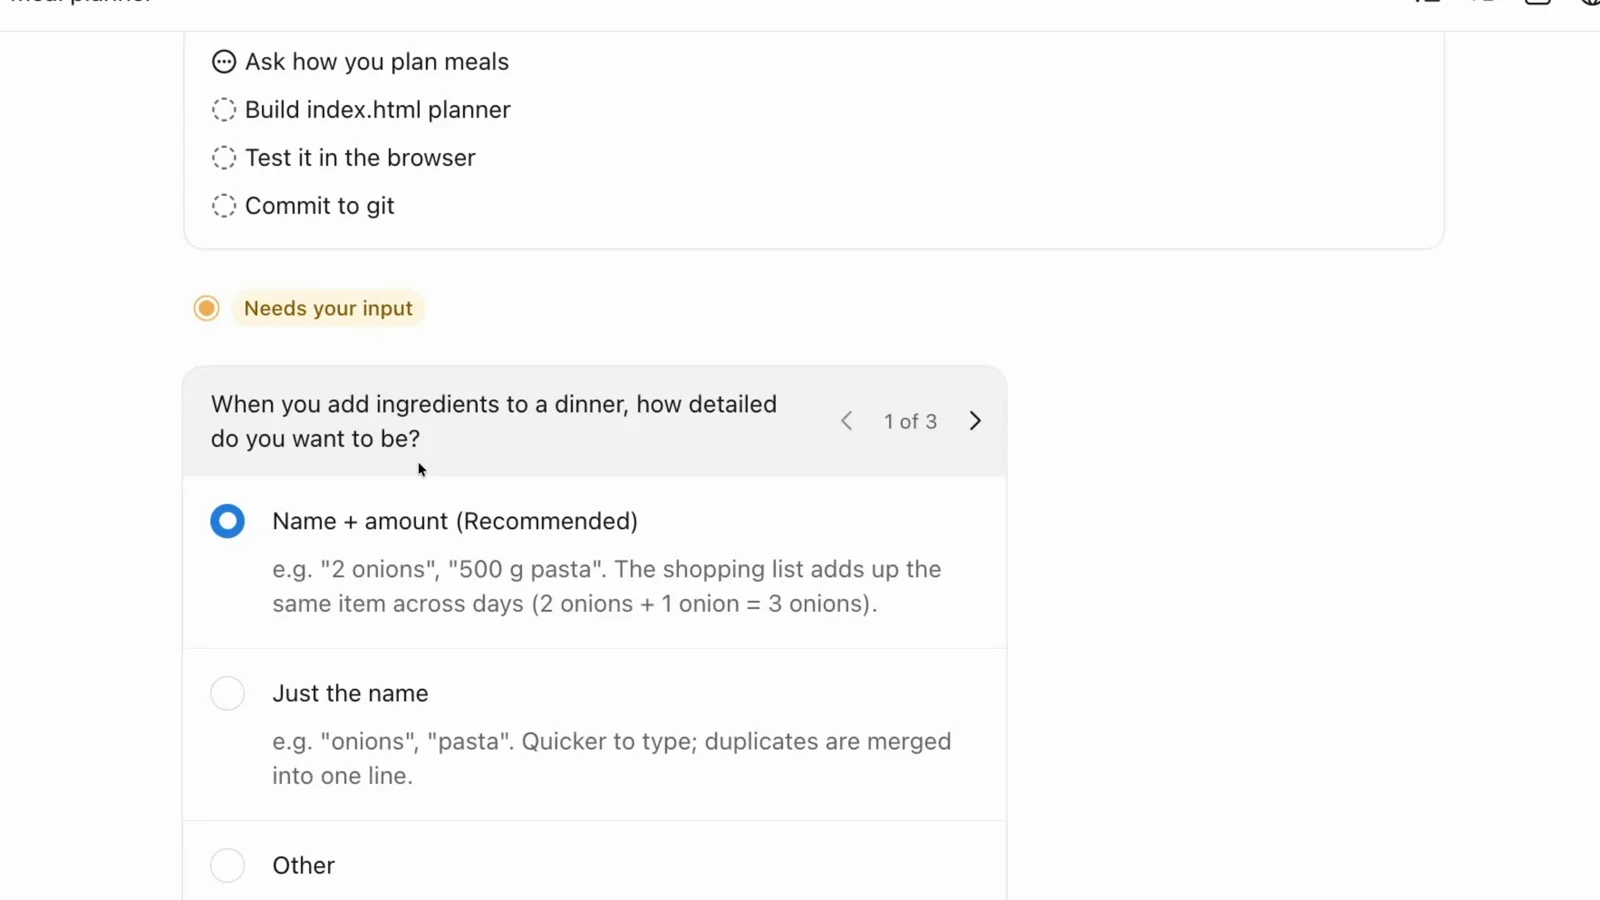
- How detailed are the ingredients? Name + amount, so the shopping list adds up the same item across days.
- Do you cook the same dinners again? Yes, save my dinners, so you can pick them again in one click.
- How should the shopping list be organized? By store section, like produce, dairy, meat and pantry. My own meal planner works that way, and it’s useful when you walk through the store.
Then Claude built the app in our folder, tested it and gave me a link to open it in the browser.
Read its note at the end. Everything is saved in the browser you use, so a different browser or clearing your browser data starts with an empty planner.
That’s fine for this app. For something you use long term, you would want a database at some point, but that’s a topic for another video.
Why Claude made a branch
Claude also said it created a branch called feat/meal-planner. This is a git convention.
main is the version you want to keep clean. For every new feature you branch off main, do the work there, and main stays safe. Claude usually does that by default and asks you to merge when the work is done.
Try the App
Here’s the app. You plan a dinner for each day of the week, add ingredients with an amount and a store section, and they show up in the shopping list.
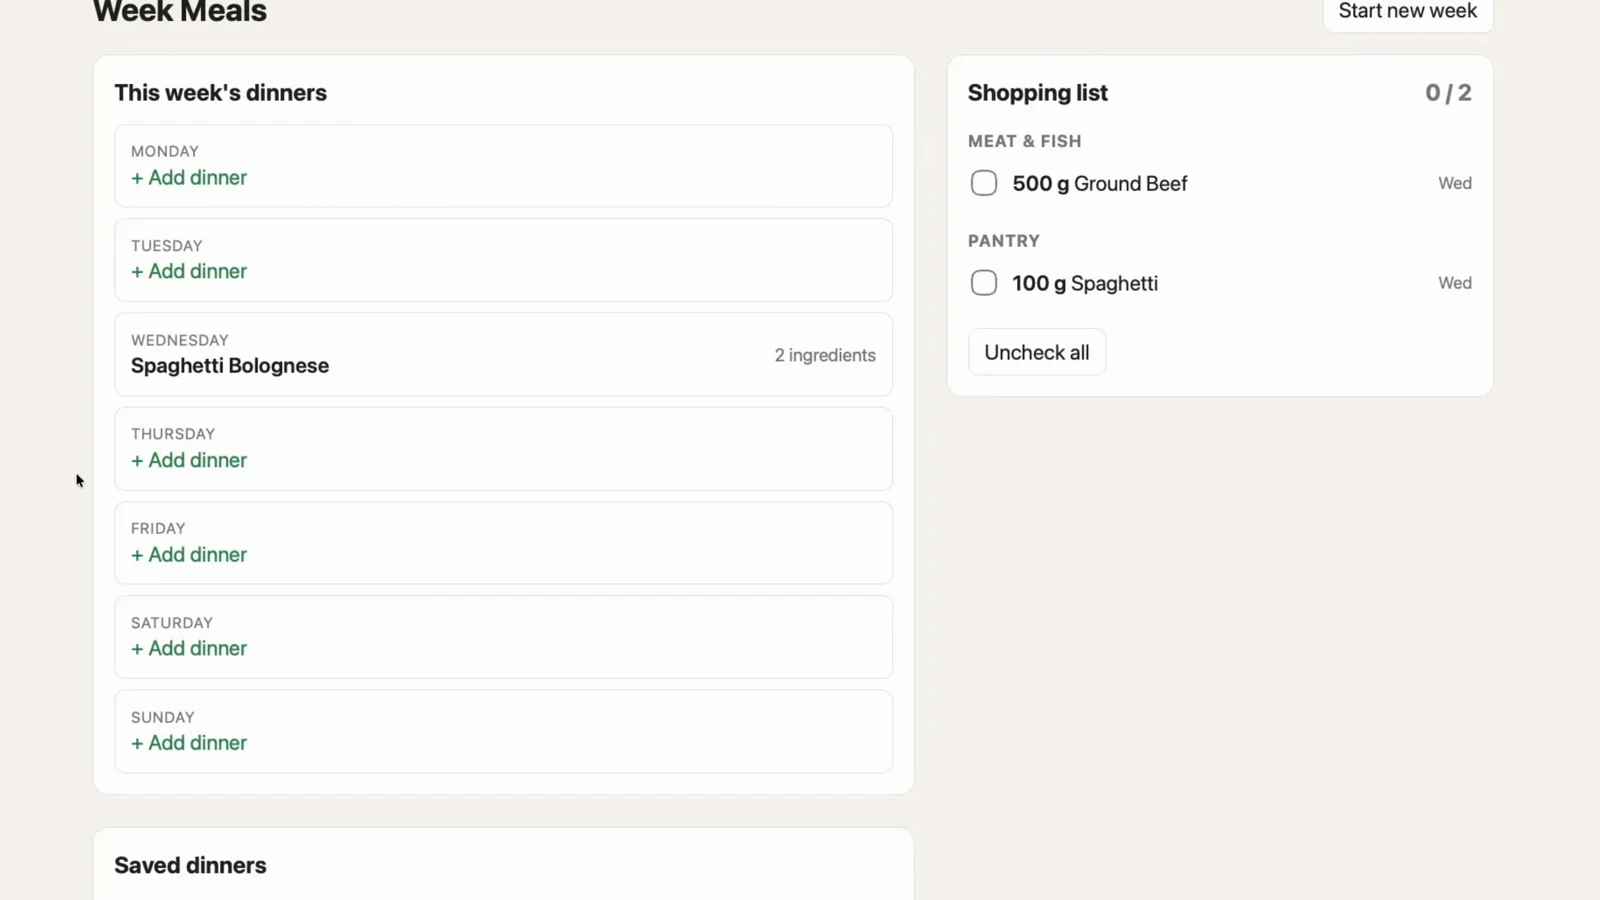
I added Spaghetti Bolognese on Wednesday and Fried Rice on another day. Then I refreshed the page, and the dinners were still there. As you can see, it really saves in the browser.
Save It on GitHub
When Claude finished, it asked whether to merge the branch into main. I chose yes.
Claude committed the README, pushed the branch, opened a pull request on GitHub and merged it. In plain words: it saved what we built on github.com.
On GitHub you now see the index.html, and the README explains the app.
Think of a commit like a save game. Whenever you want to keep your progress, make a commit and get it onto GitHub.
Claude doesn’t always ask. When you are happy with something, just tell it to save. This is the line I use as an example in the video (20:03):
The app works, save it, commit everything with a short message a human can read and push it to GitHub.Make It Yours
Let’s make one change of our own to bring that point home. I asked Claude for three small change ideas, and it suggested a few features.
I went with something you see right away: call it Stefan’s Kitchen and give it a dark look with green accents. Claude made the change on a new branch, feat/stefans-kitchen-theme, and showed the result in its built-in browser.
Then I told it: “I like it. Save this version and push it.” Claude committed and pushed the branch.
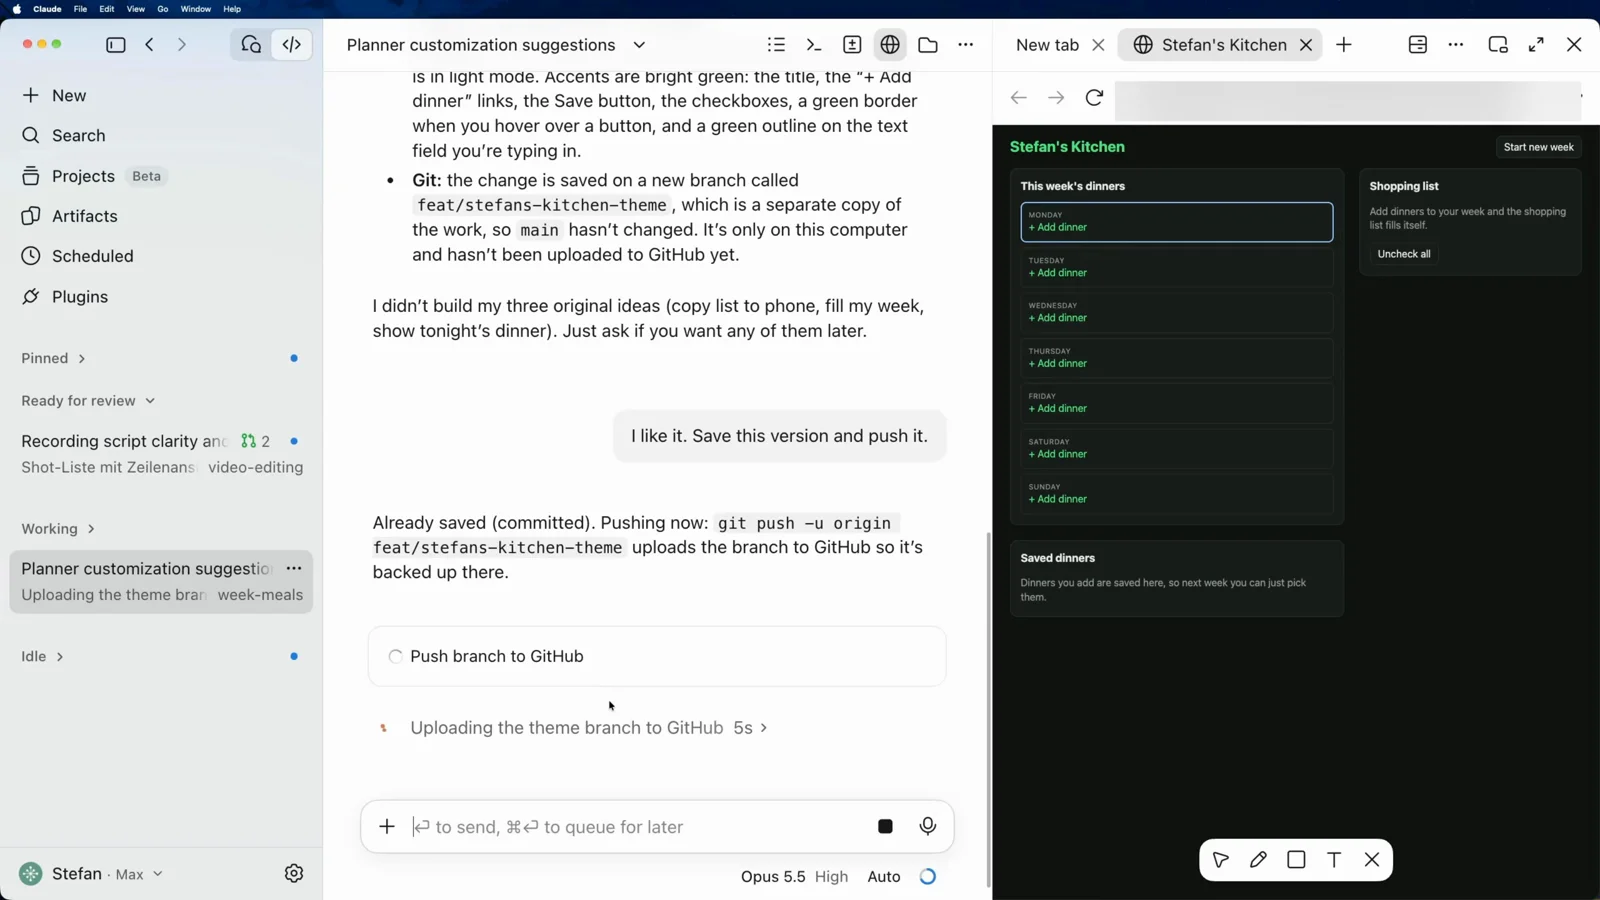
The change was on GitHub now, but not in main yet. That’s what the pull request is for, a preview of the change that other developers can check.
If you build apps for yourself, you usually don’t need that review. Just tell Claude to merge to main.
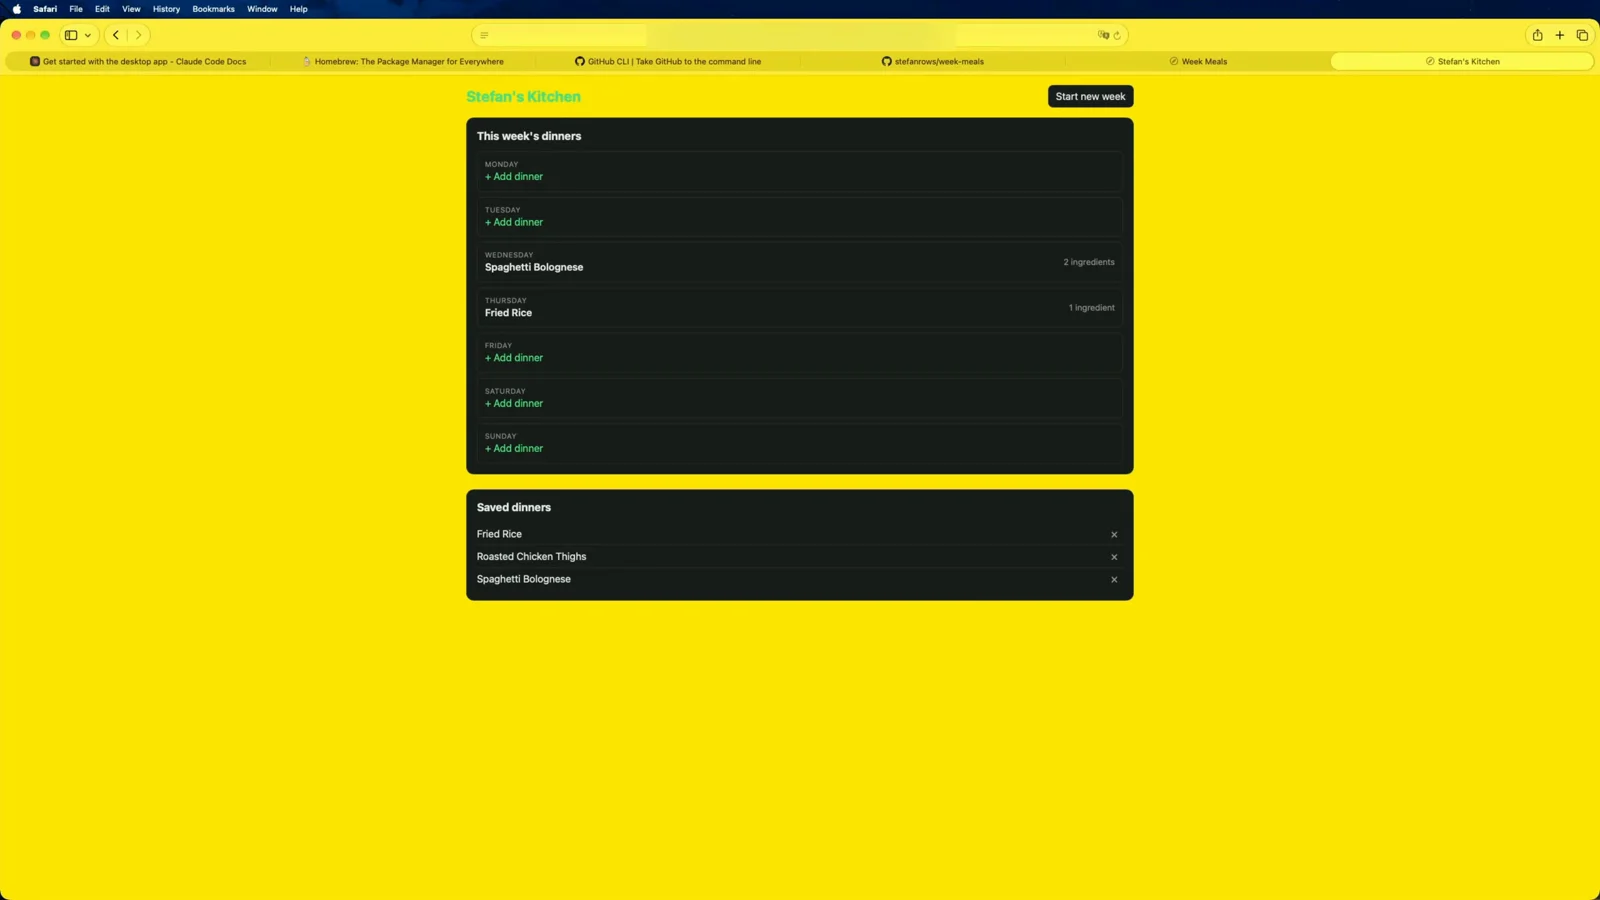
To show the short way, I started a new session and asked for a hot yellow background. Claude even warned me that it’s hard to read, which I agree with. Then I told it to merge the changes into main, and it did.
If you always want to be asked about merging, put that rule in an AGENTS.md file in your project. Claude Code reads it as your project instructions when there’s no CLAUDE.md (memory docs), and you can ask Claude to write the file for you.
Break It, Then Roll Back
Now the part that saves you when something goes wrong. First I asked Claude whether everything is saved. It said yes, both on my computer and on GitHub.
main is the good copy, and a branch is a safe place to try something risky.
The risky change prompt
I pasted these two lines (video 25:31):
Create a new branch called try-change for a risky change.
On this branch, remove the shopping list completely and save that as a commit.
Pretend this is an experiment that went wrong. As you can see, the shopping list is gone.
The rollback prompt
Now we go back (video 26:25):
That was a mistake. Switch back to main so I have the working app again, and delete the try-change branch.Open the app again and the shopping list is back. That’s a rollback, and it’s the reason to always try things on a branch.
Keep Your .env File off GitHub (Not Shown in the Video)
This check is not in the video. I only show the .gitignore there, so here is the written version, based on the git docs and GitHub docs.
A .env file is a file you keep only on your computer. It holds your API keys, secrets and passwords, and it should never be committed to GitHub.
The .gitignore tells git which files to leave out of commits. This is the one Claude wrote from the repo prompt, as it shows on GitHub:
# Secrets: ignore every .env file...
.env*
# ...except the example file, which holds no real secrets
!.env.example
The * matches anything except a slash, so .env* covers .env, .env.local and so on. The ! in front of the last line brings .env.example back. That file holds no real secrets, only the names of your settings, so it’s safe to commit.
Test it with a dummy value
Make sure to test this with a dummy value, never a real key. Create a .env in your project folder with something like a fake key in it, then run this in the project folder:
git check-ignore -v .envIf the file is ignored, git prints the .gitignore rule that matches it together with the file name. If it prints nothing, the file is not ignored.
You can also ask Claude: “Is my .env file ignored by git?” Then check GitHub itself. After your next push, the file list in your repo should show .gitignore but no .env.
If .env was committed already
A .gitignore rule does not affect files git already tracks. To stop tracking one, the git docs use:
git rm --cached .envThat only stops future commits. If a real key was ever pushed, revoke or rotate it first, as GitHub recommends. I wrote more about this in Claude Code settings.local.json secrets.
Troubleshooting
- The Code tab asks you to upgrade: the Code tab needs a paid plan (Pro, Max, Ultra, Team or Enterprise).
brew: command not foundafter installing Homebrew: close the terminal and open a new one.ghnot found on Windows after WinGet: open a new terminal window, not a new tab.- Claude can’t find
gitorghon Windows: quit and reopen the Claude app so it picks up the newPATH. - The planner is empty in another browser: that’s by design. The data lives in the browser you used.
- Claude asks before every edit or command: you are in Manual mode. That’s fine for learning, Auto is faster.
Further Reading
- Claude Code on WSL2, if you want the Linux route on Windows
- Claude Code Plan Mode vs One-Shot, the same kind of app built five ways
- How to Run Claude Code on a VPS, a step toward running your apps on a server
- Official docs: Get started with the desktop app
Your Turn
You now have an app running on your computer, saved in a private GitHub repo, and a way back when you break something. You don’t need to be a git expert to keep your work safe.
Right now the app only runs on one laptop, and the meals live in one browser. In the next video I want to put it on a small server that only your devices can reach, with Tailscale.
Build your own first app and tell me what it does on X @StefanRows. If you’re on Windows and want a video for it, let me know there too.
More posts
All AI Workflows