
Out of popular demand, I give you a quick tutorial on how to fix the Strict NAT pfSense PS4, PS5 and Xbox issue and the NAT Type 3 problem on your PS4, PS5 or Xbox Gaming Consoles. I came across this question several times and people are recommending hilariously complicated solutions where you just really need to create an Outbound NAT rule within a few seconds.
Let’s get right on it.
If you want to learn more about pfSense and take a deeper dive into the pfSense ecosystem, feel free to check out my pfSense Bootcamp over at Udemy!
Table of Contents
👀 This Tutorial has some related Articles!
👉 The Complete pfSense Fundamentals Bootcamp
👉 Install pfSense from USB – The Complete Guide
👉 Install pfSense on VirtualBox
👉 The Complete pfSense OpenVPN Guide
👉 The Complete pfSense DMZ Guide
👉 Generate SSL Certificates for HTTPS with pfSense
👉 The Complete pfSense Squid Proxy Guide (with ClamAV!)
👉 pfSense Site-to-Site VPN Guide
👉 pfSense Domain Overrides Made Easy
👉 pfSense Strict NAT (PS4,PS5,Xbox,PC) Solution
👉 The Best pfSense Hardware
👉 Traffic Shaping VOIP with pfSense
👉 pfSense OpenVPN on Linux – Setup Guide
👉 pfSense Firewall Rule Aliases Explained
👉 Email Notifications with pfSense
👉 pfSense DNS Server Guide
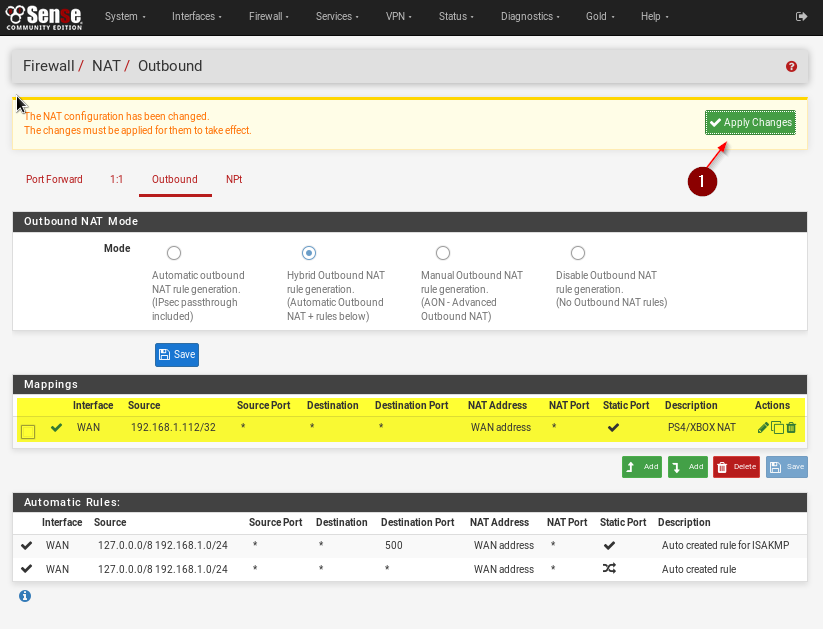
Step 1 – Creating an Outbound NAT Rule
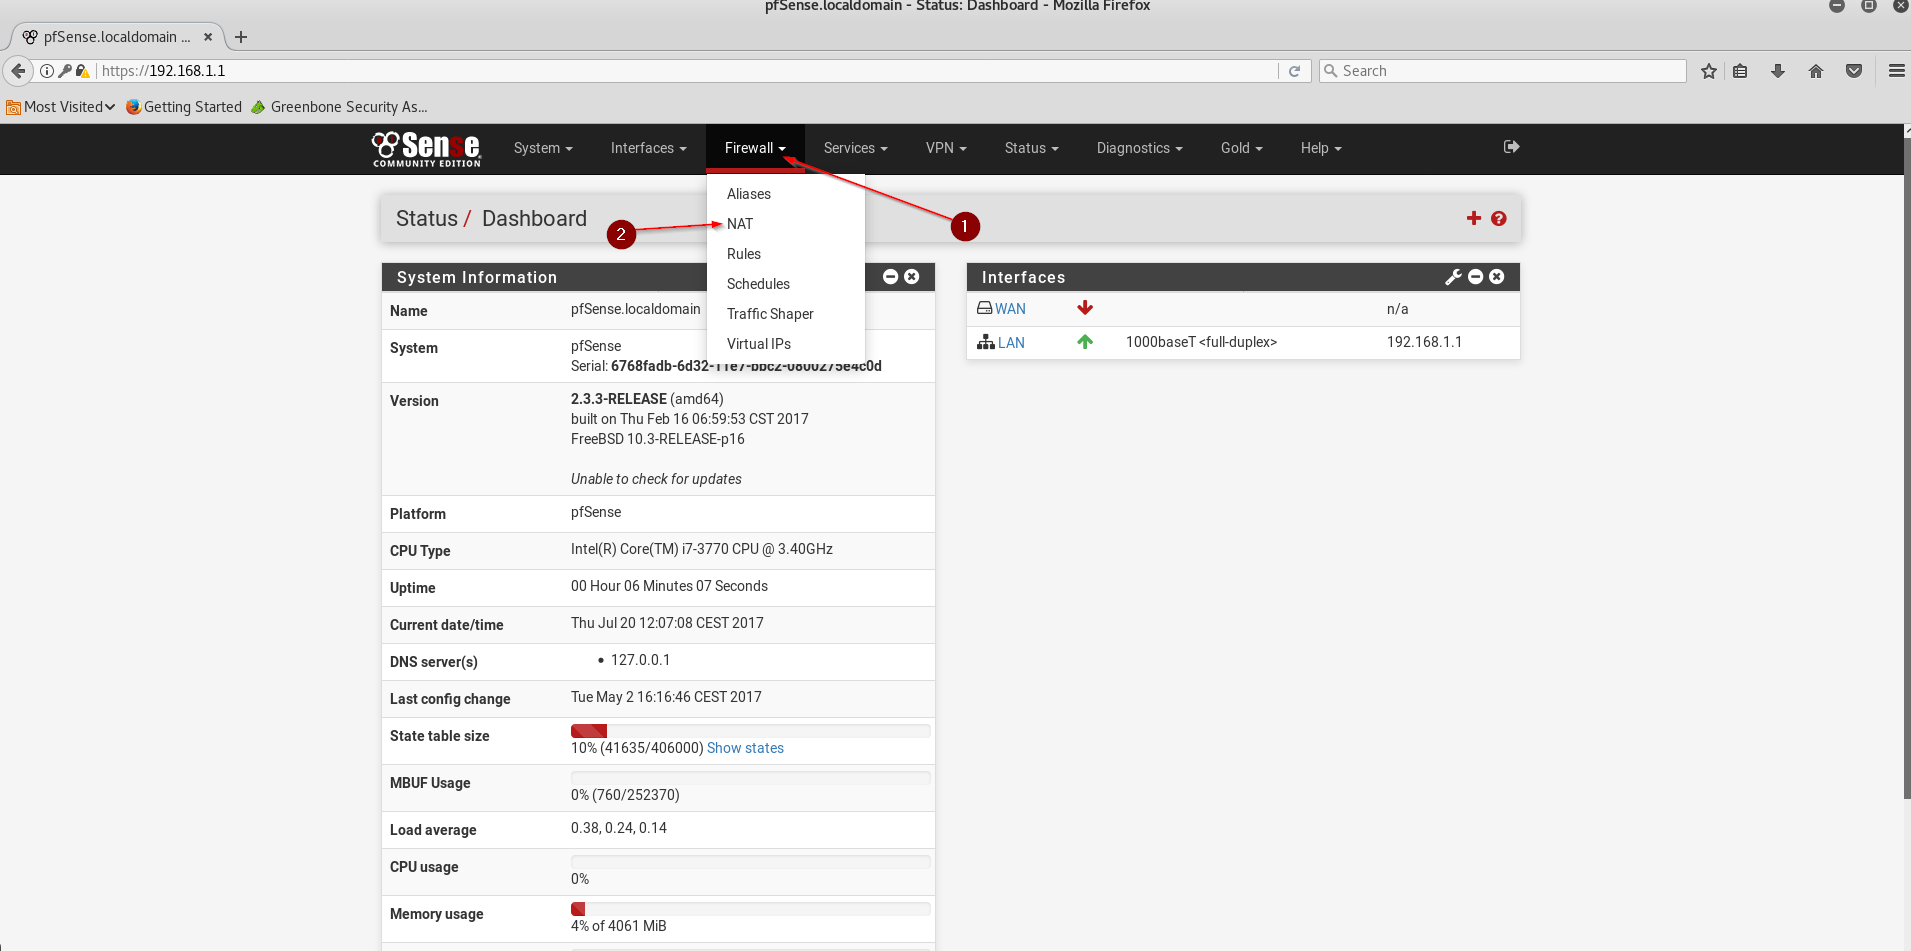
Log in to your pfSense Web Interface and Navigate to Firewall / NAT.
Navigate to Outbound and change the Outbound NAT Mode to Hybrid outbound NAT Rule Generation and click on Save.
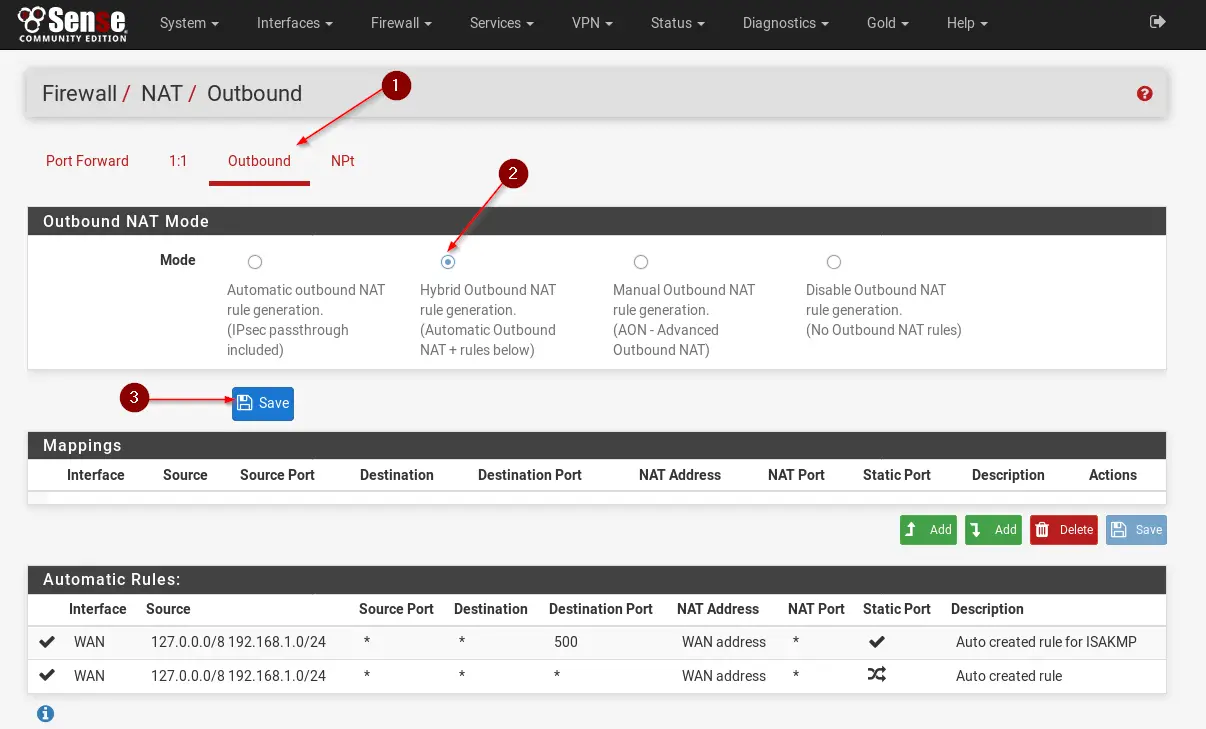
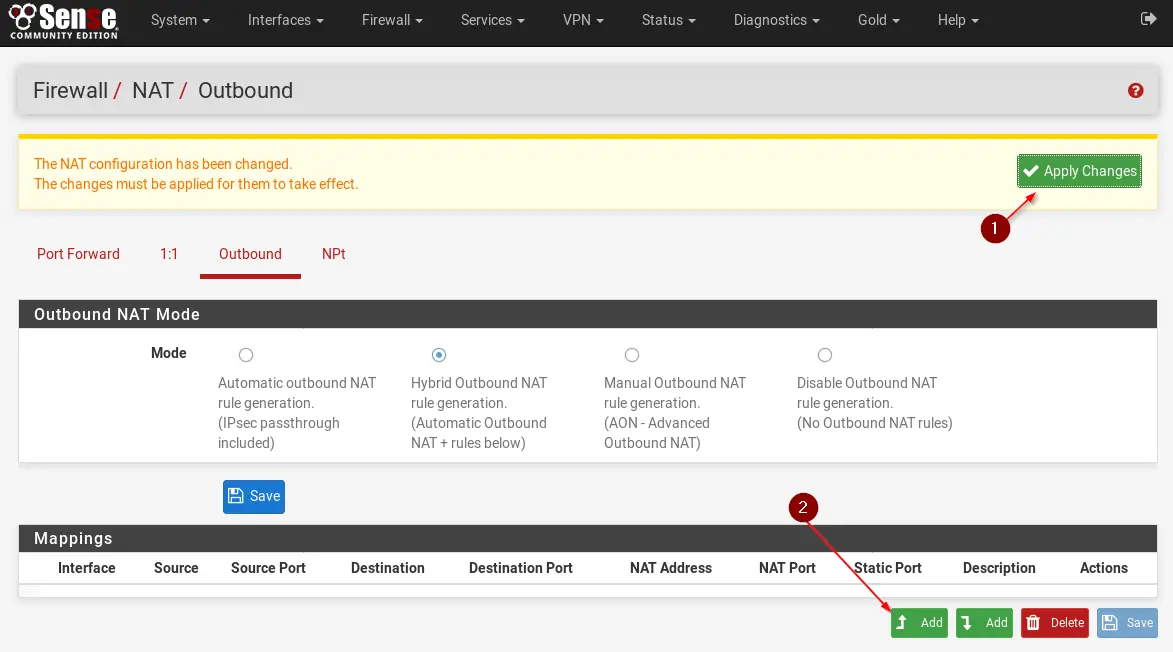
Don’t forget to click on Apply Changes and click on Add to Add a new Rule next.
Step 2 – Modifying the Outbount Rule
Adjust the rule like in the example below. The Source IP is the IP of your Gaming Console. You can see that under Status / DHCP leases or ideally give your console a static IP Address. You can do that over your pfSense DHCP Server. Also make sure you select 32 as your subnet mask, which means that this rule ONLY applies to this one IP Address or your Gaming Console.
Make sure you tick Static Port. Give it a Description and hit Save.
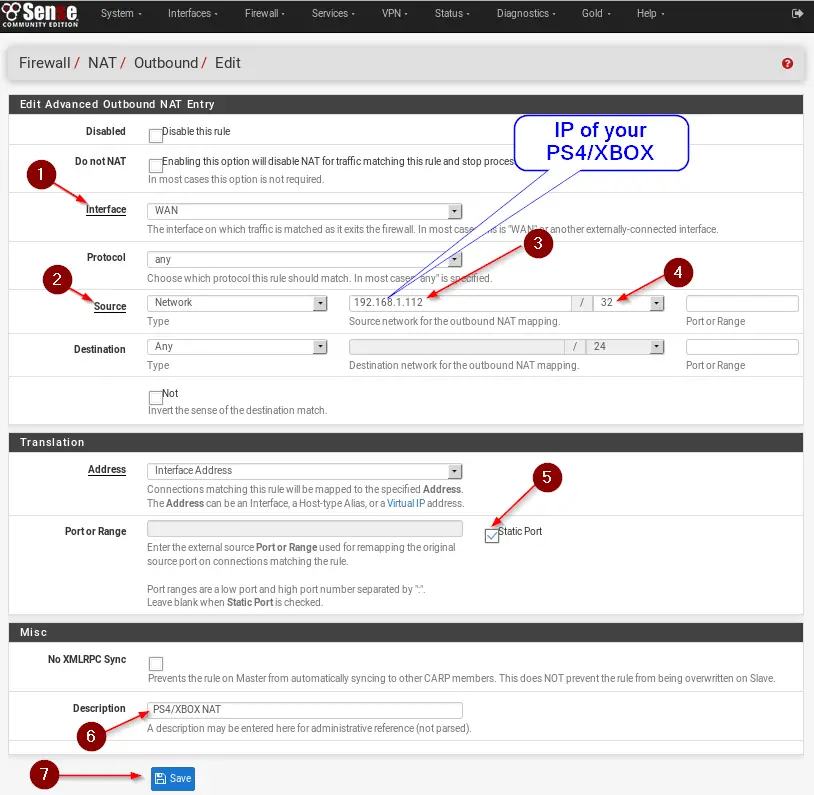
Now hit Apply Changes again and you are good.
You should now have NAT Type 2 on your console and be able to use Voice Communication and play with your friends.
👀 This Tutorial has some related Articles!
👉 The Complete pfSense Fundamentals Bootcamp
👉 Install pfSense from USB – The Complete Guide
👉 Install pfSense on VirtualBox
👉 The Complete pfSense OpenVPN Guide
👉 The Complete pfSense DMZ Guide
👉 Generate SSL Certificates for HTTPS with pfSense
👉 The Complete pfSense Squid Proxy Guide (with ClamAV!)
👉 pfSense Site-to-Site VPN Guide
👉 pfSense Domain Overrides Made Easy
👉 pfSense Strict NAT (PS4,PS5,Xbox,PC) Solution
👉 The Best pfSense Hardware
👉 Traffic Shaping VOIP with pfSense
👉 pfSense OpenVPN on Linux – Setup Guide
👉 pfSense Firewall Rule Aliases Explained
👉 Email Notifications with pfSense
👉 pfSense DNS Server Guide
Question, I have an updated PfSense OS…
For translation, you’ve selected Interface Address. However, I only see the following options…
1. Network or Alias
2. WAN Address
3. LAN Address.
Would you be able to tell me which one would be the best option to match your configuration?
Excellent, still in 2024 I had the same problem and this post saved my life.
Super easy and effective. Finished in about 5 minutes. Thanks
Super easy and effective, thanks!
You’re welcome 🤓
Wow thanks to you, I have a solution to why Destiny 2 gave me ‘strict NAT’ all day, and yes you are right all the other solutions are super complicated – this is the only one that worked!
Amazing, and well done, and thanks so much!
Hehe, no worries. Glad it worked!
Alright this was a lifesaver. Thank you for the great explanation and screenshots. Kind regards from me and my kid man. Thanks!
Thanks for the info. I have 8 X1s and 8 PS4s on my network and this fixed the NAT Strict issue that we used to have.
But the problem that we have now is that the PS4s cannot simultaneously connect to an online COD game. One will connect, and then none of the others can connect. Really weird problem – one that only affects COD onthe PS4