In this tutorial you will learn how to install Node.js on Ubuntu. This tutorial is evergreen and always up-to-date.
Table of Contents
- Adding the Node.js Repository
- Install Node.js v18 LTS on Ubuntu
- Install Node.js v19 on Ubuntu
- Summary
Adding the Node.js Repository
Unfortunately, we can’t install the latest versions of Node.js on Ubuntu using apt by default. We first need to add the latest Node.js repository to our Ubuntu installation. We need to specify the exact Node.js version we want to add to the repository, which makes changing or upgrading and downgrading Node.js versions cumbersome. You can check the latest supported Node.js versions here.
We therefore recommend using NVM (Node Version Manager) instead.
Install Node.js v18 LTS on Ubuntu
First we add the Node.js v18 LTS repository and then we install Node.js using apt:
curl -fsSL https://deb.nodesource.com/setup_lts.x | sudo -E bash - &&\
sudo apt-get install -y nodejsCode language: JavaScript (javascript)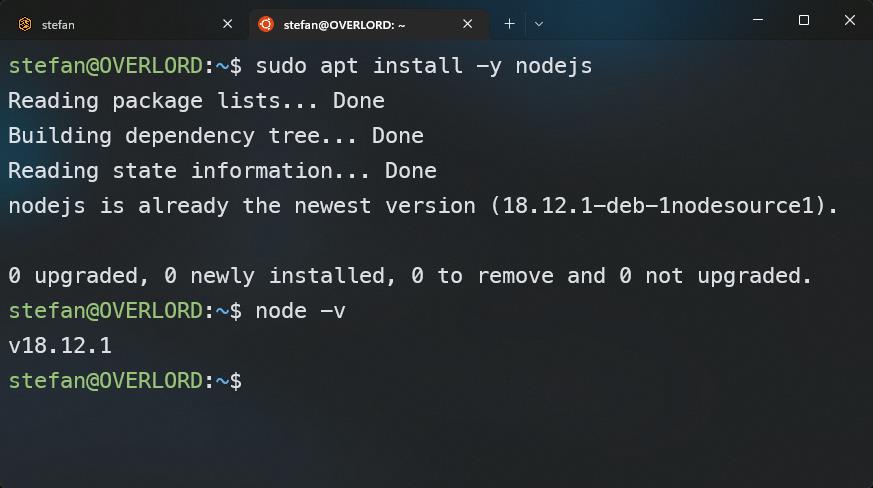
Install Node.js v19 on Ubuntu
First we add the Node.js v19 repository and then we install Node.js using apt:
curl -fsSL https://deb.nodesource.com/setup_19.x | sudo -E bash - &&\
sudo apt-get install -y nodejsCode language: JavaScript (javascript)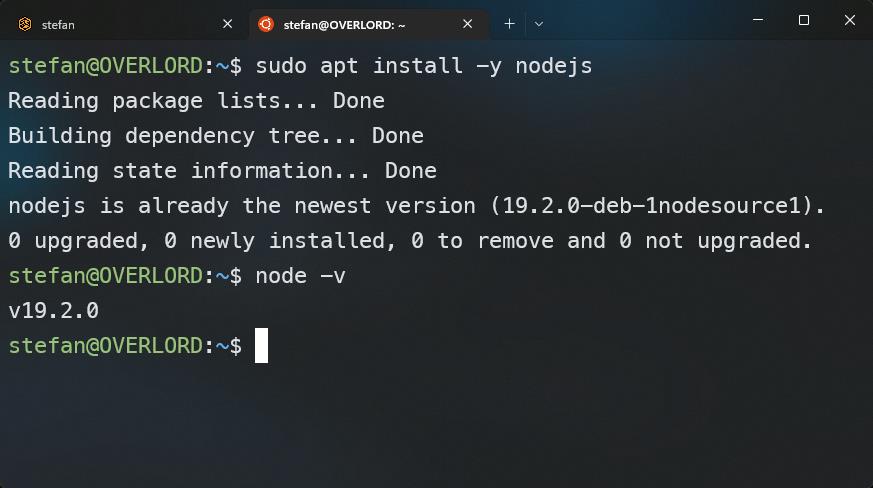
Summary
Installing Node.js on Ubuntu is really simple if you don’t have to change Node.js versions often, but if you are developing multiple projects that use different Node.js versions, we highly recommend using NVM instead. Learn how to install NVM here.