Last week we have learned how to install WSL 2 on Windows, and as I have promised, we will continue this series until we have a beautiful and optimized terminal for WSL2. In this guide, we will cover Windows Terminal Customization.
We will look at how far we can get by just using Windows Terminal’s own settings and customization options. They have added a ton of features that will probably satisfy most of the needs a regular person might have. If you want to take it a step further and really go deep into Windows Terminal Customization, you have to stay tuned for the next guide where we will cover OhMyZSH and further customization that goes far beyond basic usage.
Now without further ado, let’s dive into Windows Terminal Customization for WSL2. A short side-note: Parts 1 – 7 represent default Windows Terminal settings. The actual WSL2 customization starts in Part 8. I recommend having a look through Steps 1 – 7 anyway since we cover a lot of basics that affect startup behavior and so on.
⚠️This is a Tutorial Series⚠️
Part 1 – How to install WSL 2 with Windows Terminal – Complete Guide
Part 2 – Windows Terminal Customization for WSL 2
Part 3 – In-Depth Windows Terminal Customization for WSL2
Table of Contents
- Part 1 – Basic Settings
- Part 2 – Windows Terminal Startup Settings
- Part 3 – Windows Terminal Interaction Settings
- Part 4 – Appearance
- Part 5 – Windows Terminal Color Schemes
- Part 6 – Windows Terminal Rendering Settings
- Part 7 – Keyboard Shortcuts
- Part 8 – Customize Windows Terminal for WSL 2
- Part 9 – Windows Terminal Settings JSON
- Conclusion
Part 1 – Basic Settings
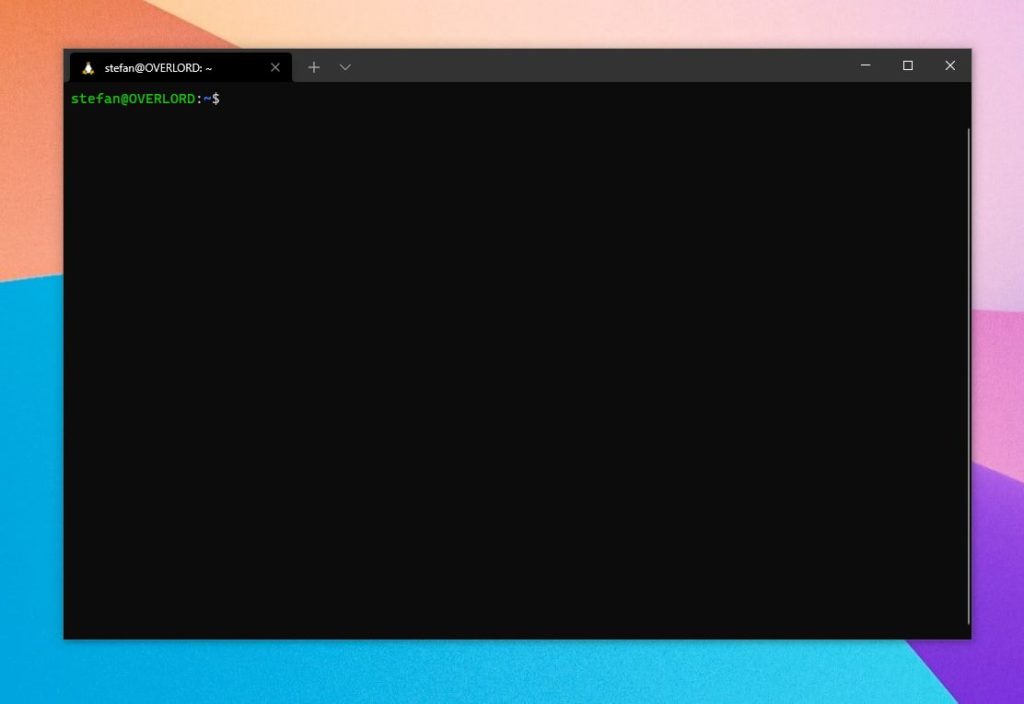
When you just freshly install WSL2 and Windows Terminal, you are left with a pretty vanilla experience, which might be enough for some, but not for those striving for that hacker-feel that automatically makes you feel that your skills are far higher than they actually are!
The times where we have to edit a JSON file to Customize Windows Terminal are over – they implemented a ton of GUI options to choose from – which of all of them make sense to me.
Windows Terminal Settings Overview
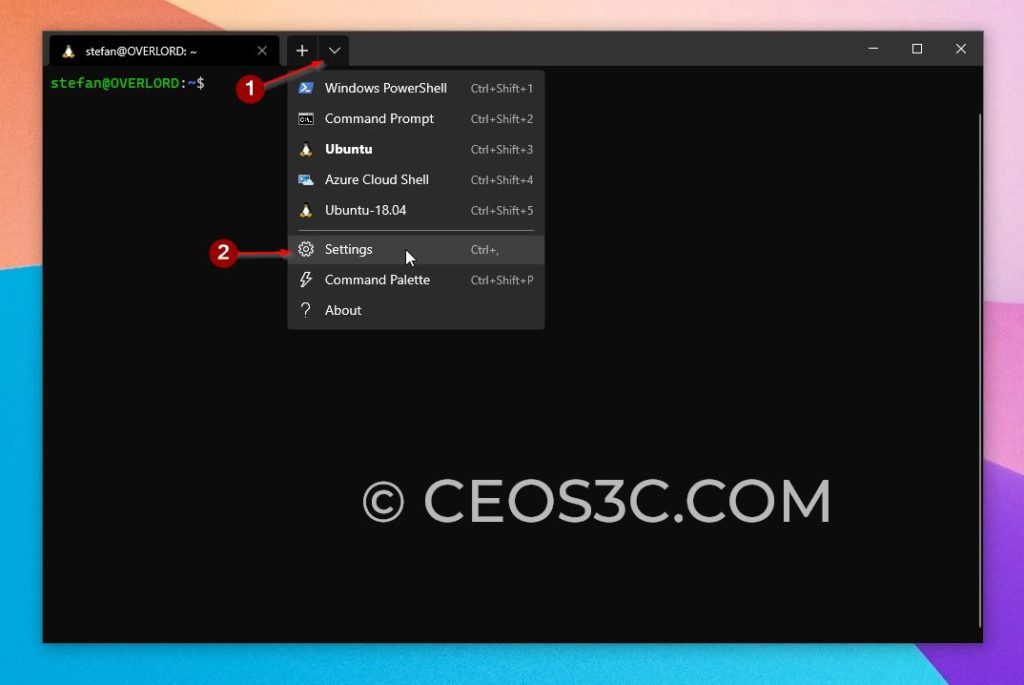
To open Windows Terminal Settings, click on the small down-arrow and click on Settings.
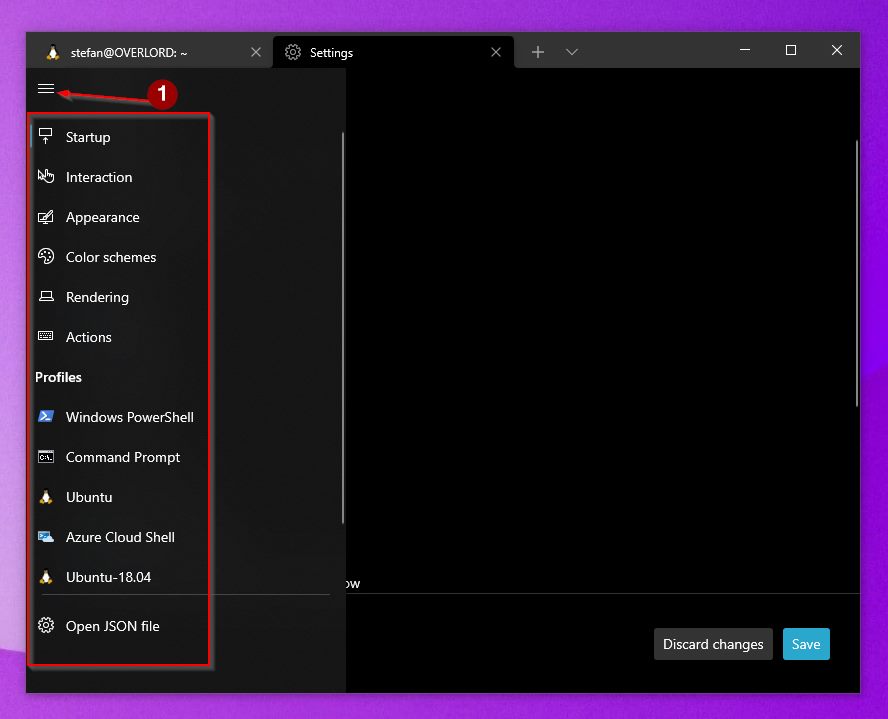
Once in there, you can click on the hamburger menu to extend the sidebar and get a quick overview of all of the available options.
Part 2 – Windows Terminal Startup Settings
Now, if you use WSL2, you probably want to use WSL2 as your default profile in Windows Terminal. To do that, simply select your preferred distribution as the default profile in Windows Terminal.
You have a couple of other options there as well, like launching your WSL2 instance right when Windows starts, and you have a couple of options for window sizing and behavior. Choose to your own liking.
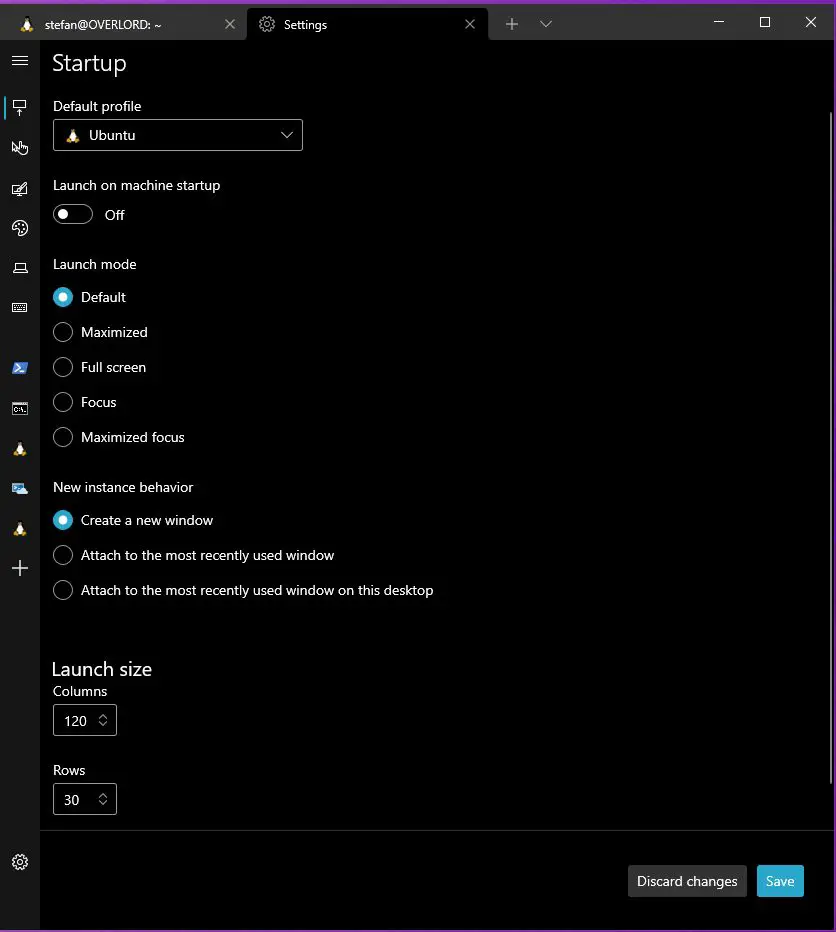
Once you are satisfied with your settings, we can move on to the interaction menu.
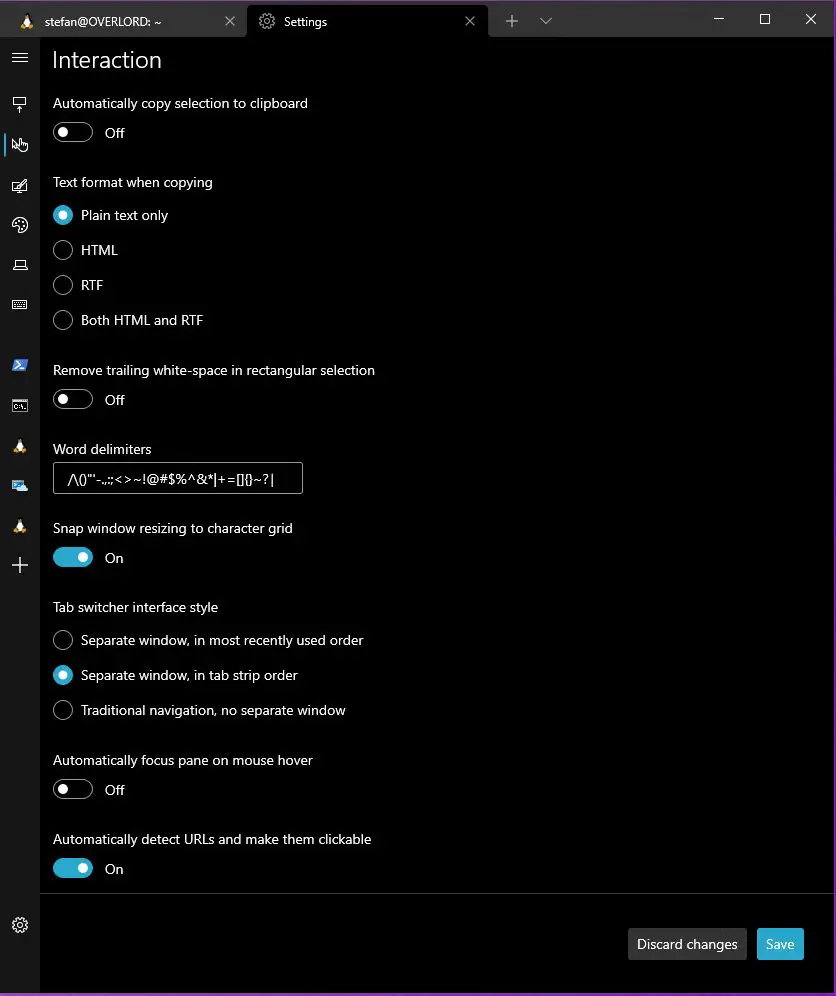
Part 3 – Windows Terminal Interaction Settings
Here we have a couple of formatting settings that we can adjust to our liking. I personally did not change any of those settings, but there is some interesting stuff in here like delimiters, automatically copying selection to the clipboard, and some text-formatting options, amongst others.
Have a thorough look through those options and just keep them in the back of your head in case you want to change them later, you know where to find them.
Part 4 – Appearance
On the Appearance tab, we have a couple of Windows Terminal Customization options in regards to it’s basic appearance. It sounds more exciting than it really is – it’s simple options like dark/light theme, showing tabs behavior, and so on. Play around with those as you see fit.
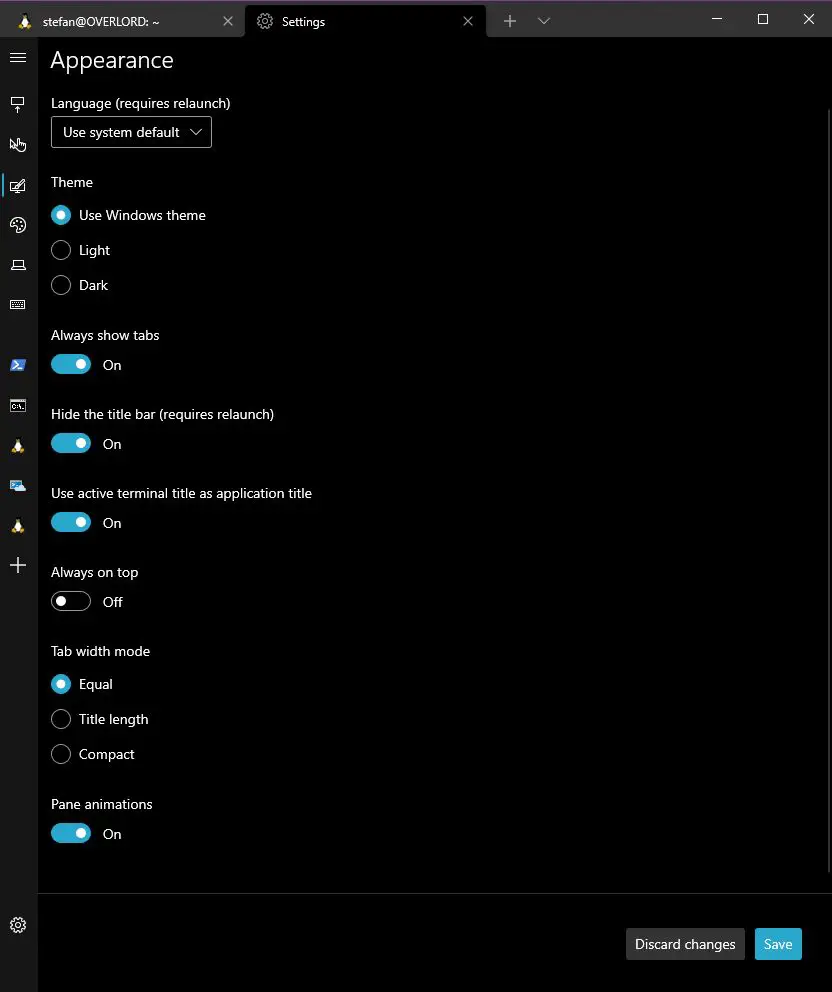
Next up, we will cover Windows Terminal Color Schemes.
Part 5 – Windows Terminal Color Schemes
Here, you can select a default appearance for Windows Terminal. This doesn’t really affect our WSL2 installation tho, to modify our WSL2 color schemes, we need to actually modify the appearance settings within our WSL2 installation – I show you how to do this in a second.
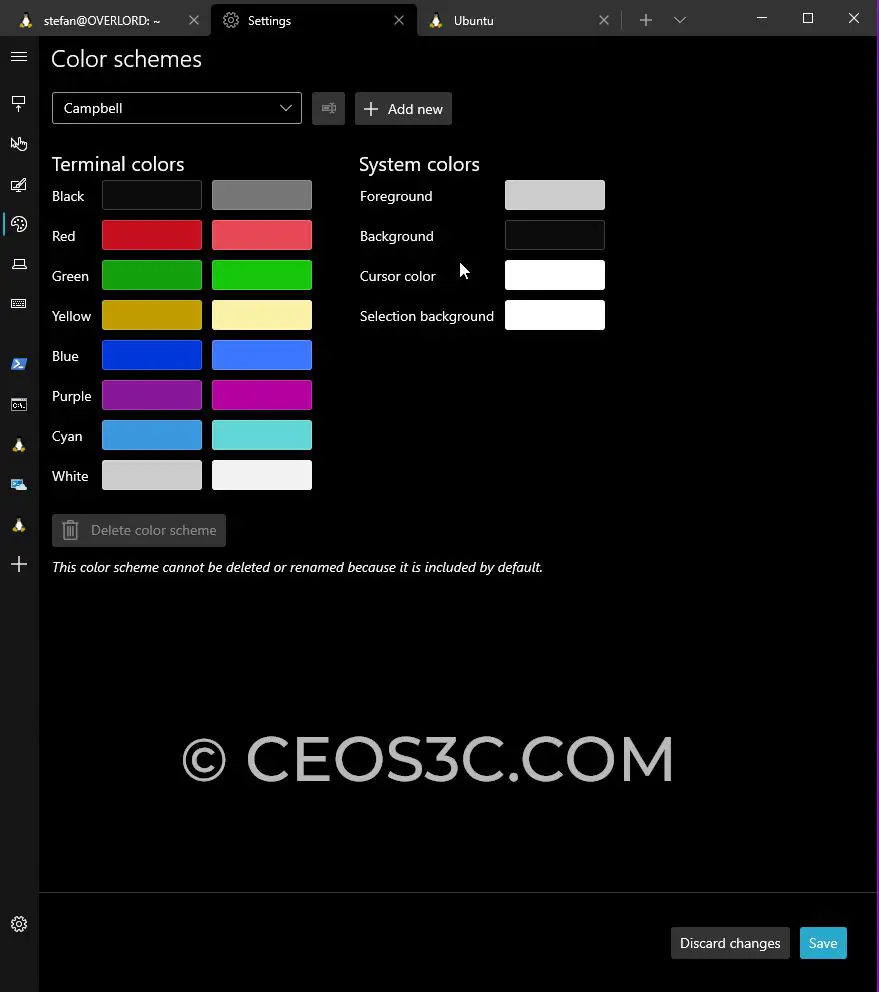
That means, you can just acknowledge that those settings exist for now, but changing anything here doesn’t make sense if we want to customize WSL 2 appearance.
Part 6 – Windows Terminal Rendering Settings
Next up, rendering settings.
Those really only need to be modified if you experience any kind of performance problems. I would not see any case where it would be necessary to enable software rendering nowadays, but maybe if you run into some issues with an older GPU or something like this, it’s good to know these settings exist.

You can also choose to redraw the entire screen when displaying updates if that’s something you’re into.
Part 7 – Keyboard Shortcuts
Now, this is really important and can boost your productivity by a ton! I use those shortcuts all the time. This is just an overview of those shortcuts – to modify them you need to modify the settings.JSON file, which I will show you later.

Alright, finally it gets exciting! Now we learn how to Customize Windows Terminal for WSL 2!
Part 8 – Customize Windows Terminal for WSL 2
Now that we have covered all the Basic Windows Terminal Settings, we can dive into how to customize Windows Terminal for WSL 2.
You probably have seen it by now, but all those options up top are the Default Windows Terminal Settings, whereas you find all of the individual settings for PowerShell, Command-Line, and all of your Linux terminals below.
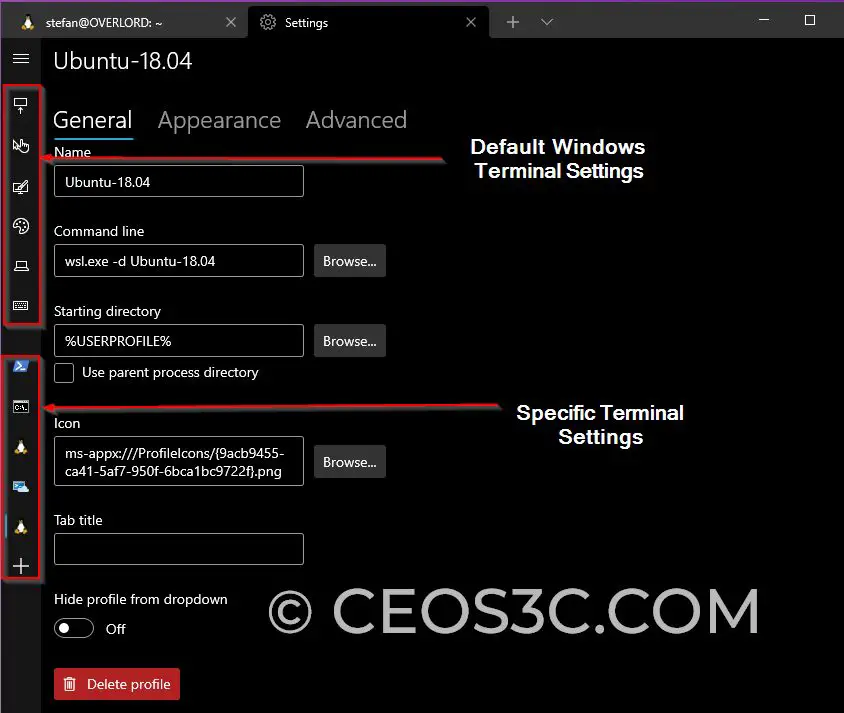
Windows Terminal WSL 2 General Settings
Here you have a bunch of general options to choose from, I’ll break them down for you below.
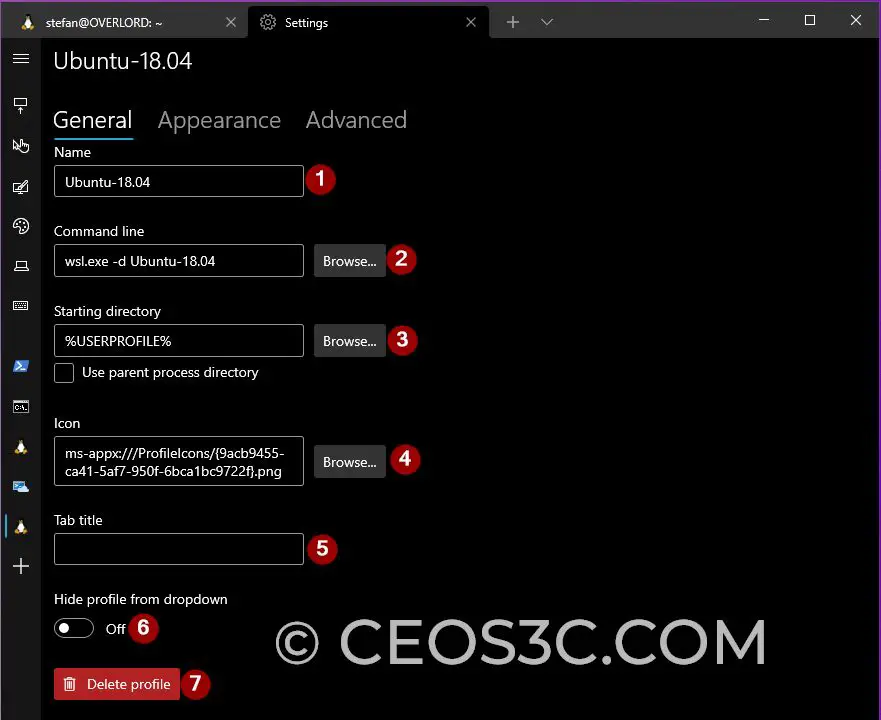
- Change the Name of your distribution how it will appear in the drop-down list.
- Change the Startup Parameters. (Advanced users only)
- Change the Default Starting Directory your WSL 2 will start in. Per default it is your user profile (stefan@OVERLORD:/mnt/c/Users/ceos3c$)
- You can Change the icon if you must. (Replace the Linux penguin with something else)
- Change the Tab Title. So instead of your tab saying stefan@ubuntu you can choose to let it say “Ubuntu” only, or something like that.
- Allows you to hide this profile from the selection drop-down.
- Delete this profile.
I usually like to modify the Tab title to something nicer, like the name of the distribution.
Windows Terminal WSL 2 Appearance Settings
Now comes the part you all have been waiting for! Customizing Windows Terminal appearance for WSL 2!
Here, you can change anything from the Color Scheme, Font Family, Font Size, Font-Weight, and a couple of very cool options like Retro Terminal Effects, change Windows Terminal Background Image as well as Acrylic Effects, or changing the Windows Terminal Background Opacity.
I highly recommend you watch the video that is mentioned at the beginning of this article where I go over each of those options in-depth.
You will always see a preview of your changes in the little console preview window up top in the Appearance options.
Let me give you a pretty cool example config that makes your Windows Terminal look immediately 10-times cooler. On the Appearance Tab select the following:
- Color Scheme: One Half Dark
- Font Face: Cascadia Code
- Font Size: 13
- Font Weight: Light
- Retro Terminal Effects: On
- Cursor: Vintage
- Acrylic: On
- Acrylic Opacity: 80%
You’ll end up with something like this:
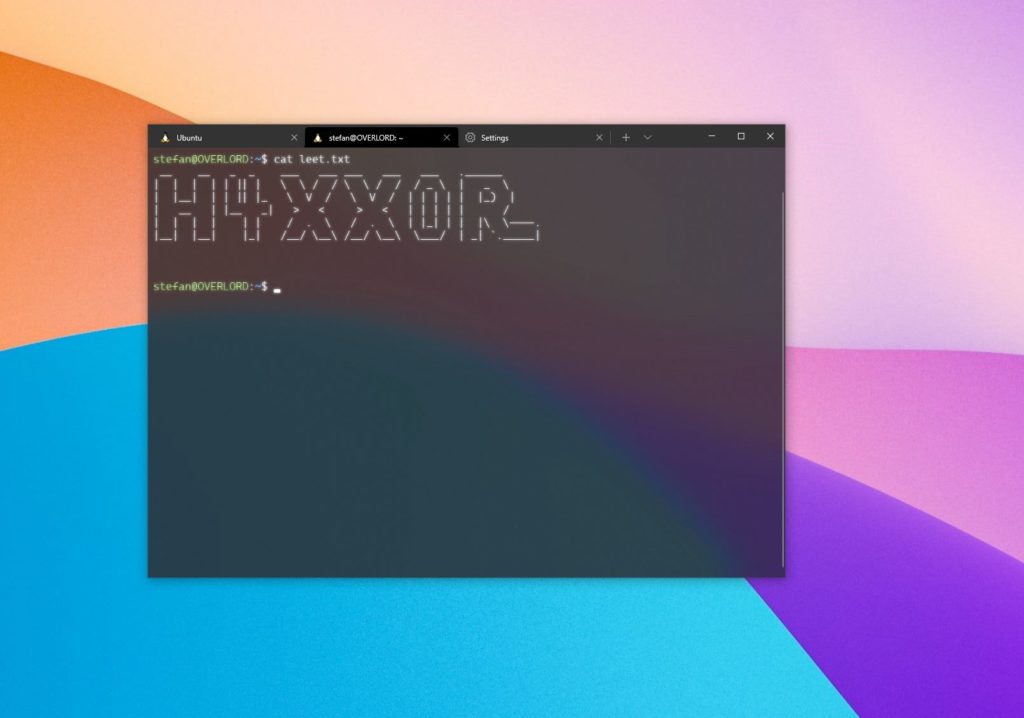
Pretty sick for the minimum effort we put towards that I would say!
Play around with those settings and see what you like best. You can also Change Windows Terminal Background Image that way and have it look completely custom with a picture of your favorite cat behind your code.
Windows Terminal WSL 2 Advanced Settings
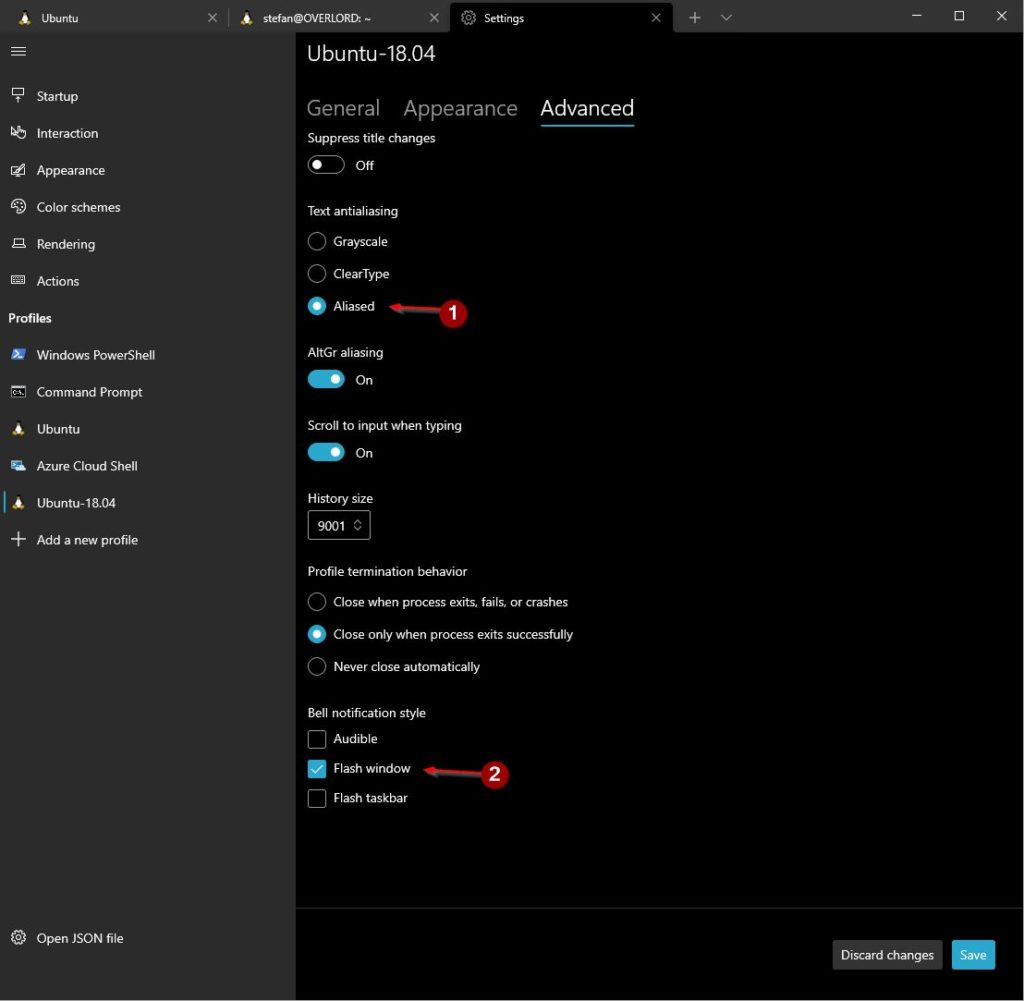
Next up, there are a couple of advanced options of which I would change at least two of them:
- Text Antialiasing: Aliased
- Bell Notification Style: Flash Window
I would recommend changing those two things to have better readable text and to disable audible notifications when you enter wrong syntax.
There is nothing that I had more than that annoying beep every time I hit double-tab for auto-completion and something goes wrong.
The Window Flash Effect instead is actually quite pleasing, so I like to roll with that. Of course, you can choose to enable none of that.
Part 9 – Windows Terminal Settings JSON
Now, as promised, this is the last part of this tutorial – Customizing Windows Terminal Settings.JSON.
Here, you can go down into all the nitty-gritty little details to fine-tune your Windows Terminal. I don’t actually see the need of using it for the most part since they improved the GUI experience so much, but go ahead and knock yourself out.
To open Windows Terminal Settings JSON just click on the small cog-wheel in the lower-left corner:

Now I obviously won’t go over every single setting in here. This is a simple JSON file and you can do a bunch of stuff in there, but as I said, I did not found the need to modify this at all since the newest version of Windows Terminal came out.
That being said, if you really, really want to modify the settings JSON file and you want a specific guide on that, let me know in the comments below and I shall deliver it.
Conclusion
Those Windows Terminal Customization and WSL 2 guides seem to be really popular among you guys, so I try to provide as much value as I can.
I think Windows Terminal is definitely the way to go when it comes to using WSL 2 on Windows, and since they made it much easier to get a beautiful WSL 2 terminal experience by simply going through a couple of settings in Windows Terminal, I don’t really see a need to go the whole nine yards by installing something super customizable like OhMyZSH for most people.
In the next part of this series, we dive deeper and we supercharge our terminal with OhMyPosh!
Click here to continue with part 3
I’m glad to hear you found the run-through helpful. Yes, interfaces can change over time, but it’s great that you’re still navigating it smoothly. If you have any questions or need assistance with the new options, feel free to ask!
22 Jan 2023
This is another great run through, even though some of the interface and options have changed. Thanks!
Thanks for that! I’m updating the entire series shortly 🙂
Hi Mr. Stefan
Did you create a guide on how to install OhMyZSH on WSL 2 ??
How did set the transparency for Terminal? I thought you could only configure it for background images only (like you could never see what’s behind the Terminal window).
Hey Tom, you have to enable the Acrylic Option and adjust its opacity. Read this: https://www.ceos3c.com/wsl-2/windows-terminal-customization-wsl2/#windows-terminal-wsl-2-appearance-settings
Missing is https://ohmyposh.dev
Cool! Haven’t heard of that, gonna check it out!
Prepare to get lost for days in customization. It’s such a fantastic prompt theme engine.