Welcome back, fellow security enthusiasts! After covering the Basic Metasploit Commands in the last article, it’s time to get familiar with Metasploit Workspaces. Workspaces are a great tool to keep everything organized within your Metasploit Framework.
Table of Contents
- What are Metasploit Workspaces?
- Workspaces Overview
- Creating new Workspaces
- Changing Workspaces
- Deleting Workspaces
- Conclusion
What are Metasploit Workspaces?
If you work on a couple of different projects, things can get messy real quick. You want to stay organized, that also counts for Metasploit.
So how do Workspaces work? Workspaces allow us to work on several different projects without using a separate Database for each of them. All of the Workspaces we create reside in the same Metasploit Database.
Let’s say you work on your Metasploitable2 project.
You scan some hosts, find some vulns, run some db_nmap scans (more on that later) and everything gets stored in the Default Workspace. Now you have enough of Metasploitable2 and start working on another CTF or vulnerable VM.
You run more NMAP scans, scan more hosts et cetera. All of them will also be stored in the Default Database. Now after a couple of days, you come back and run the hosts command. All messed up. At the view of the whole mess, you probably stop working on both projects altogether. This is where Workspaces come into play.
Workspaces allow you to create a separate Working Area for all of your projects. All hosts, vulns, scans et Cetera will be stored in that Workspace, allowing you to quickly switch between them and continue working on a different project.
Workspaces Overview
Let’s first have a look at the options. Start your msfconsole and type:
msfconsole
workspace -h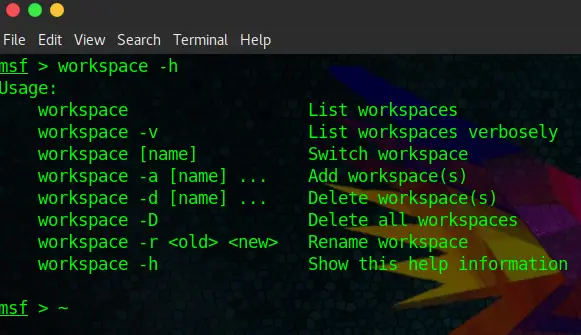
Alright, that should be pretty self-explanatory. We can list, switch, add, delete, delete all and rename Workspaces, pretty easy to work with. Let’s have a look at the default Workspace:
workspace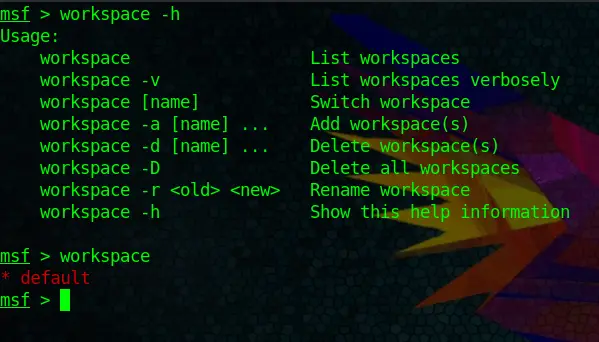
Cool, now we know how to view Workspaces.
Creating new Workspaces
By now you should already get the grasp of it. Let’s create two workspaces:
workspace -a metasploitable2
workspace -a MrRobot
And run the command below to show all Workspaces:
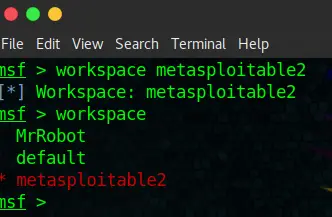
workspace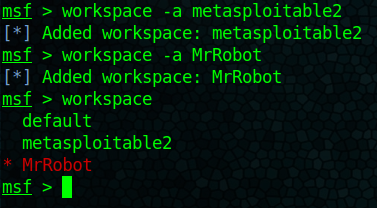
We got that down. But do you recognize something? You automatically end up in the latest Workspace that you have created. Which brings us to the next part.
Changing Workspaces
You probably know how by now:
workspace metasploitable2Brings us right back to our metasploitable2 Workspace:
And finally how to delete them again.
Deleting Workspaces
Piece of cake for you now:
workspace -d MrRobot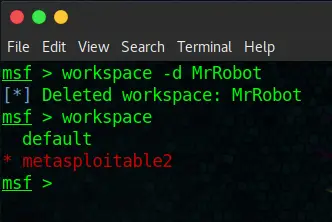
Conclusion
As you can see, pretty straightforward. This feature will make more sense to you once we start using the db_nmap command to run scans within Metasploit and save hosts, vulns and so on in our Metasploit Database. It will be covered in one of the next tutorials.