
I recently installed Zabbix 3.4 on Ubuntu 18.04 and didn’t realize that version 4.0 LTS was already released. Version 3.4 is not LTS, so it is desirable to have the LTS version in place if you plan to use it well into the future. So I had to upgrade Zabbix from 3.4 to 4.0, first, I thought it was going to be a lengthy process, but in fact, it is really easy. I will show you how.
I will only cover the upgrade process here, but be aware that I do not include the Database Backup Process. Make absolutely sure that you have either a complete Snapshot of your Server or a complete backup of your Database in place before upgrading!
Step 1 – Backing up your Database
As I mentioned above, I am not going to cover that here, to back up your Database, follow the official Documentation.
Step 2 – Backing up your Config / PHP and Binary files
Next, we are going to back up our Config / PHP and Binary files, just to make sure.
Configuration Files
mkdir /opt/zabbix-backup/
sudo cp /etc/zabbix/zabbix_server.conf /opt/zabbix-backup/
sudo cp /etc/apache2/conf-enabled/zabbix.conf /opt/zabbix-backup/
PHP and Binary Files
sudo cp -R /usr/share/zabbix/ /opt/zabbix-backup/
sudo cp -R /usr/share/doc/zabbix-* /opt/zabbix-backup/Code language: JavaScript (javascript)
Step 3 – Stopping the Zabbix Services
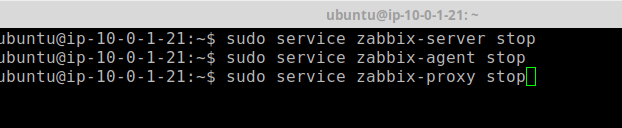
To Upgrade Zabbix from 3.4 to 4.0, we first need to stop all its services. So log in to your Zabbix Server and run:
sudo service zabbix-server stop
sudo service zabbix-agent stop
sudo service zabbix-proxy stop
Step 4 – Removing the current Repository Package
Next, we need to remove the old Zabbix Repository Package.
sudo rm -Rf /etc/apt/sources.list.d/zabbix.listCode language: PHP (php)
Step 5 – Installing the new Repository Configuration Package
And now we install the new one.
sudo wget https://repo.zabbix.com/zabbix/4.0/ubuntu/pool/main/z/zabbix-release/zabbix-release_4.0-1+bionic_all.deb
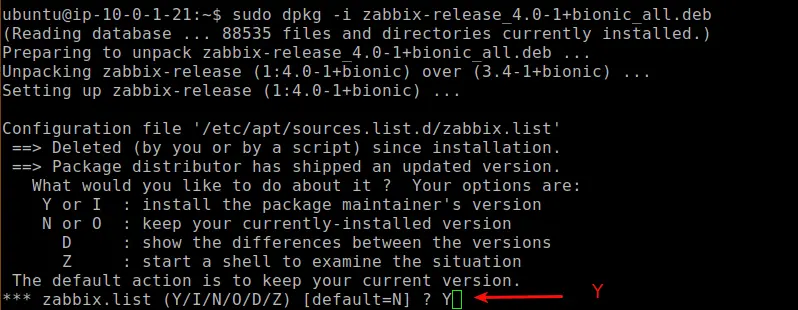
sudo dpkg -i zabbix-release_4.0-1+bionic_all.debCode language: JavaScript (javascript)After running the dpkg -i command, make sure you answer the question if you want to use the new version of the zabbix.list with YES.
When you are done with this, run an update to pull the new versions.
sudo apt-get updateCode language: JavaScript (javascript)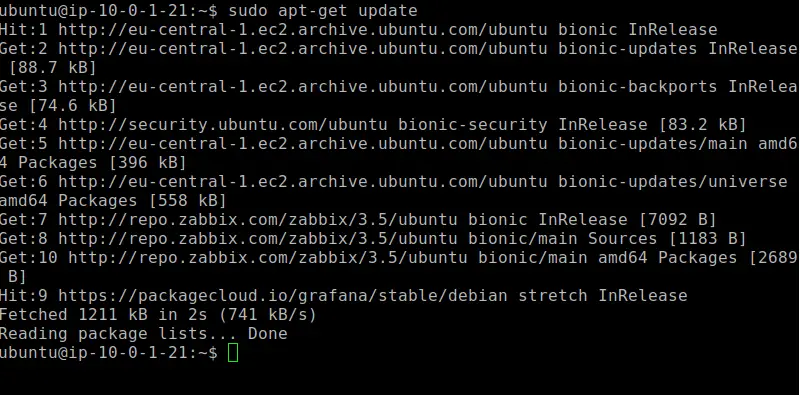
Step 6 – Upgrade Zabbix from 3.4 to 4.0
Time to run the final upgrade.
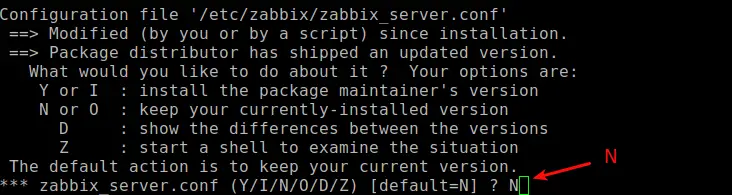
sudo apt-get install --only-upgrade zabbix-server-mysql zabbix-frontend-php zabbix-agentCode language: JavaScript (javascript)Make sure that you select NO to the question if you want to update the zabbix_server.conf file! If you choose Yes here, you need to enter your Database information again. In case you choose Yes out of a mistake, the updater automatically creates a backup of your old config, in /etc/zabbix/zabbix_server.conf.dpkg or something like this.
Step 7 – Starting Zabbix Services
And finally, we are going to start our services again. Depending on the size of your Database, it can take a while until it’s updated. Make sure to wait for a while if something is not working.
sudo service zabbix-server start
sudo service zabbix-agent start
sudo service zabbix-proxy start

Upgrading between minor Zabbix versions
If you want to upgrade between minor versions, let’s say from version 4.0.1 to 4.0.3, it is significantly easier.
Upgrade Zabbix Minor Version
sudo apt install --only-upgrade 'zabbix.*'Code language: JavaScript (javascript)Upgrade Zabbix Server Minor Version
sudo apt install --only-upgrade 'zabbix-server.*'Code language: JavaScript (javascript)Upgrade Zabbix Agent Minor Version
sudo apt install --only-upgrade 'zabbix-agent.*'Code language: JavaScript (javascript)Wrapping Up
As you can see, it’s really easy to Upgrade Zabbix from 3.4 to 4.0. If you have followed each step carefully, you should be on the newest version in no time. Make sure to check out my YouTube channel, there are plenty of Zabbix and Monitoring Tutorials as well.