Did you buy a used Hard Drive and are now uncomfortable using it as it is? Well, there is a safe way to make sure you completely wipe that Drive. We achieve this by Overwriting the Hard Drive with Zeros. We are going to use Linux to do this. Linux comes pre-equipped for that task with a tool called Shred.
Step 1 – Selecting the correct Hard Drive
We first need to find out which Drive Letter our Hard Drive has so we are not accidentally erasing the wrong Hard Drive.
sudo fdisk -lNow find your Hard Drive by using its Size as an Indicator. My external Drive is 3TB, so it’s pretty easy to distinguish from my other Drives.

My Drive has the Drive Letters sde.
Step 2 – Overwrite the Hard Drive with Zeros using Shred
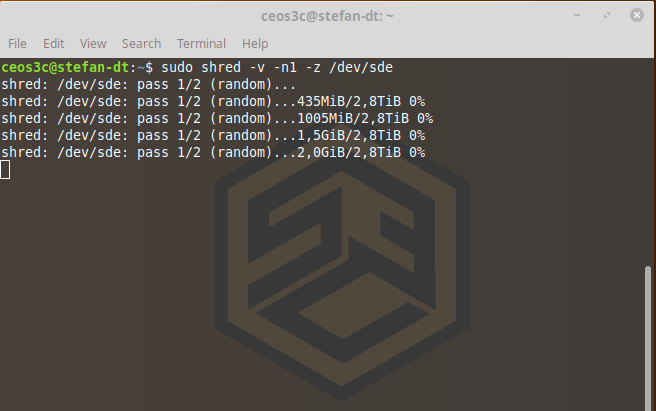
Now we are going to Overwrite our Hard Drive with Zeros. Double and triple-check if you really have the correct drive selected. That thing will get wiped clean after running the next command.
sudo shred -v -n1 -z /dev/sdXThe -v Tag stands for Verbose, the -n1 Tag stands for “One Time” and the -z Tag stands for Zeros. So Shred will run one time verbosely using the Overwrite with Zeros procedure.
Now you better occupy yourself with something time-consuming like Installing FOG Server or reading through some more awesome Open Source Tutorials, because this is gonna take a LONG time. Depending on the size of your Drive, it can take several hours to finish. For my 3 TB Drive, it will probably take around 10 Hours.
Once the procedure is finished, we have to format the Drive using GParted.
Step 3 – Format the Drive using Gparted
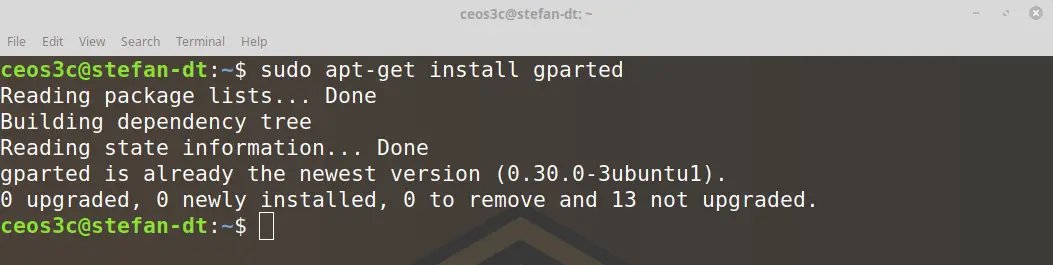
If you haven’t installed Gparted yet, first do that.
sudo apt-get update -y
sudo apt-get install gpartedCode language: JavaScript (javascript)
Run Gparted by typing:
gpartedOr simply via your Start Menu.
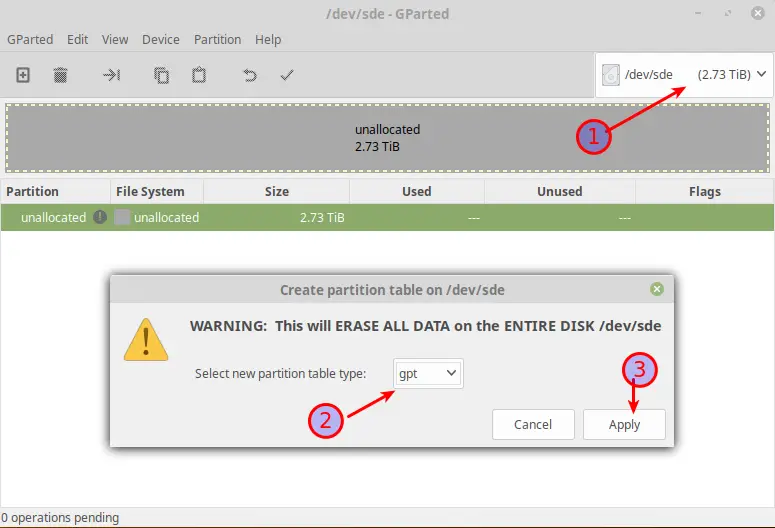
Now make sure you select the correct Hard Drive from the Upper Right Corner. After that, select Device -> Create Partition Table.
Next, right-click the unallocated space and select New. Choose NTFS as the Format and click Add.
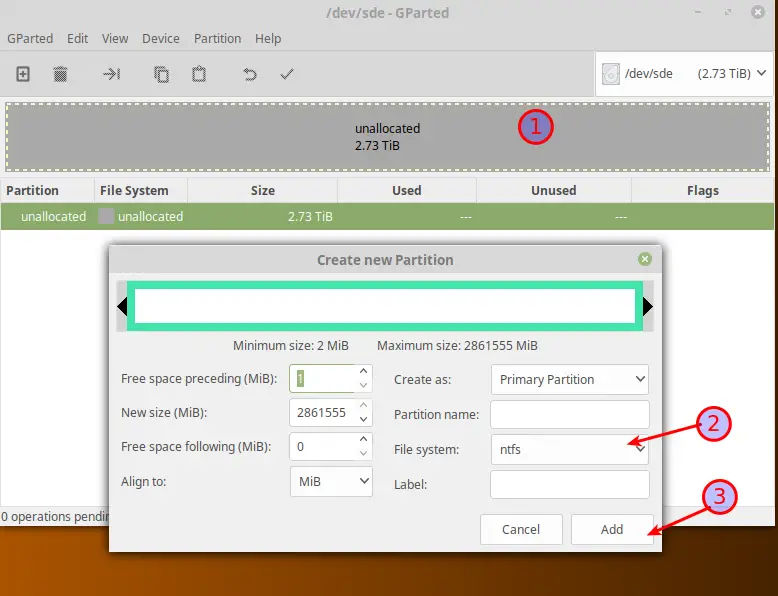
Now click on the Checkmark to Apply the operation. Don’t be confused by the File Size in the next Image, I had to continue this Tutorial on another Day and haven’t had the original Hard Drive at hand anymore.
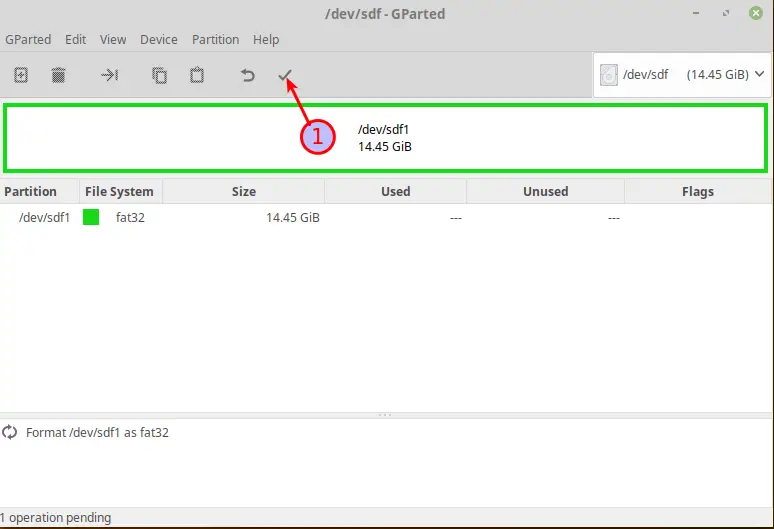
Once the Operation is finished, your Drive is cleanly formatted and ready to use!
Conclusion
You see, it is really easy to Overwrite a Hard Drive with Zeros on Linux. Now you have completely wiped all Data from the Drive, and it is safe to use again.
The command you gave will actually overwrite the disk TWICE. The correct command would be: sudo shred -v -n0 -z /dev/sdX