
A quick tutorial on how to Install LAMP on Ubuntu.
Without a big instruction, let’s get to work right away. LAMP means Linux Apache MySQL PHP, which is exactly what we are going to install now.
Table of Contents
- Step 1 – Update your system
- Step 2 – Installing Apache2
- Step 3 – Starting Apache2 Service
- Step 3 – Installing MySQL
- Step 4 – Installing PHP
- Step 5 – Testing the configuration and wrapping up
Step 1 – Update your system
First, we are making sure you are up to date by running:
sudo apt-get update -yCode language: JavaScript (javascript)Step 2 – Installing Apache2
Now that we have the L in place, it’s time to install the A.
sudo apt install apache2 -yYou can verify if that worked by entering your server’s IP into a browser, you should see something along those lines:
Step 3 – Starting Apache2 Service
If you are running Apache2 on a Ubuntu Server, you can start it by typing:
sudo systemctl start apache2If you are running Apache2 on something like WSL2, you can start it by typing:
sudo service apache2 startStep 3 – Installing MySQL
Alright, time for the M. Let’s install mysql-server:
sudo apt install mysql-server -yNow we are also going to run through the installer.
During the installation, you will be prompted to enter the MySQL root password. Make sure to write that down. You can just press enter on every step that follows to run with the default values, or modify them as you see fit.
sudo mysql_secure_installation- Now you get asked a couple of questions, answer as below:
- Enter current password for root (enter for none): Enter your root password
- Would you like to setup VALIDATE PASSWORD plugin? N
- Change the password for root? [Y/n] N
- Remove anonymous users? [Y/n] {ENTER}
- Disallow root login remotely? [Y/n] {ENTER}
- Remove test database and access to it? [Y/n] {ENTER}
- Reload privilege tables now? [Y/n] {ENTER}
- That’s it. Let’s continue with PHP.
Validating MySQL Installation
To check if the installation was successful, you can run:
sudo service mysql status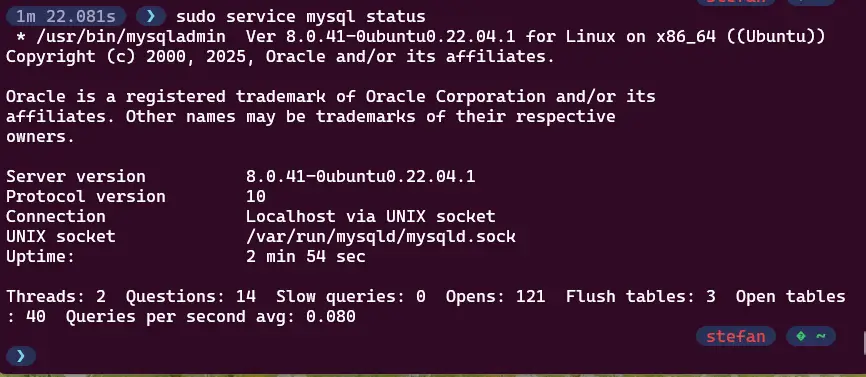
If you also want to make MySQL automatically start at system startup, run this:
sudo service mysql start >/dev/null 2>&1Code language: JavaScript (javascript)Step 4 – Installing PHP
And last but not least, the P.
For PHP, we need to install slightly more PHP with all its dependencies:
sudo apt install php php-mysql php-cli php-common php-mbstring php-zip php-curl php-xml -ysudo apt install libapache2-mod-php -yVerify PHP Installation:
php --versionLet’s restart apache2:
sudo service apache2 restartStep 5 – Testing the configuration and wrapping up
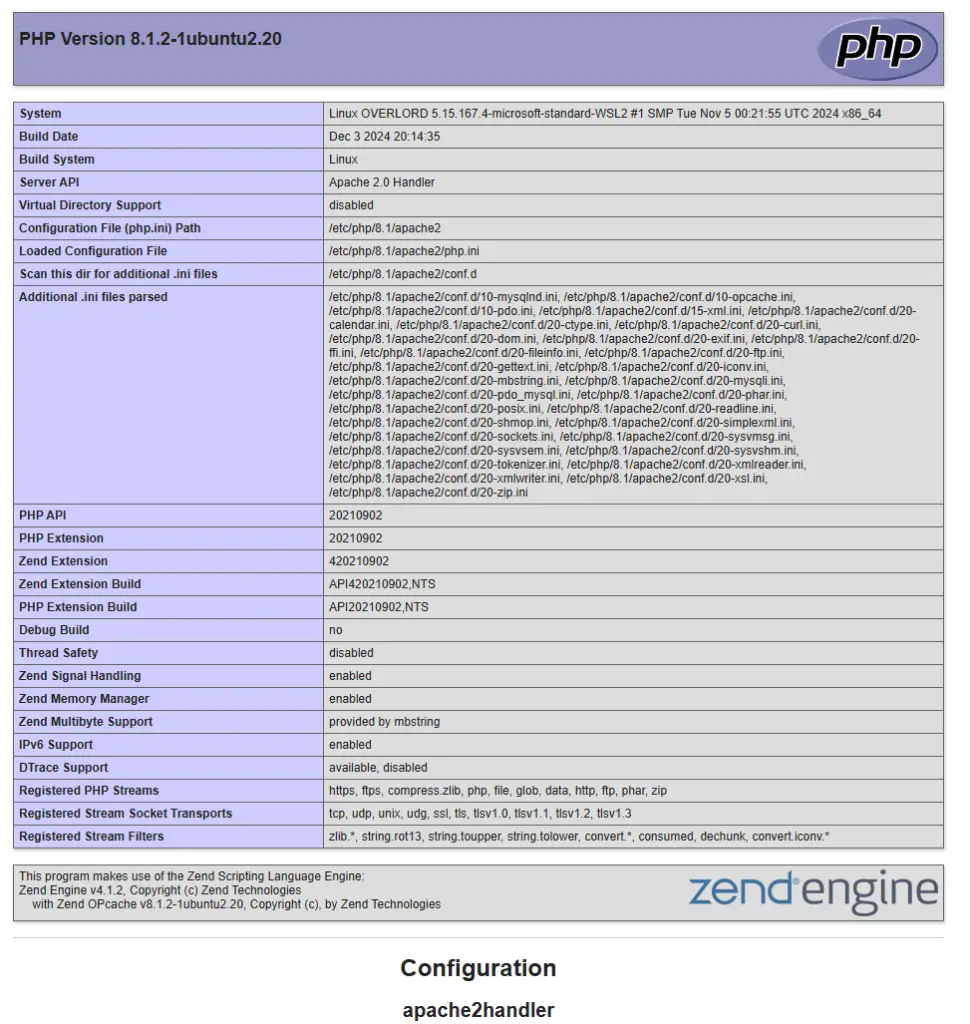
To test your configuration, we first need to create the phpinfo.php file:
sudo echo "<?php phpinfo(); ?>" | sudo tee /var/www/html/info.phpCode language: PHP (php)If you now open http://YOURSERVERIP/info.php or, http://localhost/info.php (this also works with WSL2) in your web browser, you should see the PHP configuration page:
And that concludes this tutorial. Now you can configure your server for whatever your needs are.