
After a lot of talking about it, we will dive right into it by setting up AWS Route53 DynDNS with pfSense. In this step-by-step tutorial, I will show you how you get Route53 DynDNS with pfSense working in no time!
If you missed the post about our Concept, check it out here.
⚠️ If you would like to learn more about pfSense, I highly recommend you check out my pfSense Fundamentals Bootcamp over at Udemy. This is the most up-to-date as well as the highest-rated pfSense course on Udemy.
Table of Contents
What is Dynamic DNS?
DynDNS is a service that translates your external IP Address into an URL like yourcompany.dyndns.org
If you have a static IP from your provider, you will not need DynDNS necessarily, I got a static IP but will use DynDNS anyway, just to have an address I can remember out of my head instead of remembering an IP address.
Most of you, at least for private usage, will have an external IP Address that changes every 24 hours. So it would be impossible to reach your internal network after the change of your IP Address.
This is where DynDNS comes into play.
Each time you got your 24h disconnect, pfSense will tell your DynDNS provider your new IP Address automatically.
There are plenty of completely free services out there that do that, I recommend NO-IP.
But because we are talking about AWS here, I will utilize AWS’s own DNS Service: Route53.
Now, Route53 can do A LOT more than just DynDNS. You can register domains, host websites, and so on.
If you want to utilize Route53 for DynDNS, you HAVE TO use route53 on that Domain. You can register a new domain with AWS just for the purpose of using DynDNS or transfer your own domain to them to use Route53 on it.
For example dyndns.yourcompany.com
In our case we will not use this homepage in any way, it solely is for the purpose of DynDNS, that’s not bad, cost just around 9$ per year for the domain. There will be very few fees for each DNS request tho, but they are minimal. Just be aware, that there are fees. IN doubt, use NO-IP.
Ok, let’s do this. It is very important that you read carefully through ALL the steps!
Step 1 Logging in to your AWS Web Interface and creating a new User
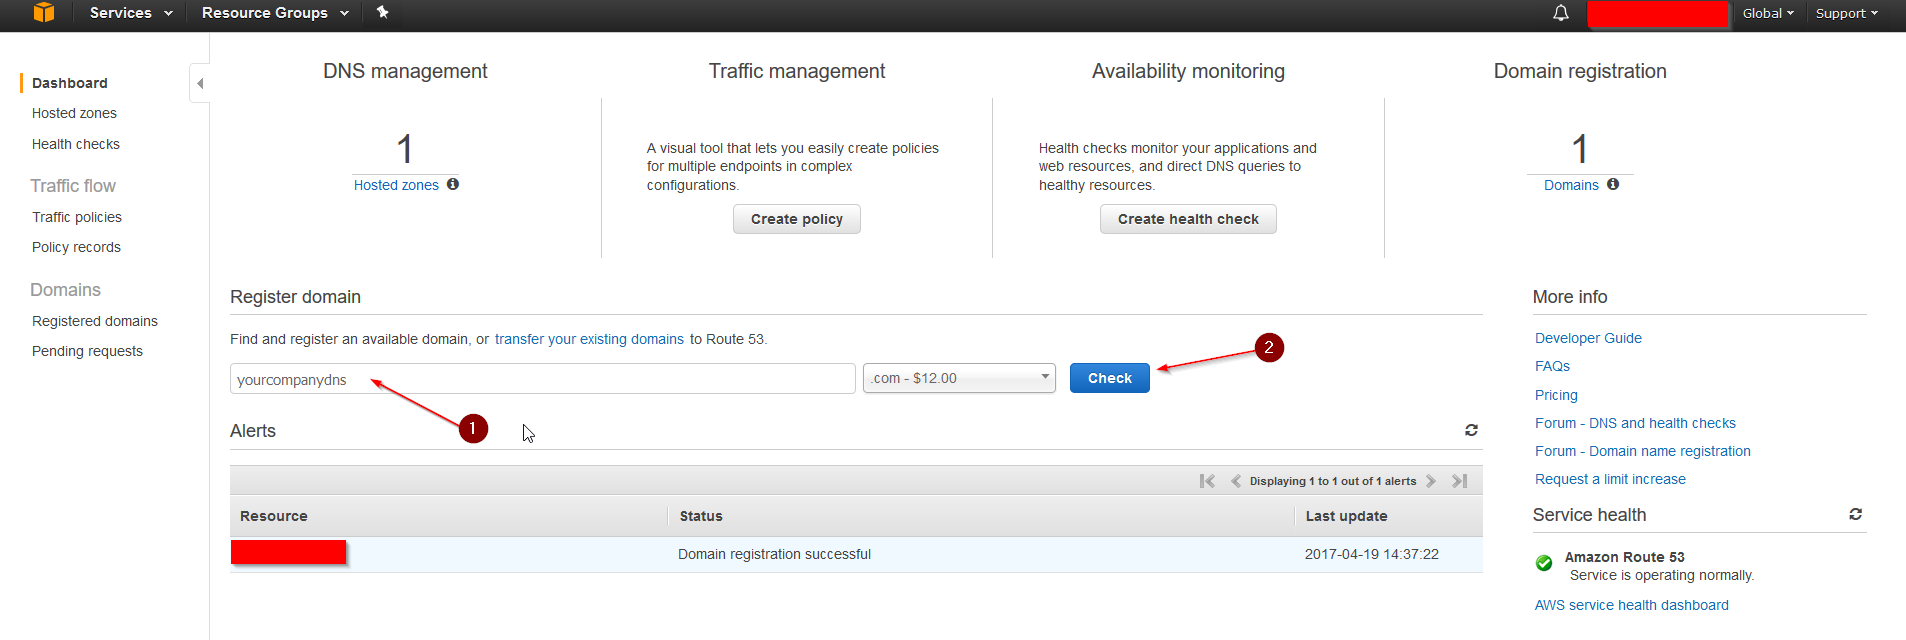
Navigate to Route53 after logging in.
Register a domain you like or transfer your own, for example, yourcompanydns.com, and go through the registration process. The registration can take a few hours to be finished. A Hosted Zone will be automatically created in the process. After everything is registered and the Hosted Zone populated, continue.
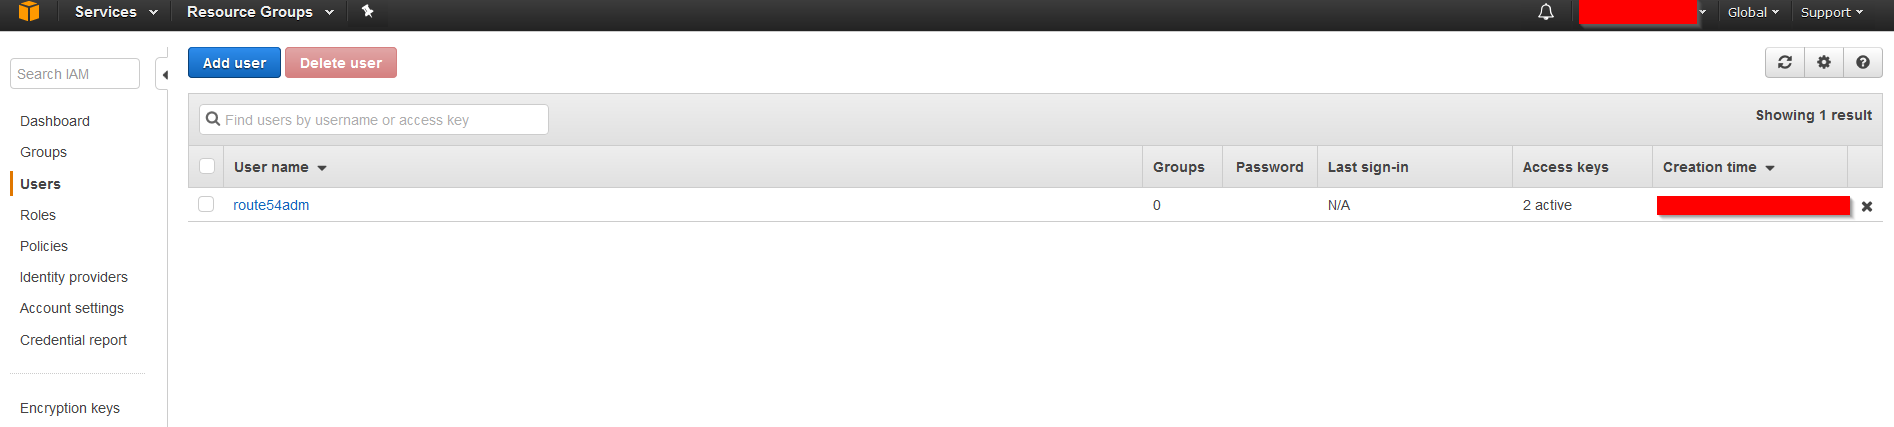
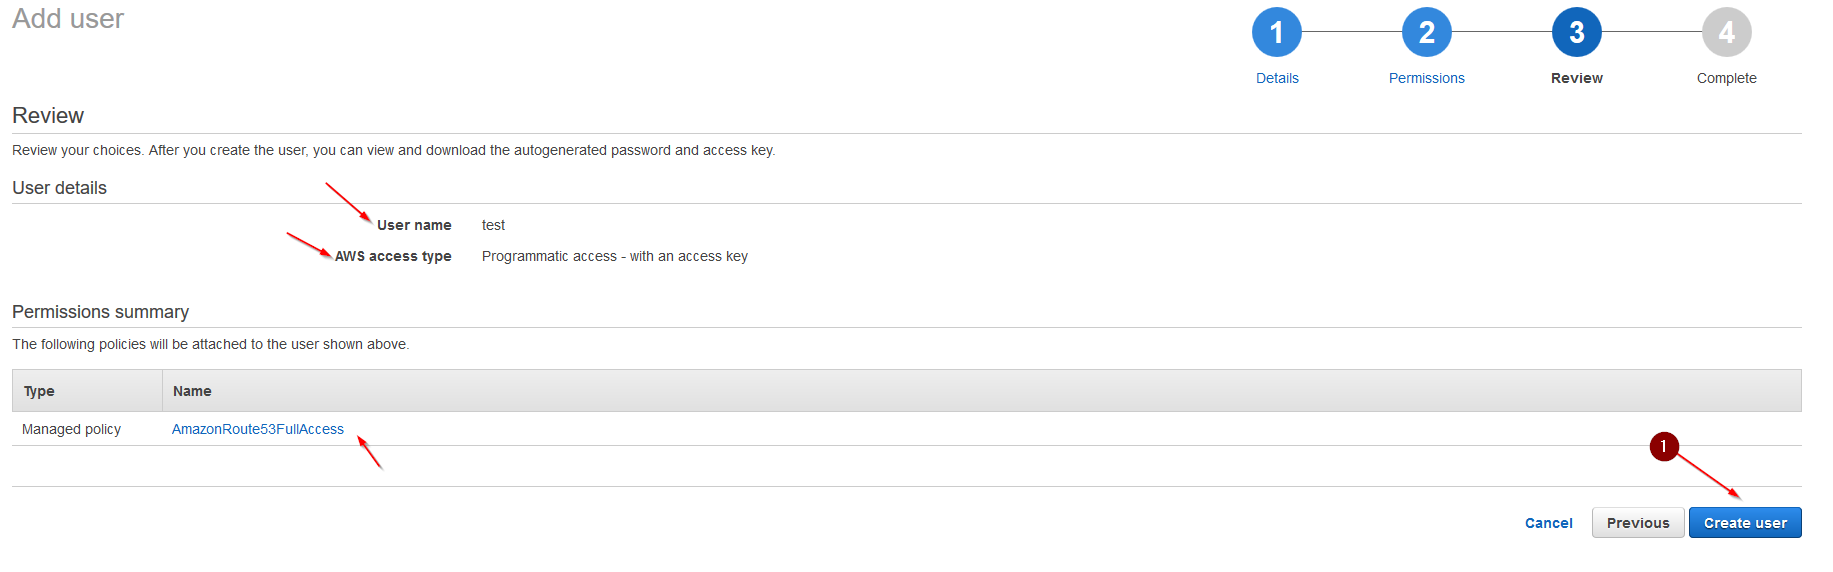
Now we want to create a new user who is designated and has permission to update our DNS Records in the newly created Hosted Zone. We don’t want to use our root account for this. In the AWS Web Interface navigate to IAM and to Users.
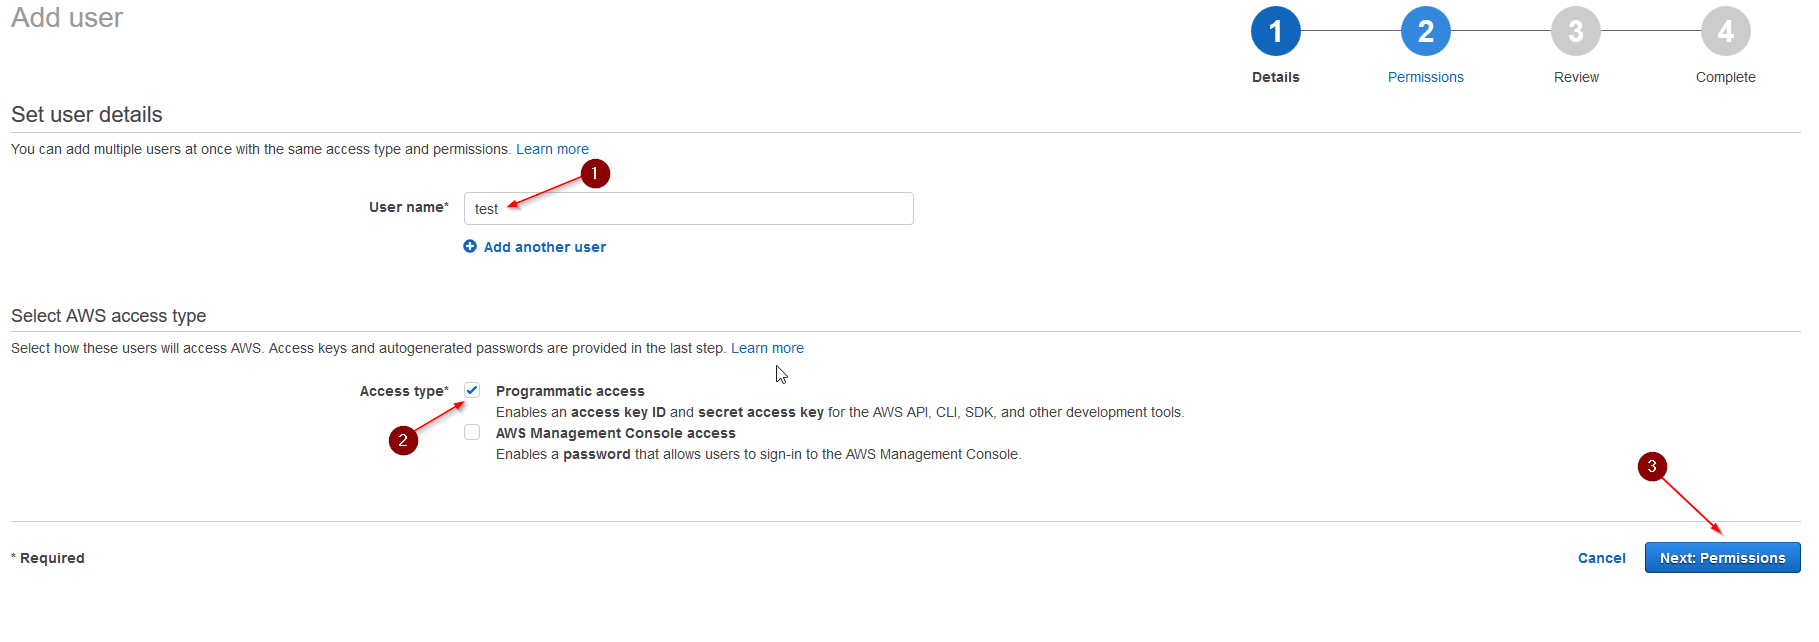
Enter a User Name and for Access type choose: Programmatic access.
Click Next: Permissions.
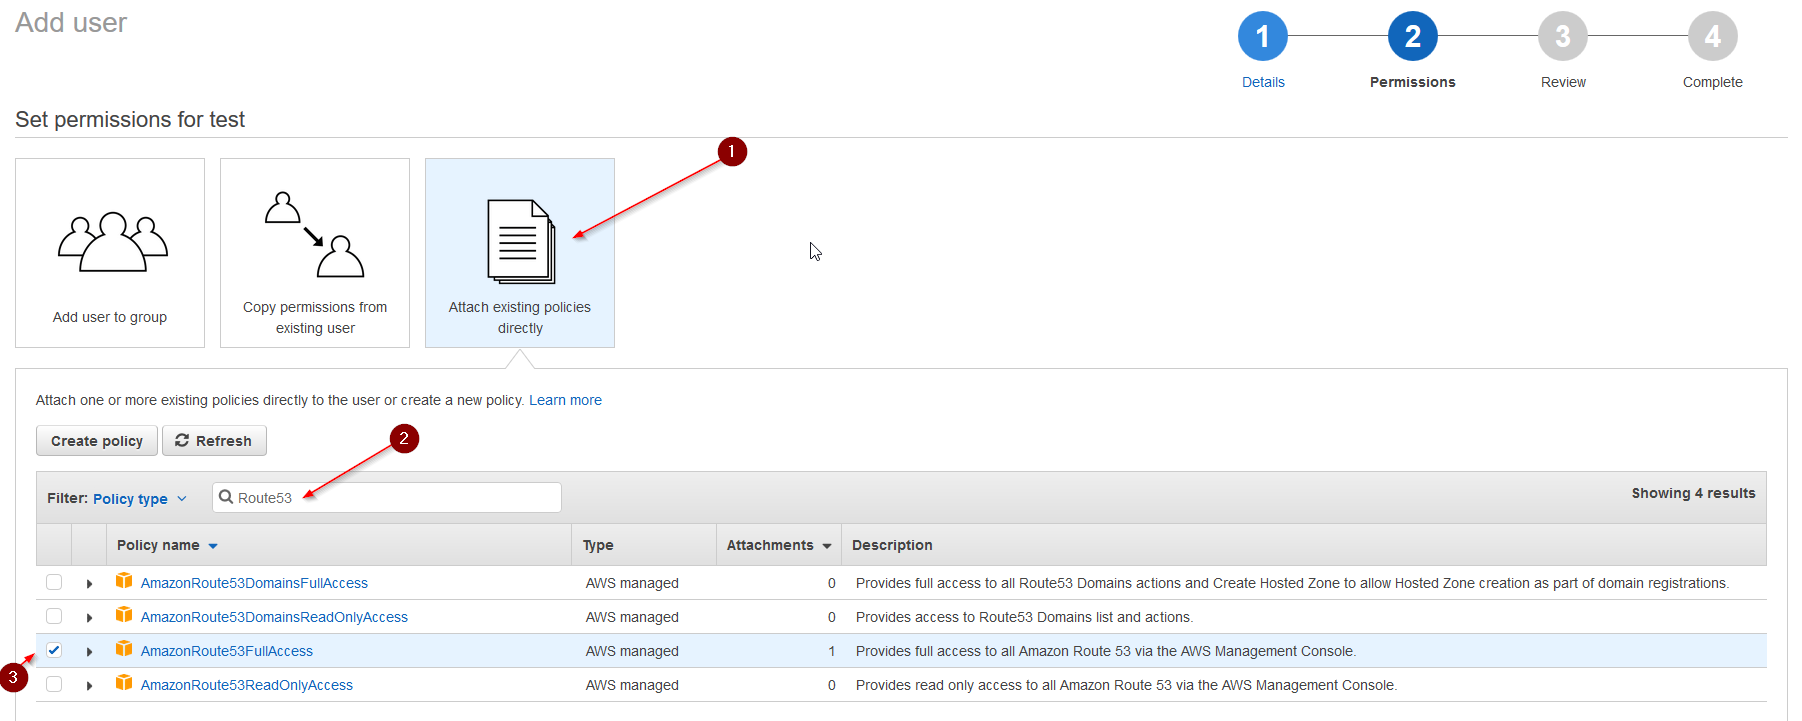
Select: Attach existing policies directly. Type: Route53 in the search field. Tick AmazonRoute53FullAccess. Click Next: Review.
Check if all is set correctly and hit: Create User. You will get presented with your Access Key ID and your Secret Access Key. Note BOTH down for later, we need them in our pfSense. If you do not note them, you need to create a new key pair later, this will be the only time this key pair is shown to you.
Step 2 – Configuring pfSense
Good. Now we already got our AWS side set up and ready to go. Let’s head over to our pfSense.
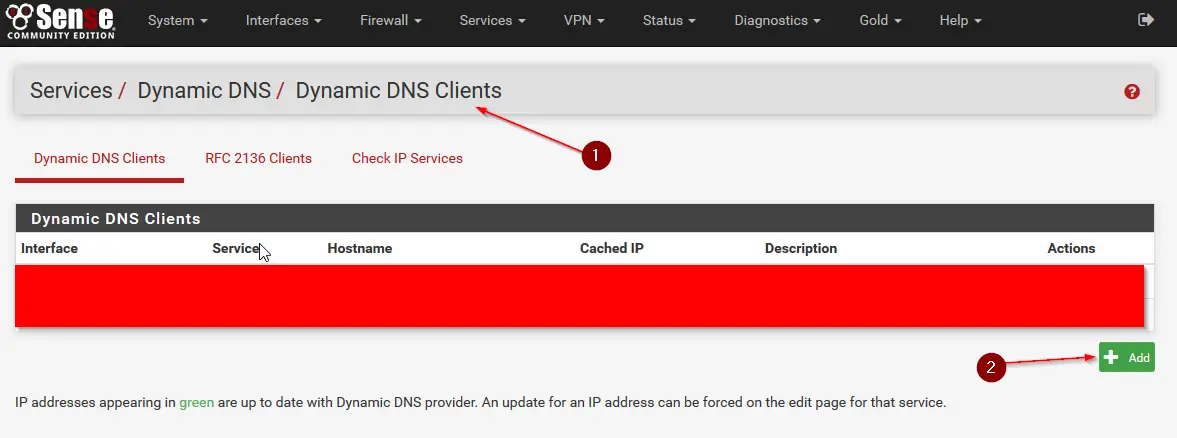
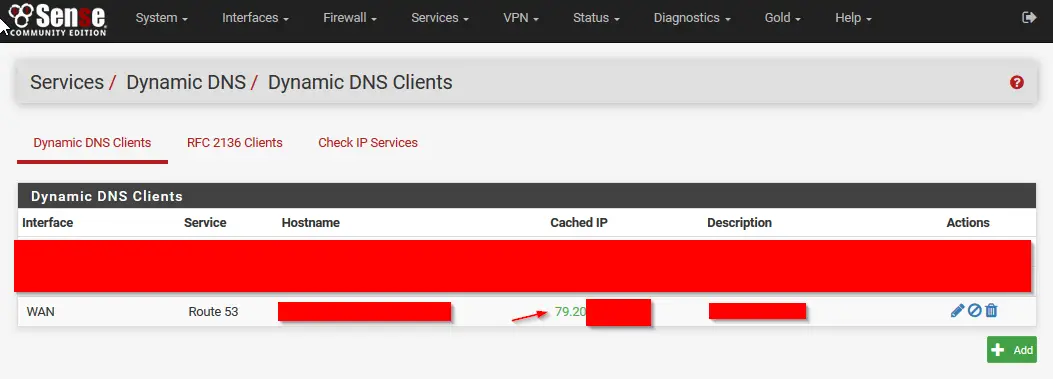
After logging in to the pfSense Web Interface head to: Services / Dynamic DNS / Dynamic DNS Clients and hit: +Add.
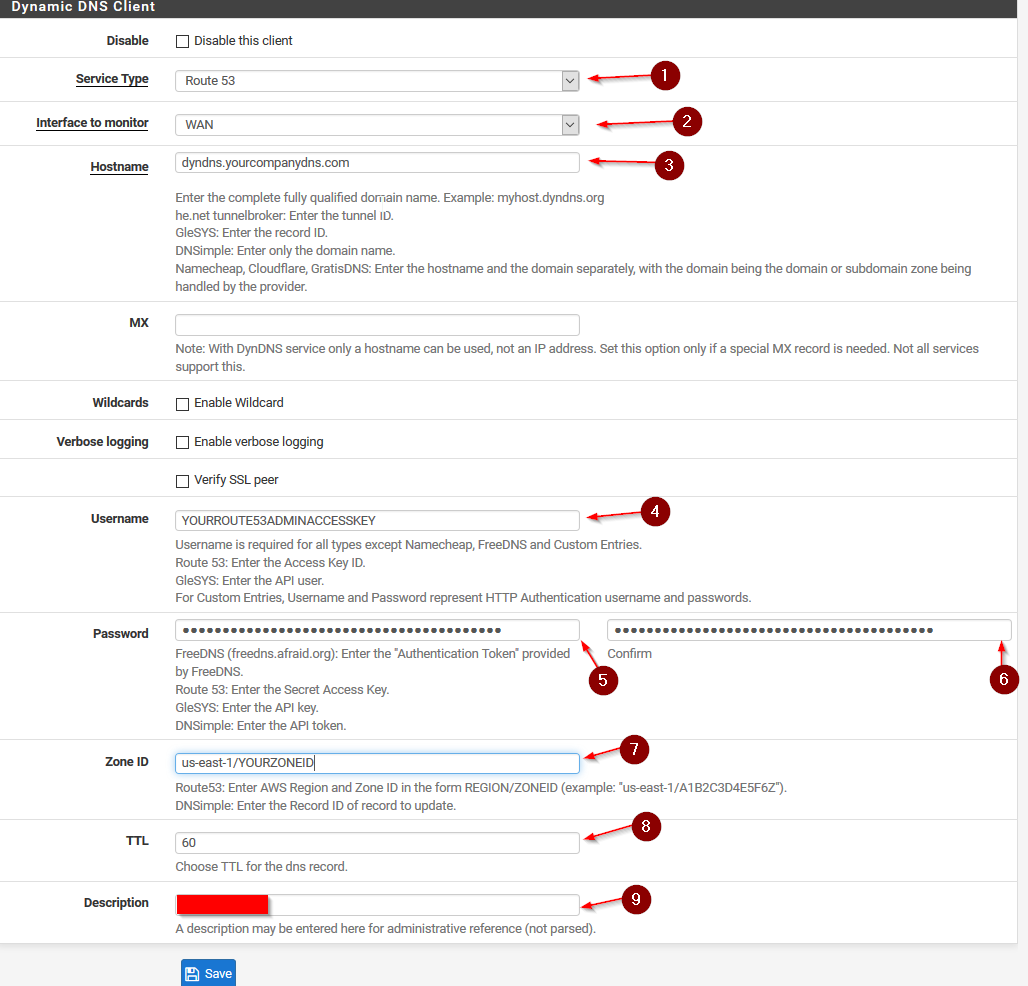
Now fill the information in like below:
Service Type: Route53.
Interface to Monitor: Your WAN Interface.
Hostname: The Name your DynDNS will update to, for example, if you registered yourcompanydns.com write in the hostname field: dyndns.yourcompanydns.com
Route53 will automatically create that entry for you inside of your Hosted Zone.
Username: The Access Key ID of your Route53 Admin user you created earlier.
Password: The Secret Access Key of your Route53 Admin user.
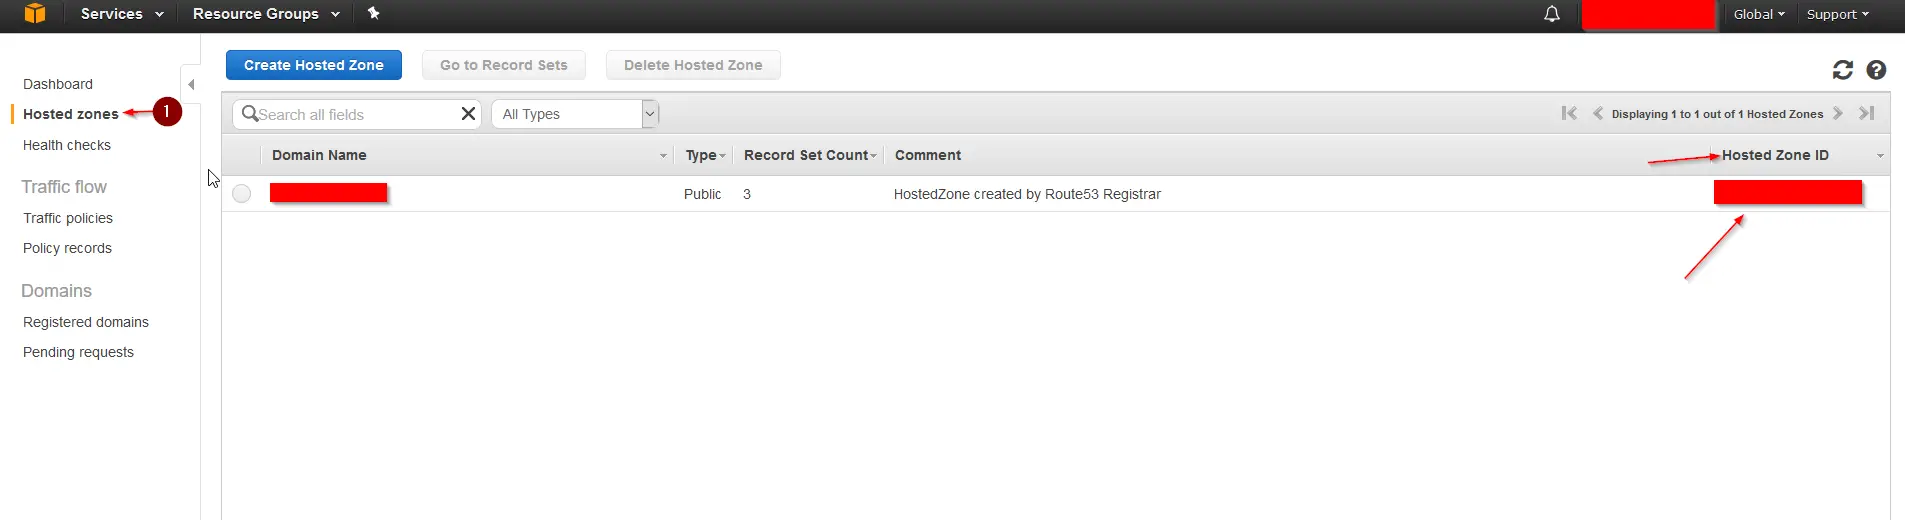
ZoneID: You find your ZoneID in Route53 under Hosted Zones and on the right side of your Zone Name.
It is very important that you enter us-east-1/YOURZONEID and NO MATTER where you are located, it is always us-east-1.
TTL: 60
Description: MyWANDynDNSRoute53
Your Zone ID
pfSense DynDNS Settings
If all went well, a green IP shows up and confirmed that the DNS record was updated. You can now reach your internal network over the dynamic DNS name you just created.
You can test it by pinging: dyndns.yourcompanydns.com from a computer outside of the network.
Also, if you go back to your Hosted Zone and click on the Zone, you will see that an entry with the name: dyndns.yourcompany.com and your IP Address was created.
Now every time your ISP changes your IP Address, pfSense will send an update to Route53 and update it to the new IP Address, meaning no matter how often your IP changes, your company network will always be reachable over dyndns.yourcompany.com
I hope this can help some of you, it took me quite a long time to find all the information on the internet especially with pfSense and the use of us-east-1 as the only working zone for DynDNS.
In the interest of security, I would recommend a much stricter policy on your IAM user than AmazonRoute53FullAccess.
This is all you need to get it to work, restricting it to specific API calls on the specific zone you want to update.
{
“Version”: “2012-10-17”,
“Statement”: {
“Action”: [
“route53:ChangeResourceRecordSets”,
“route53:ListResourceRecordSets”
],
“Resource”: “arn:aws:route53:::hostedzone/your-zone-id”,
“Effect”: “Allow”
}
}
@ceos3c great work with the article:) It seems like this has changed with 2.4.3. #ZoneID
us-east-1/YOURZONEID is not longer vaild. Just add YOURZONEID and your are good to go.
Amazing! Thanks for pointing that out!
I’m running pfSense 2.4.0, and I couldn’t get it to work *with* the us-east-1 in the Zone ID. Once I deleted it, and just used the plain zone id as reported in Route 53, everything worked.
Thanks for everything else. Much appreciated.
Interesting! Thanks for letting me know. I am glad I was able to help!
Odd.. It wasn’t working for me until I put in the US East 1.
@ceos3c, thanks for posting this guide. It got me up and running with Route53
Thanks! The “us-east-1” part of the Zone ID threw me off too!
No worries. Yeah, that’s a bit hard to grasp 🙂