
If you have been following me for a while, you know that I hate nothing more than incomplete guides. Unfortunately, when it comes to Vue (specifically Vue 3), there are a lot of incomplete guides out there. I had to read several articles to get Tailwind and Vue 3 to work, so I decided to share what I have learned.
Gladly, there is a very easy way on how to install Tailwind CSS in a Vue 3 project.
I have just recently started to learn Vue after a longer endeavor with React. Since I do not care about getting a job, I decided to give Vue a try. I am still at the beginning of my journey, but I can already tell that it is, in my opinion, easier to understand than React – And so far, I really enjoy it.
Since I am going to use Tailwind and Vue 3 as my flavor of choice when it comes to quick development, I am going to keep this article up-to-date and will add content as we go.
In this first draft, I’ll show you how to install Tailwind and Vue 3 with the help of Vue CLI. I take you through it step-by-step and show you how to use Tailwind CSS classes in a very basic app.
Bookmark this page should you decide to use Tailwind and Vue 3 as well and make sure to check back regularly for updates.
Since this is no “How to install Vue 3” guide (let me know if you want one), I assume you have Vue 3 already installed and ready to go. Let’s dive in.
Table of Contents
- The Setup
- Step 1 – Installing Requirements
- Step 2 – Installing Vue 3 and Vue CLI
- Step 3 – Create a new Vue 3 Project
- Step 4 – Install Tailwind CSS on Vue 3
- Step 5 – Visual Studio Code Extensions
- Step 6 – Testing Tailwind and Vue 3
- TL; DR
- Conclusion
The Setup
For this guide, I will use the following setup.
- Windows 10
- WSL 2 (or Ubuntu for that matter)
- Visual Studio Code
- NPM (8.1.0 or higher)
- Node.js (v14.18.0 or higher)
- Vue 3
- Vue CLI (v4.5.14 or higher)
- Coffee (The delicious brown liquid)
Step 1 – Installing Requirements
It is crucial for this to work that your system is up-to-date. The same goes for npm, our package manager. Now, unfortunately, if you use apt to install npm, you’ll end up with an utterly outdated version (3.x.x). The latest LTS version of npm however, is version 8.1.0.
To circumvent this, I came up with a surefire way to make sure we are on the same page. If you develop on Linux, you should be using NVM(Node Version Manager) anyway. This allows us to run the latest versions of npm and Node.js.
Updating the System
First, updating.
sudo apt update -y && sudo apt upgrade -yCode language: Bash (bash)Installing NVM
Now we install NVM from its original source and activate it.
curl -o- https://raw.githubusercontent.com/nvm-sh/nvm/v0.35.3/install.sh | bash
source ~/.bashrc
Code language: Bash (bash)Tip: If you use zsh instead of bash, use the following syntax:
curl -o- https://raw.githubusercontent.com/nvm-sh/nvm/v0.35.3/install.sh | zsh
source ~/.zshrcCode language: Bash (bash)
Installing npm@latest and nodejs@latest
Now we can install both, the LTS version of npm as well as nodejs. To make sure we are on the same page, we are going to upgrade npm to the latest version afterward.
nvm install --lts
nvm install-latest-npm
Code language: Bash (bash)
Now you are set to follow along with this tutorial.
Step 2 – Installing Vue 3 and Vue CLI
Even I said this is no “how to install Vue 3 guide”, I want to make sure we are on the same page. If you got Vue 3 and Vue CLI ready, skip ahead.
First up, we install Vue CLI using npm.
npm install -g @vue/cliCode language: Bash (bash)Step 3 – Create a new Vue 3 Project
We will do a simple example project. Simply choose Default (Vue 3) and hit Enter.
vue create my-projectCode language: Bash (bash)Navigate into the project directory.
cd my-projectCode language: Bash (bash)Step 4 – Install Tailwind CSS on Vue 3
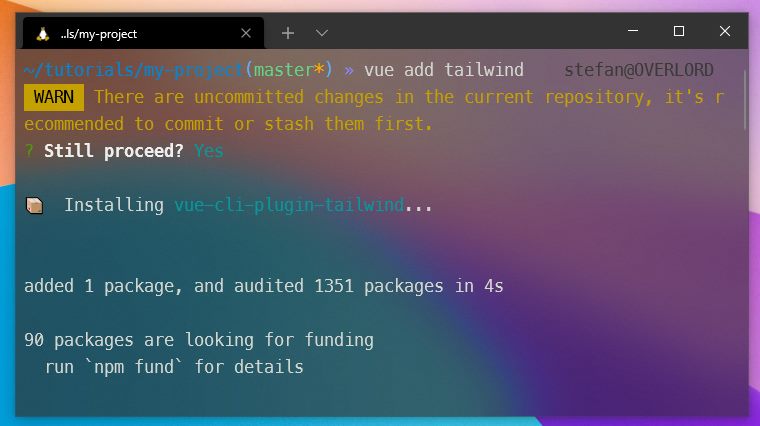
Now, to use Tailwind and Vue 3, we install it using Vue CLI. Select y if there is a warning about uncommitted changes.
vue add tailwindCode language: Bash (bash)If you get asked which tailwind.config.js file you want to create, go for minimal (or full if you know what you’re doing).
Step 5 – Visual Studio Code Extensions
We are almost done. Open up your project with Visual Studio Code.
code .Code language: Bash (bash)Or manually the way you are used to it.
Head to Extensions and install the Tailwind CSS IntelliSense Extension by Brad Cornes. This is essential if you want to use Tailwind CSS with Vue 3.

Step 6 – Testing Tailwind and Vue 3
Alright, now that we are all up and running, let’s see if it works. Open your project root directory in VSCode.
Verifying Tailwind and Vue 3 Configuration
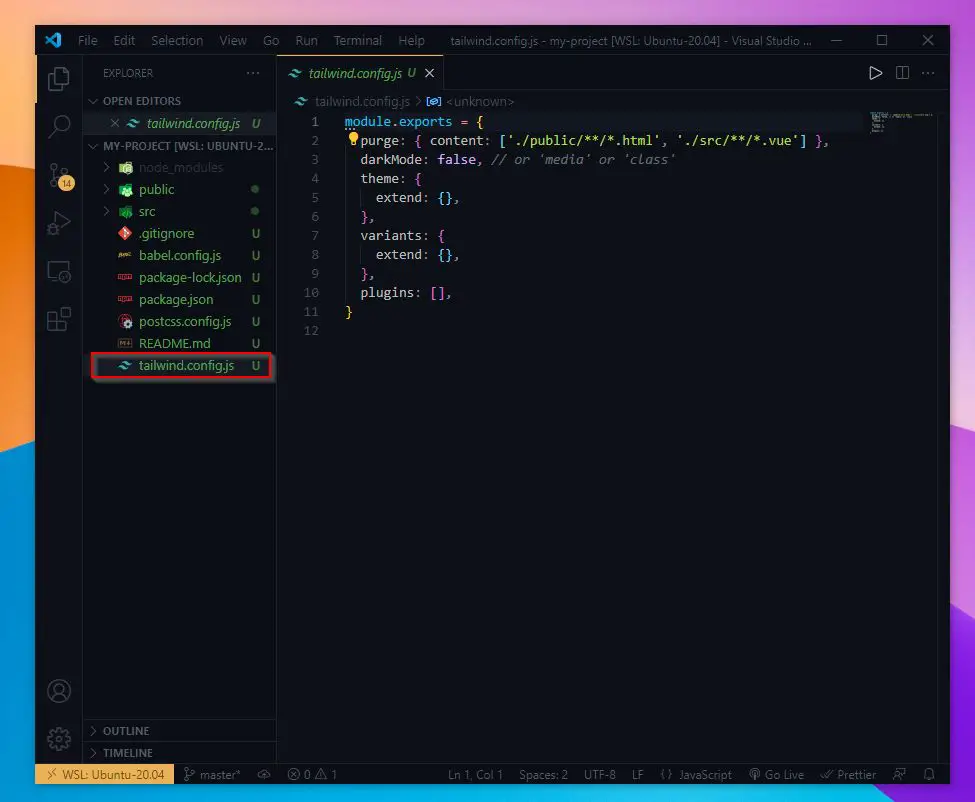
One indication that you did everything right is the tailwind.config.js file that you’ll find at the bottom of your root folder. This is the place where you do all your custom settings for Tailwind CSS, for now, you don’t need to touch it.
Running the Development Server
Start the Development Server to fire up the default Vue 3 App.
npm run serveOpen your Web Browser and navigate to HTTP://localhost:8080/, or for the lazy, click here.
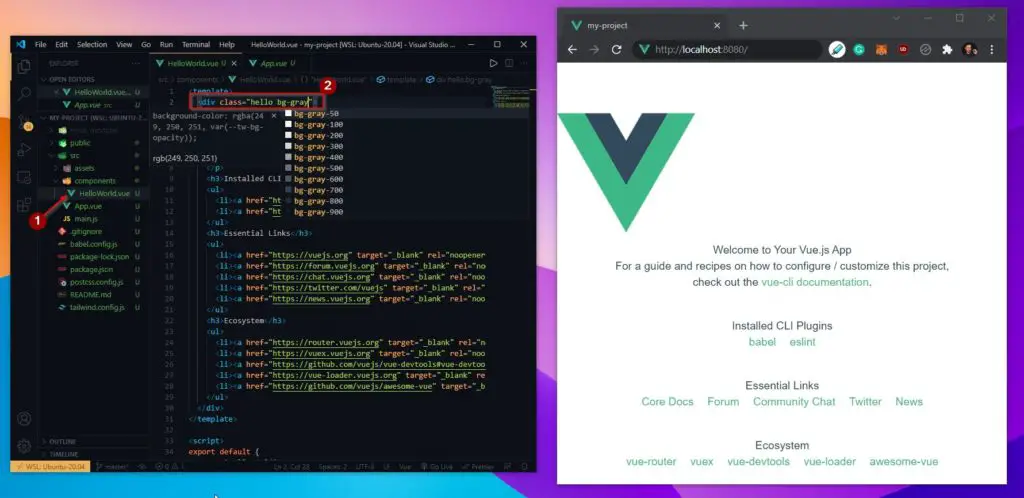
You will already see that Tailwind did something since the Vue Logo is not centered anymore. This is a sign that Tailwind and Vue 3 are in fact working together already!
To try if it is really working, open up the HelloWorld.vue file inside of the components folder click right at the end of <div class=”hello (right here)“> and make one space and start typing a Tailwind class name like bg-gray-. This should already fire up the Tailwind IntelliSense Extension we have installed earlier and presented you with a couple of choices.
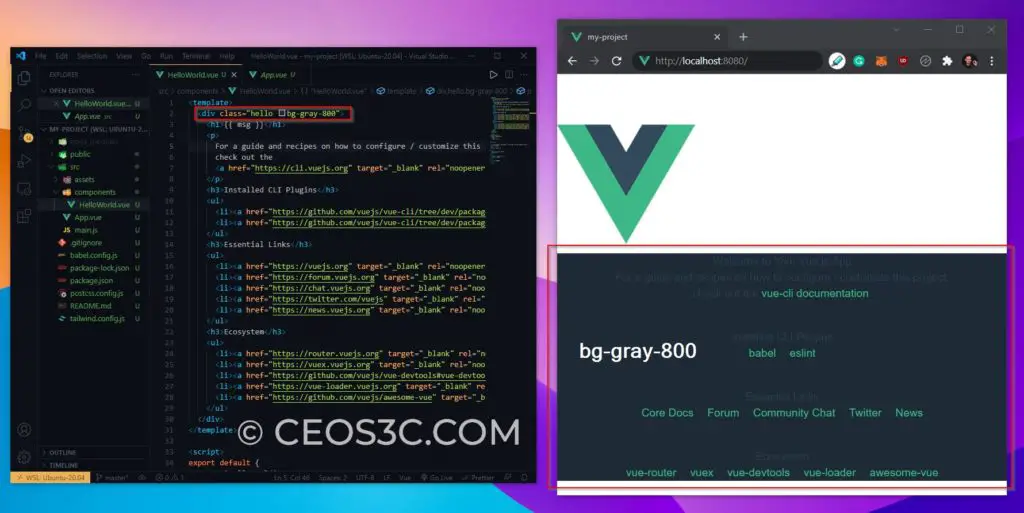
And if you do set it to something like bg-gray-800, you’ll see the effects applied to your app, hence, Tailwind and Vue 3 are working!
And this is that.
TL; DR
For the lazy, as always, I know you people already ?.
sudo apt update -y && sudo apt upgrade -y
curl -o- https://raw.githubusercontent.com/nvm-sh/nvm/v0.35.3/install.sh | bash
source ~/.bashrc
nvm install --lts
nvm install-latest-npm
npm install -g @vue/cli
vue create my-project
cd my-project
vue add tailwind
Code language: Bash (bash)
Open Visual Studio Code -> Install Tailwind CSS IntelliSense Extension by Brad Cornes.
npm run serveCode language: Bash (bash)Open the browser and start using Tailwind CSS with Vue 3.
Conclusion
This is how simple it is to set up Tailwind and Vue 3. As I have said, Tailwind CSS is one of the most popular CSS frameworks out there, and if you combine it with something like Vue, you really harness all of the power of quick prototyping apps.
I have another great article coming up where I will talk about a Tailwind CSS component library in combination with Vue 3, so make sure to bookmark this blog (or sign up for the newsletter in the sidebar) to stay on top of that.
Leave a comment below and let me know if that has worked for you!