In this article, you are going to learn how to install Ubuntu 18.04 (Bionic Beaver). You will learn how to install Ubuntu 18.04 in a VirtualBox Virtual Machine, so you can first try it out on your Windows computer.
I will also show you how to install it on a physical computer. You can simply download & install VirtualBox right here.
Table of Contents
- Why would you want to install Ubuntu 18.04?
- Step 1 – Creating a bootable USB Drive
- Step 2 – Create a VirtualBox Virtual Machine
- Step 3 – Install Ubuntu 18.04
Why would you want to install Ubuntu 18.04?
It is one of the easiest-to-use Linux distributions out there, perfectly suited for beginners. It is on place 3 on DistroWatch and has been at the top of that list for a very long time. It is a great distribution if you want to try Linux out and maybe consider it as an alternative to Windows. If you just use office applications or you are a System Administrator, having at least basic Linux skills can be a valuable asset in your repertoire.
Who should not install Ubuntu 18.04?
If you are an avid gamer, Linux is probably not the right thing for you. While Game Support is far better than it was years ago, mostly thanks to Steam, it still lacks support for many popular games out there.
Enough introduction; let’s get into the installation process. First, I will show you how to create a bootable device if you want to install Linux on a physical computer because then you can just follow along with the Virtual Box Tutorial. After that, the steps will be the same.
If you only want to install it on VirtualBox, continue with Step 2.
Step 1 – Creating a bootable USB Drive
Downloading Ubuntu 18.04
First go ahead and download Ubuntu 18.04.
Downloading Rufus
Next, we are going to download Rufus, the software to create our bootable USB drive. You can get Rufus here.
Creating a bootable USB drive
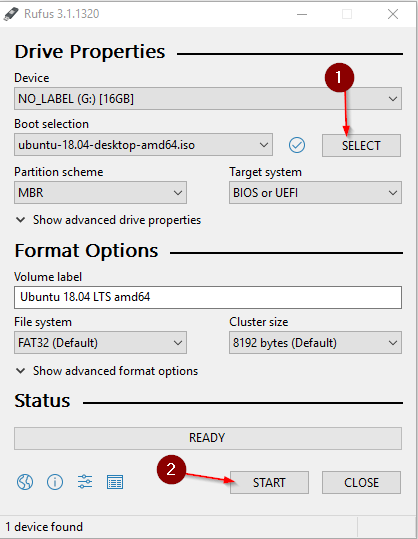
Go ahead and plug a USB drive with at least 8 GB of space in your computer. Make sure you don’t need any of the files on it anymore, as the USB Drive will get formatted. Now start Rufus. Make sure your USB Drive is selected, click on Select and choose the Ubuntu 18.04 image you downloaded earlier. Click Start to start the imaging process.
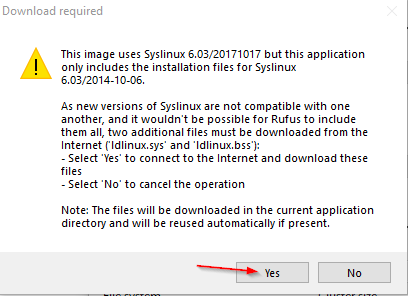
After you start, you probably get the message to download some newer files. Just click Yes.
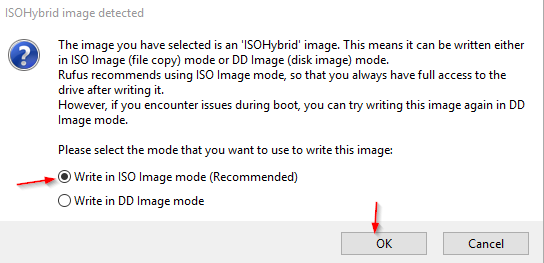
Next, you get asked if you want to write in ISO or DD Image mode. We select ISO mode.
Alright, once the process is finished, you can remove the USB drive from your computer and plug it in the computer you want to install Ubuntu 18.04 on.
Booting from USB
Now, this is different on every computer/manufacturer. Most computers, when you start them, have a small info screen where is written “Press…. to enter Start Up Menu”. You have to check that for your device, it mostly is either pressing Enter, F11, F12 or F2 directly after you switch your computer on. Just Google “YourComputerName boot menu”.
Once you are in the Ubuntu Boot Screen, select Install Ubuntu 18.04 and continue with Step 3.
Step 2 – Create a VirtualBox Virtual Machine
VirtualBox really is the perfect tool if you want to try out a distribution before committing to it. You can even run the OS in fullscreen, basically simulating a full installation. As long as your computer has enough horsepower, which most modern machines have, running a Virtual Machine is no problem at all. Note that you should have at least 8GB of RAM. If you run Windows 10 on a 4 GB RAM Laptop, you will have a hard time.
Downloading Ubuntu 18.04
First, go ahead and download Ubuntu 18.04.
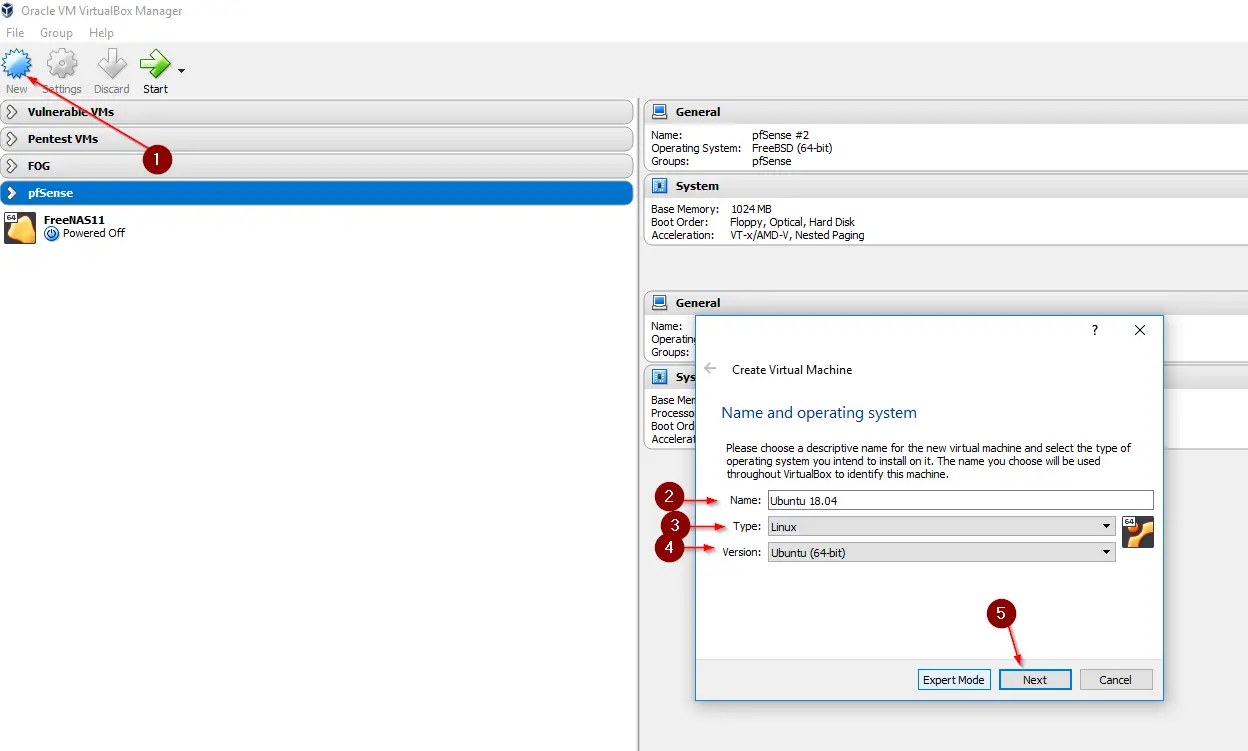
Creating a VirtualBox VM
Start up your VirtualBox and click on New to create a new VM. Enter everything like in the screenshot below.
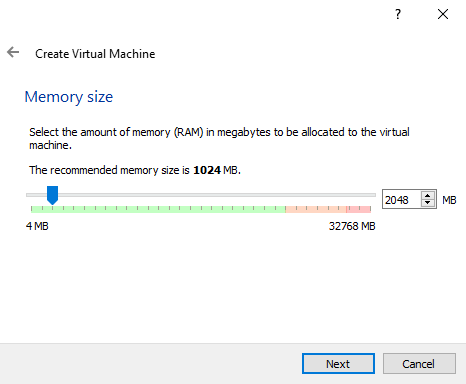
Allocate it as much RAM as you can. As a rule of thumb, half of your available memory. So if you have a computer with 8GB of RAM, you can assign it 4GB.
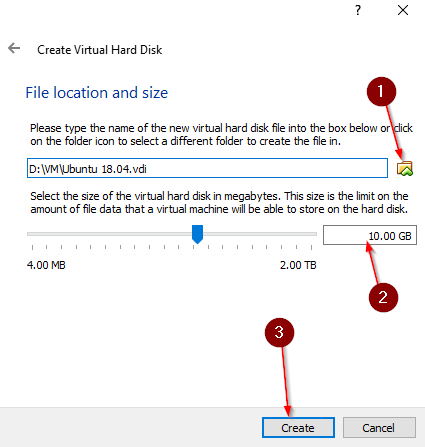
In the next step, select Create a virtual hard disk now and click on Create. Choose VDI (VirtualBox Disk Image) and click Next. For Storage on physical hard disk select Dynamically allocated and click Next. Finally, choose a Name, Hard Disk Size (10GB is sufficient to try it out) and choose where you want to save the hard disk file. Then click on Create.
Perfect, now we are ready to start to Install Ubuntu 18.04 on VirtualBox.
Starting the VM
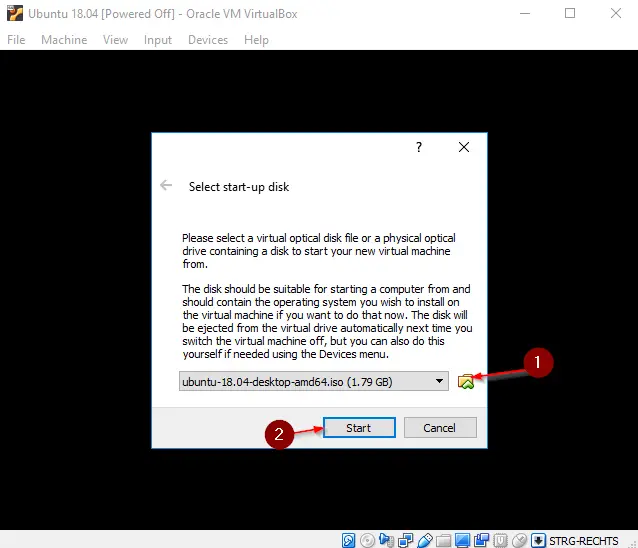
Select the created VM and click on Start. Once you do that, you have to choose the Ubuntu ISO you downloaded earlier.
After a short while, choose a language and click on Install Ubuntu 18.04.
Step 3 – Install Ubuntu 18.04
Good, now we have everything prepared to actually Install Ubuntu 18.04. From here, the steps on VirtualBox and your Physical Hardware are going to be the same.
Selecting a Keyboard Layout
Select a Keyboard Layout that suits you best and clicks Continue.
Updates and other Software
Select Normal installation here and select Download updates while installing Ubuntu, to save you time later. Click Continue.
Installation type
Select Erase disk and install Ubuntu. Choose if you want to Encrypt the VM / Hard Drive and click Install Now. Select Continue in the Write the changes to disks screen.
Where are you?
Choose your location to adjust the time zone correctly and click on Continue.
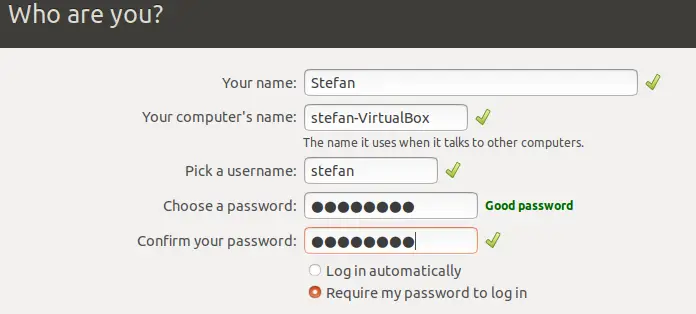
Who are you?
Now you need to enter your credentials and name, as well as the computer name. Click on Continue after.
Now Ubuntu will run through its installation routine; you can lean back, grab a coffee or tea and maybe check out my YouTube channel in the meanwhile.
Wrapping up
After the installation is done, click Restart Now. You can remove your USB Drive from your computer now. VirtualBox does that automatically. Now Ubuntu will boot in your new installation, and you can select the user you created earlier and log in with your password.
For VirtualBox, you can click on View -> Full-Screen Mode to enjoy Ubuntu in full screen, which kind of makes it feel like you really have it installed on your computer. Have fun with trying out Ubuntu; it’s a great and easy-to-use Linux Distribution!